For a long while now, I have been focusing on paper crafts. And that is because I keep getting gifted paper from friends and I needed to reduce my supplies. I still have too much, and you can read about my paper crafts here, but it is time to switch gears. There are several reasons for this. Number one, life happens, and crafting opportunities arise. Number two, I need change to keep the creative juices flowing. This blog post is because of number one. Life happens, a jacket got ruined and it needed to be repaired. So, this is how we came to repair a torn jacket. I should preface this by saying, I have repaired things in the past, but have not always had the time to document them, so this is that as well.
As an Amazon Associate, I earn from qualifying purchases. This post contains affiliate links. I may receive a commission if you purchase an item from one of my links. This will not change the price you pay.
Supplies needed to repair a torn jacket
The supplies needed for this project are as follows:
- A jacket with a rip, tear or melted spot. Ideally, a larger area, but small damage also works with this method.
- Fabric, iron-on patches. The specific patches I used are Unique Sewing Iron-on Patches but I can’t find them available online. These ones here are similar. If the hole is small enough, you can use sticker patches instead.
- Iron – for ironing on the patches
- Iron board or a surface protected with several towels/blankets so it doesn’t ruin the surface.
- Less than 10 minutes
- Scissors – optional
Now that we have all our supplies it is time to fix our jacket!
How to repair a torn jacket
Assess the damage
The first thing you want to do is assess the damage. Is it a big or a small tear? Is stuffing falling out? Did it go all the way through? These are simple things to look for but will help you assess what to do.
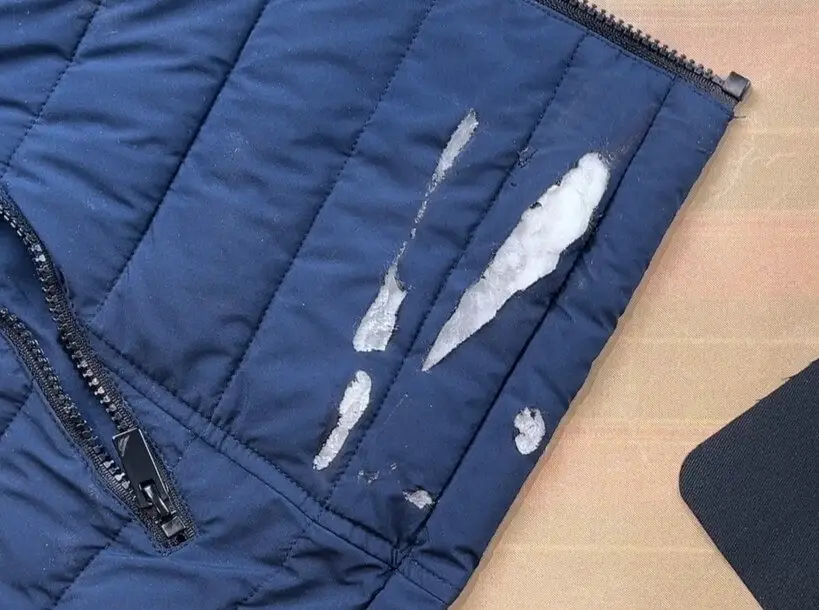
Clean the tear before you repair it
You should clean up the damaged area. If stuffing is popping out, push it back in. Are there loose threads? Those can be trimmed. If you melted the jacket and there are visible chunks of melted fabric, they can be cut off. You can also wipe away any dirt with a damp cloth. Just make sure to dry any moisture before applying any patches.
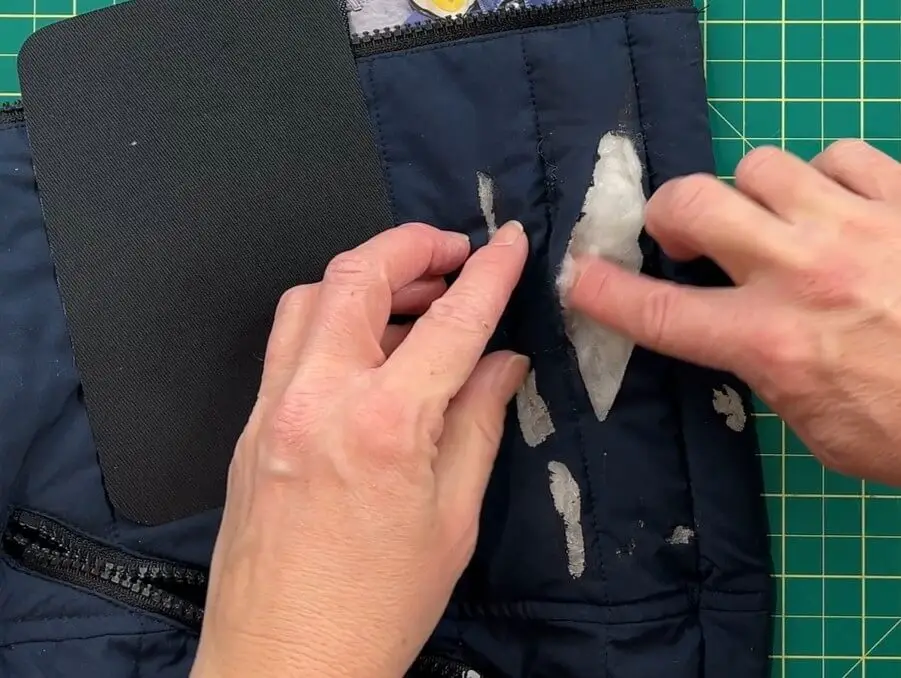
Prepare the Patch
Now that you know how back the damage is, and it’s all cleaned up, it is time to prepare your patch. This means you need to figure out how large a patch you need to cover the damage. You want about 1cm (1/3″) or more space around the tear covered with patch material. If your tear is large, like my melt, you will need a larger patch. If your tear is small, you can cut the patch fabric to be smaller.
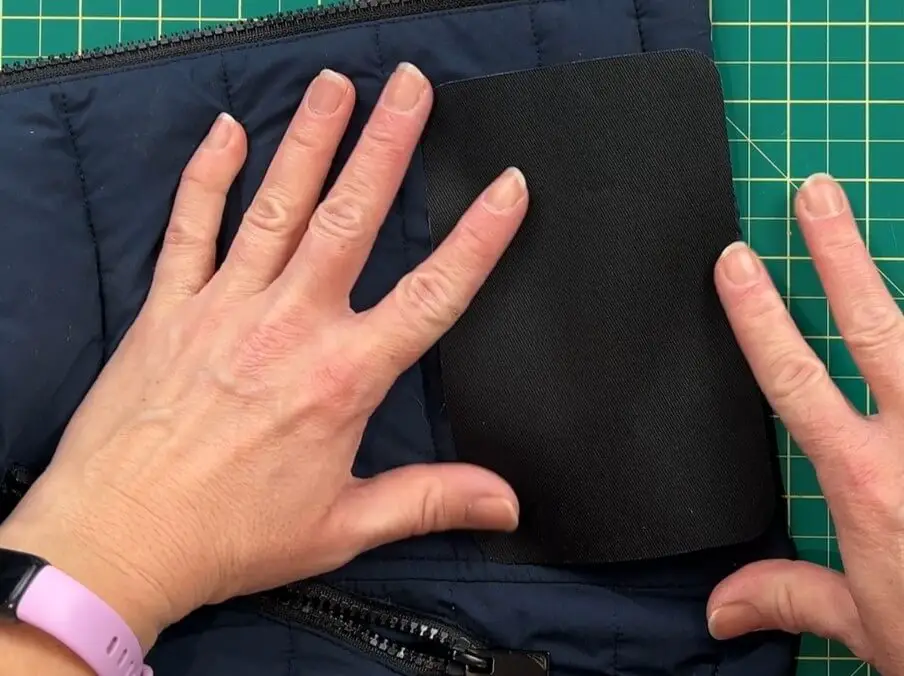
Remember, you want the patch touching the undamaged fabric the entire way around the tear.
Time to patch the tear
OK, now we are ready to repair our tear!
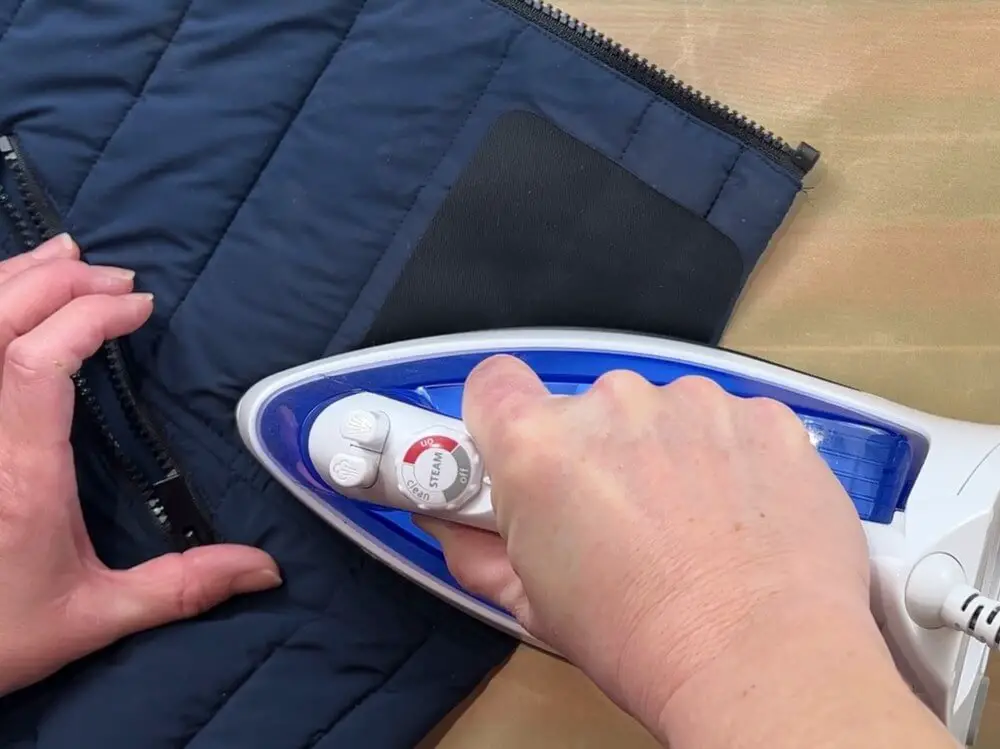
Turn your iron on. Set it to the highest setting that the fabric of your jacket can withstand. If your jacket has the ok to iron symbol on it, it should be good to withstand full iron heat. But read the label on your jacket first!
Place the patch over the affected area. Double-check to make sure all stuffing is pushed back in and that the patch is covering the entire damaged area.
Press and hold the iron on top of the patch for 30 seconds. Depending on how large of a patch area you are using, you may need to move your iron around.
Check the edges of the patch to make sure it is all sticking. If not, reapply the iron to the patch to get all the edges to stick.
Let it cool down and you’re done!
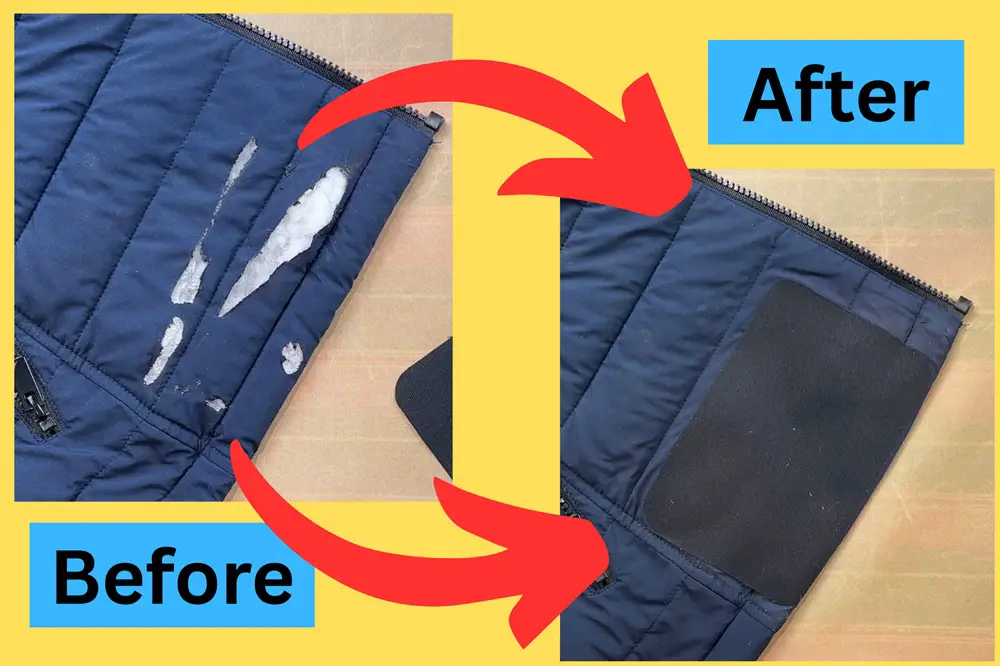
And that’s it! You have Successfully repaired a torn jacket!
Things I learned while repairing a torn jacket
As a mom, many things get broken, ripped and very well used. And so, I have repaired clothes to give them a bit more life. But every repair comes with its own trials and tribulations. So here are some things I learned while repairing this torn jacket.
- Size does matter… I jest, but there is a big difference when repairing a small hole versus repairing a large gash. The jacket that I was fixing got melted by touching something really hot, and as a result, there was a large area to fix. When working with something large like this, I find that working with iron-on patches works better. I’m not sure why the simple sticker patches don’t work as well on larger areas, but I find they don’t. So, when it is something large like this damaged jacket, I prefer to iron on patches.
- Matching colors can be a challenge. I had a navy blue jacket. And although I have a lot of patch material, I found that the black worked the best. It wasn’t shown in my video or the blog post above, but I have 4 shades of blue patches and they all looked wrong. Black seems to be the solution to all color problems.
- The jacket I fixed was a synthetic/polyester type material, and it has stuffing inside – not feathers. But the process I described works the same for down jackets and other fabrics.
- Regardless of what you are fixing, you need to read the washing and handling instructions of the fabric. Not everything can be ironed at high heat.
- After you finish repairing your jacket do not wash it right away. Wait at least 24 hours before washing and drying it. The adhesive on the patches will last longer if you let it dry for a day.
- Sticker patches work best when there is a small hole or tear. I’m talking less than an inch in size. And not a full-on melting like I did her, but more of a straight line rip or small hole.
Did you enjoy this tutorial on how to Repair a Torn Jacket?
Did this tutorial on how to repair a torn jacket help you? Let me know in the comments below.
If you enjoyed this project, be sure to check out my other sewing project here.
I have several other repair-like blog posts as well: