Small Kids, large Pants
I seem to run into the problem quite often that clothes are too big for my kids. Now, I know what you are thinking, why not just buy a smaller size? I would agree with you, but the clothes are too big in one direction, and just right in another. So if I get a size smaller, they are just right in one area and too small in another. I know, I know, first world problems, but problems nonetheless. My kids have a small waist, so all of the pants they get are too big around the waist. So, I have started making the waist size smaller on pants. Simple. But in case you are new to this concept, or scared (as I once was), here is a quick and easy tutorial on how to do reduce the waist size in kids’ pants.
Reducing Waist Size On Pants
One final comment before I get into the tutorial – this is a quick way that I do it. There are lots of other ways and modifications. But I like this way because it is easy to undo it later. That way, when my kids have grown into the original waist, they can still wear the pants, assuming they did not wear them out beforehand.
As an Amazon Associate, I earn from qualifying purchases. This post contains affiliate links. I may receive a commission if you purchase an item from one of my links. This will not change the price you pay.
What You Need:
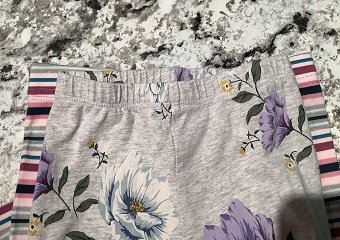
- Pants that are too big around the waist.
- Needle & thread or a sewing machine.
Let’s Begin!
Measure the Waist – wearing that pants method
I have to apologize, but I have no pictures of this part, so bear with me while I try to explain this.
We are fixing kids’ pants, so have your child put on the pants.
Using your fingers, pinch the waist at both sides. See how much loose material there is.
Either using a needle, fabric pen, or eyeballing it, see how much extra material there is on each side and mark it.
If you are brave enough to use a needle to mark the location, be careful when your child removes the pants. My kids will not let me mark with a pin anymore as I have pricked and scratched them too many times.
measuring the waist – comparison method
If for some reason, your kids are not able to put the pants on for the above method of measuring (ie: they are sleeping or outside playing or whatever else your kids are doing), you can use this method instead.
Lay the new plants flat. Place an old pair of pants, with the correct waist size, on top of them. Line up the inseam of the pants so they are centered.
That extra material on the sides, that is where you will be sewing.
Again, mark this with either a fabric marker, pin or eyeball it.
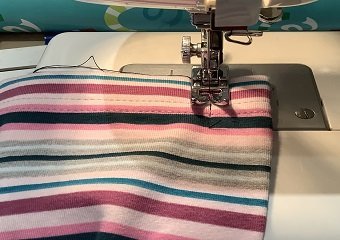
Sew
I used to do this by hand, but it is much faster with the sewing machine.
But you want to sew shut that extra bit of material on each side.
I like to run the machine over the area 2-3 times as it is a small section. That helps the thread stay put and hold on tight.
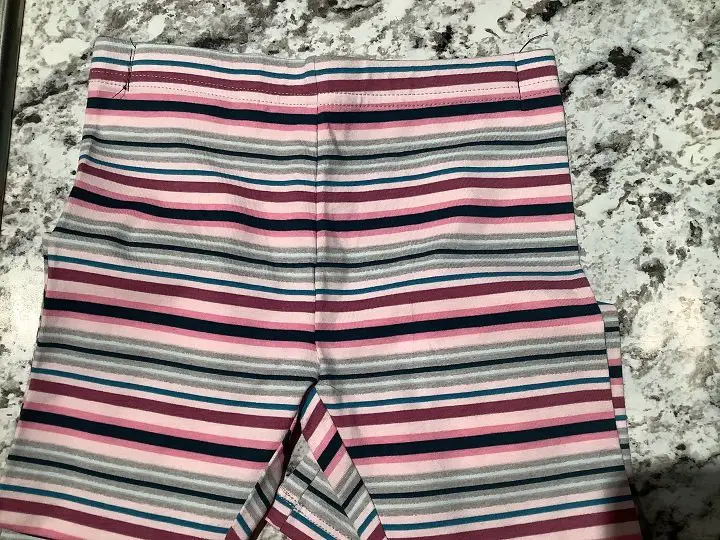
This will have 2 little tabs of surplus material left on either side of the pants.
Optional Additional Sewing
If you are not a fan of having the tabs on both sides, you can fold them over and sew them down. This will create a small crease at the side of the waist, no big deal.
I do not do this because my kids complain that it makes the pants uncomfortable and itchy. So I do not bother with it. But if you want it to look nicer, that is an option.
And That’s It! You’re Done!
Final Thoughts & Comments
I have been doing this with my kids’ pants for several years now. I also do this with skirts and shorts. Anything that goes around their waist, and I have done several trials and errors before this, so here goes:
1) I make the pants even on both sides, so they sit comfortably on my kids. If you want to make only one tab on one side, it will make the pants uneven and uncomfortable.
2) If you want to make the tab at the back and then sew it down, this will add a weird bump on the back of their pants and be very irritating while they sit or put on backpacks and coats. And they will complain to you about this.
3) If you leave the tab as they are, you can easily remove the thread when your kids’ waist catches up to the rest of their body. If you sew the tabs down, there is more thread to remove, and becomes trickier. Also, there is a higher chance that you will grab the wrong thread and make a hole in the pants – at which point you will need to read this tutorial on mending pants….
4) Also, if by some miracle, the pants do not get destroyed by the time they are grown out of, having only one simple sewn line on each side will not be very visible if you remove it and sell the pants on a mom-swap.
5) This method can be used on adult comfy pants, but… for some reason adult pants need to be loosened and not tightened… at least from my experience :p
6) Young kids are often more interested in comfort than style, or at least that is the case with mine. So if the fix you make is not comfortable, even their most favorite pants/skirt/shorts will not be worn again.
Was this Tutorial Helpful?
Did you find this tutorial helpful? Let me know your thoughts in the comments below!
If you liked this tutorial, be sure to check out my how to reduce shirt size tutorial here.


Thanks for the great tips, Katherine! My toddler is very tall but very lean so this info will def be helpful.
I do it on my kids pants all the time. I just redid a whole set of pjs they got for Xmas as the waists were just enormous! And now they can be worn and there are happy kids!