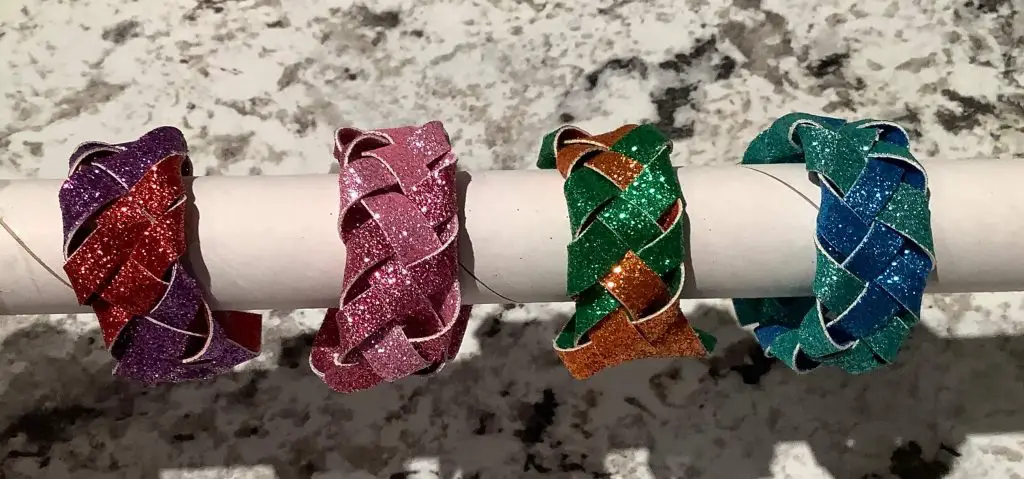
making more Faux Leather Bracelets
I recently bought an insane amount of faux leather. I’m still debating why I did this, (it was a really good price) but as I have so much, I need to use it. As you have probably already seen, I posted the other week how to make faux leather braided bracelets. I have now upped the ante and tried my hand at making Faux Leather Weaved Bracelets. This was a bit more of a challenge and a bit more learning, but I made it work. Keep reading to learn how to do it yourself.
As an Amazon Associate, I earn from qualifying purchases. This post contains affiliate links. I may receive a commission if you purchase an item from one of my links. This will not change the price you pay.
How to make Faux Leather Braided Bracelets
Making these faux leather braided bracelets took about 15 minutes with my girls. They got to pick out the colors they liked, and they even picked out some for their friends.
What You Need:
- A reason to make bracelets (it can even be for yourself)
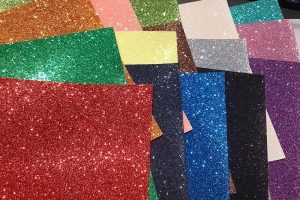
- Faux leather – this is the stuff I have – it is glittery, so a favorite for the kids.
- Plastic snaps – I use these
- Fabric Fusing Tape – I used this
- Iron
- Glue and Glue Gun, or Needle & Thread or Sewing Machine
- Options – Teflon Paper – I use this


Let’s Begin!
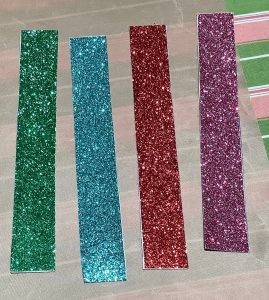
Color Selection of the Bracelet Is Key
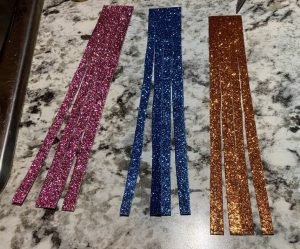
Pick out the color that you want. The pack I bought had a bunch of vibrant colors, so this part probably took the longest.
For the weave (4 stranded braids), you need 2 pieces. You can have them both the same color, or you can have them in different colors. But you need 2 pieces of faux leather.
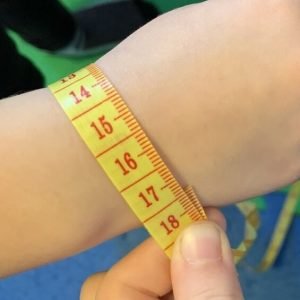
Measuring the Length of the Bracelet
You need to measure the wrist of the person, approximate size, so that you know how much material to use.
I just used a simple sewing measuring tape, but you can use a ruler or string or eyeball it.
It is important to remember that when making a weave (4 stranded braids), the final length will be significantly shorter than the original. You’ll probably need at least an extra 1/2 of the length added on to have enough. If you are making a tight weave, the bracelet can be even shorter.
For small kids, it turned out well that I could just use the width of the faux leather I bought.
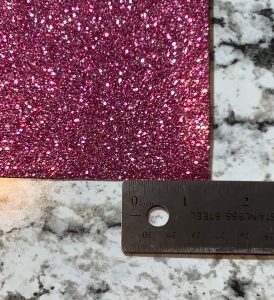
Measuring the Width of the Bracelet
Once the color is selected, you need to measure the size of the bracelet width you want. As I planned to make weaved bracelets, I needed to have the material a bit wider. I measured it to be 1.25″, but it can be thicker. Remember, there will be 4 strands.
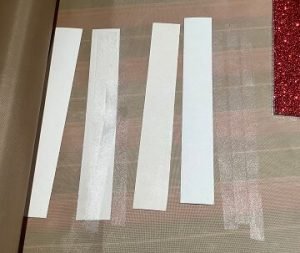
Cut all materials
Cut the 2 pieces of faux leather to the desired length and width.
(Like with most projects, I did several at a time.)
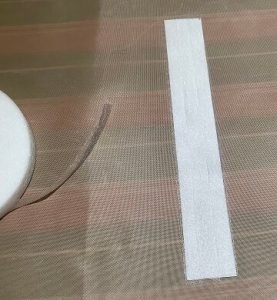
Combine the 2 Faux Leather Pieces
The 2 pieces that were cut above will now be fused together with the fabric fusing tape.
I cut 3 pieces of fusing tape to cover the whole length and width of the faux leather.
Once satisfied that there is enough coverage, it’s ready to iron together.
Iron bracelet pieces together
I use Teflon paper to cover my ironing board and to protect my iron, but this is not required.
Once the fusing tape is in place on the back of one of the colors of faux leather, place the other piece of faux leather on top (color side up).
Make sure everything is in place securely before you iron. Once you melt the fusing tape, there is no going back. You want to make sure that the whole thing is covered inside. Any surplus material on the outside will melt, so it’s not a concern.
Iron the pieces together. I use my Cotton/Synthetic setting for 30-45 seconds with a lot of pressure.
Trim Edges
Even though the pieces were cut to the same size, when fusing them together, they shifted a bit. Just cut the excess material off to leave no white edges.
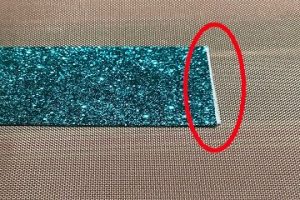
Cutting the Strands
Once the faux leather has cooled from ironing, you can cut it into 4 strands. You can measure this into 4 even strands, or you can eyeball it.
Just make sure to leave about an inch uncut at one of the ends of the bracelet as you will need this to attach the snaps.
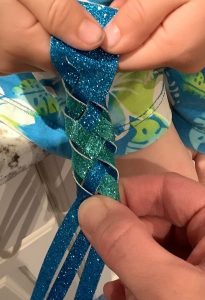
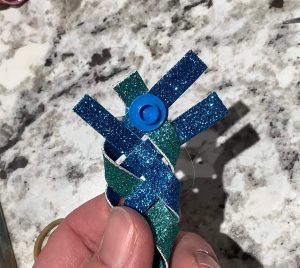
Make the weave
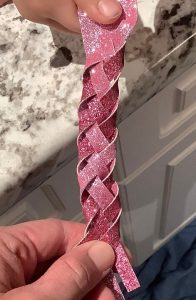
A weave/4-stranded braid is a bit more challenging to create, but once you get started, it’s not too bad.
You want each layer to go under and over, to look like a weaved basket. Once you reach the edge with a strand, you flip it to show the color on the other side.
I’ve attached a few pictures to show how this looks, and hopefully, it makes sense.
Again, I got my kids to help out with this part as I don’t have enough hands to weave and hold the end straight. They each got to hold the end of the bracelet while I made it . Otherwise, I would have to fumble with it. If you’re not able to get your kids to help, you’ll have to secure it somewhere to keep the bracelet straight.
Prepare to add snaps
OK, so this part is a bit tricky. You have 2 pieces of faux leather fused together, and you have a 4 stranded braid, so you essentially have 8 pieces of material that need to be attached together. The snaps that I have will not hold 8 pieces of faux leather. It’s just not going to happen. That’s a lot of material. Regardless of what snaps or material you are using.
You need to finish the weave so that you have 2 middle strands that you can use for snaps. The other 2 pieces will be dealt with later.
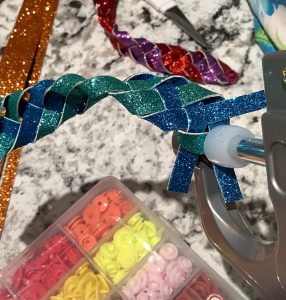
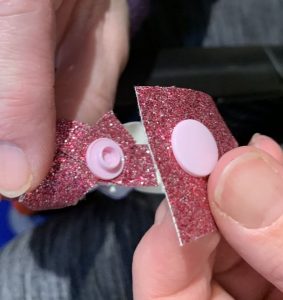
Add the Snaps
The set I bought for the snaps comes with all the pieces and instructions on how to assemble them.
It’s easy. There are male and female pieces. You press/squeeze the male end on one side of the bracelet with the pliers that come with the set. Then you do the same with the female pieces on the other end of the bracelet.
Just make sure you line up the snaps so that they are facing each other before you commit to installing them because there is no going back!
And make sure you are only using 2 strands of the weave on one side.

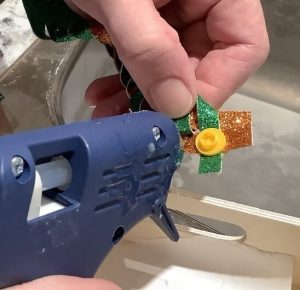
Clean up the last 2 braid strands
As mentioned above, you have 2 loose pieces of the braid left over.
You have several options on how to deal with this:
- Glue – Use glue to glue them in place. Trim any excess material.
- Needle & Thread – Use a needle and thread to sew it into place. Trim excess material.
- Sewing Machine – Use a sewing machine to sew into place. Trim excess material.
Somethings to keep in mind:
- When using glue, I recommend using a strong glue, as this will be in a high use area. It will not hold if you use the cheap stuff.
- If you are going to sew the loose strands it into place, if possible, I recommend using a sewing machine. Using a needle and thread to go through 4 pieces of faux leather is difficult. This material is thick.
- If you plan on using a sewing machine to do this, you can consider doing a quick pass before you add the snaps. Sewing with the snaps in place can be challenging.
And That’s It! You’re Done!
Some Things I Learned
- It’s important to let your kids pick out the color of the snaps… even though the bracelet is glitter pink, doesn’t mean the snap will be pink… don’t make this mistake!
- Glitter/Sparkly Faux Leather can become itchy after a while.
- Snaps work great, but little kids don’t always have the strength and strength to open them with one hand.
- Trying to glue the 2 layers of faux leather (instead of fusing tape) is possible, but you need a good leather glue. Regular crafting glue will not work.
- When doing the final step of affixing the last 2 stands or the braid/weave – if you plan on sewing with a machine, I would try to set it up to sew first and add snaps later.
Was this Tutorial Helpful?
Did you find this tutorial on making faux leather bracelets helpful? Let me know your thoughts in the comments below!
If you liked this tutorial, be sure to check out my other tutorials here.


great!
Thanks for reading!
So fun and easy! What a great idea for a fun project!
Thanks! My kids love them!
These are really cute and my nieces would LOVE the glittery options that you have here. I’m going to have to pick up some supplies before I see them next so that we can share some craft time. I’m sure they’d love to make bracelets for themselves, their friends, etc. lol
The nice thing about these is the glitter stays on, so you’re not stuck with glitter everywhere! I’m sure your nieces would love this! My girls (and all their friends now) love them! They even sleep with them on!
These are so cute! Thank you for sharing 🙂
Thanks for reading!
I’m wondering if I could adapt these to make bag/purse/tote handles – another thing on my “Give it a go list”!
That’s a really neat idea! I hadn’t thought of that! let me know if that works out! I may try it myself!