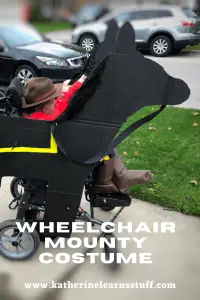
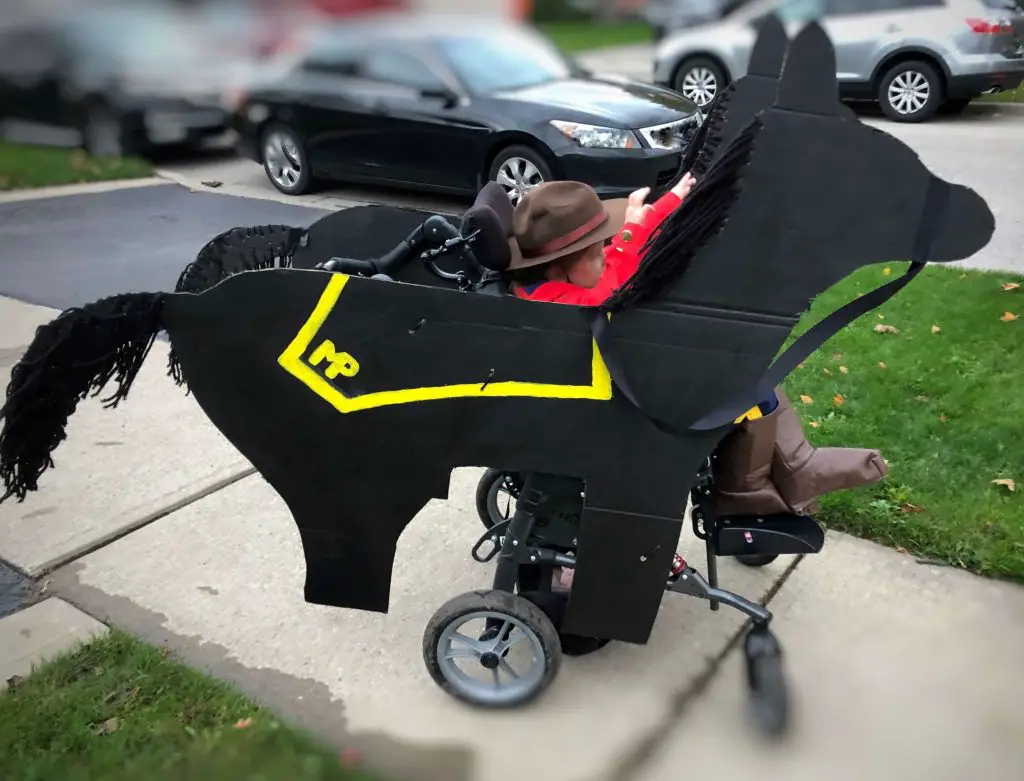
This last Halloween, I took on far too many Halloween costume projects. I should have thought it through further, but at least I started preparations and planning in September, so I somehow managed to pull them all off. One of the projects was to help a friend make a DIY kids wheelchair horse costume for her daughter to be part of a Mountie Halloween costume.
the back story
I have a friend down the street, and she has a daughter, the sweetest thing. Sadly, she has a disease called Aicardi Syndrome. Aicardi Syndrome is a rare genetic condition affecting only 4,000 people worldwide, most of whom are females. While the genetic marker has yet to be identified, it is diagnosed by a triad of symptoms, including:
- Malformation of the brain, most commonly the absence of partial development of the corpus callosum which connects the two hemispheres of the brain.
- Chorioretinal lacunae, small holes in the retina (back part of the eye).
- Seizures, typically begin as infantile spasms and progress into epilepsy that is often extremely difficult to manage.
Those living with Aicardi Syndrome typically have severe global developmental delays and intellectual disabilities. To learn more about Aicardi Syndrome, visit: http://aicardisyndromefoundation.org/
As an Amazon Associate, I earn from qualifying purchases. This post contains affiliate links. I may receive a commission if you purchase an item from one of my links. This will not change the price you pay.
Materials needed for a DIY wheelchair horse costume
We tried to make this with odds and ends where possible, as this is a unique, one-off costume.
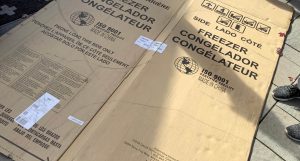
- Large cardboard box – not everyone has these lying around. We put a shout-out on our local mom’s Facebook page, looking for fridge/ stove boxes. We were lucky, and someone had a freezer box that was not crushed, or folded down.
- Paint for the body – lots of paint. Since we were going for a Mountie, we needed black paint for a black horse.
- Paint for accents – Mounties have a yellow outline on their saddles, so some yellow paint was also required.
- Black ribbon – for the reigns
- Black yarn – This is for the mane and tail of the horse. If your horse is a different color house, the yarn should match accordingly.
- Plaint stir stick – to help support the head.
- Paintbrushes – Various sizes.
- Glue – I used my glue gun for fast drying.
- Drill – to make holes – I used a 1/4″ drill bit.
Plan the design and horse – Measure the Wheelchair
Before starting this activity, some key measurements and concepts needed to be determined. You need to know the size of the wheelchair to get an idea of how big a house you need.
We measured the height of the wheelchair:
- from the ground to the top of the handles,
- from the ground to the top of the seat.
We measured the length of the wheelchair:
- distance from wheels to back wheels,
- distance from the handle to front wheels.
Other critical measurements:
- Locations where the horse costume can attach to the wheelchair.
- Interferences caused by the wheelchair frame, or locations that cannot be connect to the wheelchair.
functionality of the costume
The design needs some thought before it gets too far underway. My main questions and design concepts were:
- The design needs to allow easy access to and from the wheelchair, for removal and pushing/walking.
- The final design needs to connect to the wheelchair.
- It has to be symmetric and done on both inside and out.
Draft a sketch
As I am a visual person, I need to see the design. I cannot just imagine it in my head.
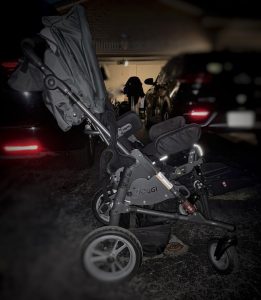
I snapped a picture of the wheelchair. This was so I could modify it and mark it up with my thoughts.
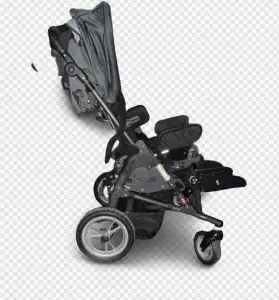
Using the website Removebg, I removed the background in the picture. Leaving only the wheelchair. These are the before and after pictures of the wheelchair:
Vectornator is my go-to sketch program. I pulled in the wheelchair image and sketched a crude black horse over top of the wheelchair to see how it would look and review potential attachment points.

Once I had drafted the design, I sent a copy to my friends for approval and feedback. As I do not typically deal with a wheelchair, I wanted to ensure that the functionality of the wheelchair was considered. They were going to need to use this wheelchair with the costume, so their approval was vital. The last thing I wanted was to have a costume that did not work.
Once the design was approved, we moved on to the tough work.
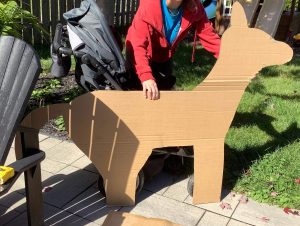
Drawing and Cutting the Horse to fit the Wheelchair
As I mentioned above, we managed to get a very large cardboard box from some local moms. Although it was a large box, it was bent, so we would need to work around it, but that was not a show stopper.
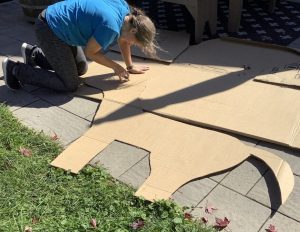
Even though we measured the wheelchair beforehand, we needed to take additional measurements with the wheelchair and box.
Using a pencil, we held up the box against the wheelchair and marked off the location of the wheels and how high the seat was. We needed to make sure that our sketch covered the wheelchair and, have space to attach it securely.
Once we had the vital locations marked off, I did a rough sketch of a horse.
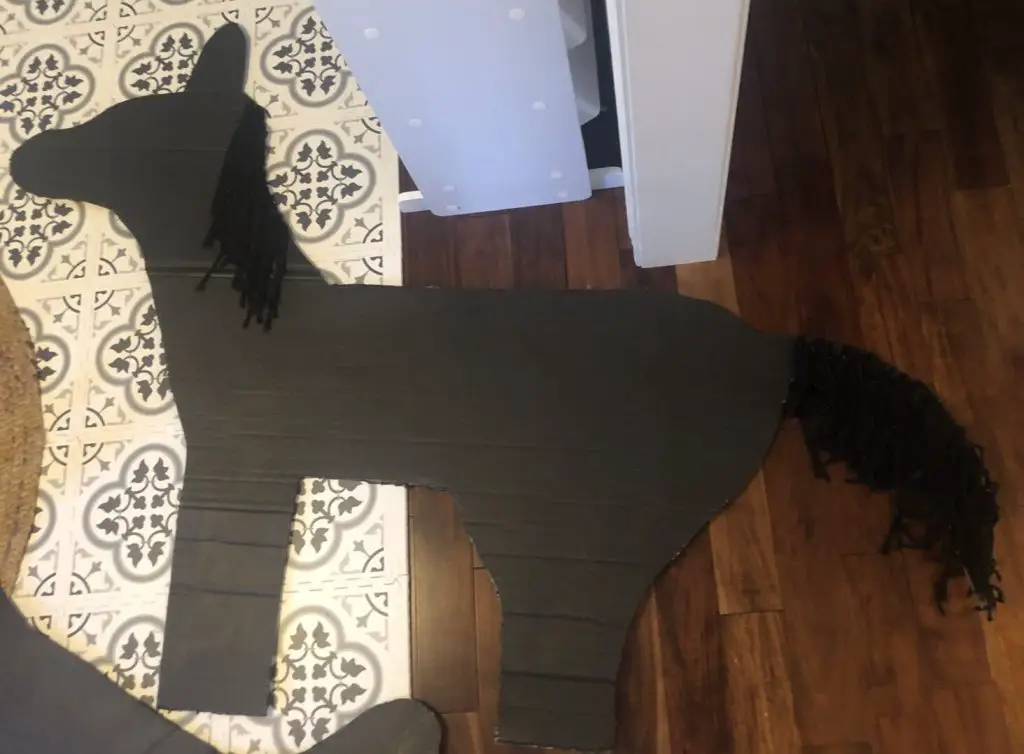
Once we were happy with the general shape of the horse, I used a box cutter to cut the cardboard.
Then, we traced the horse and cut a second one for the other side of the wheelchair.
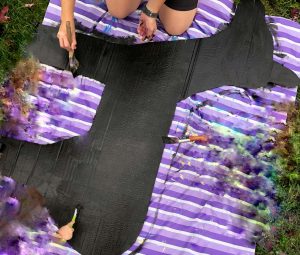
Painting the horse costume
Using black paint, we painted the horse black.
The one thing we needed to remember was that both sides of the cardboard needed to be painted, not just the outside of both horses. As the wheelchair would only cover part of the horse. This way, the horse will be black on all sides.
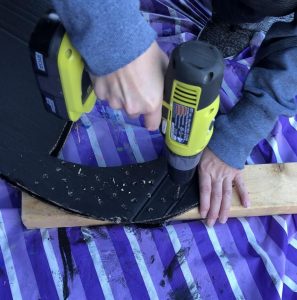
A Horse Costume Needs a Mane and a tail
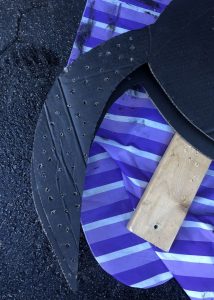
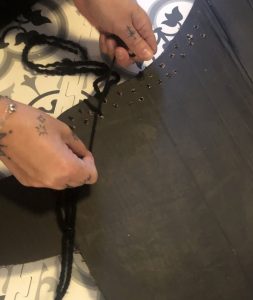
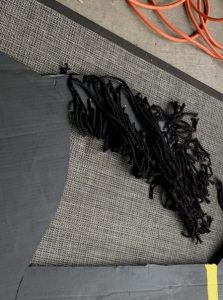
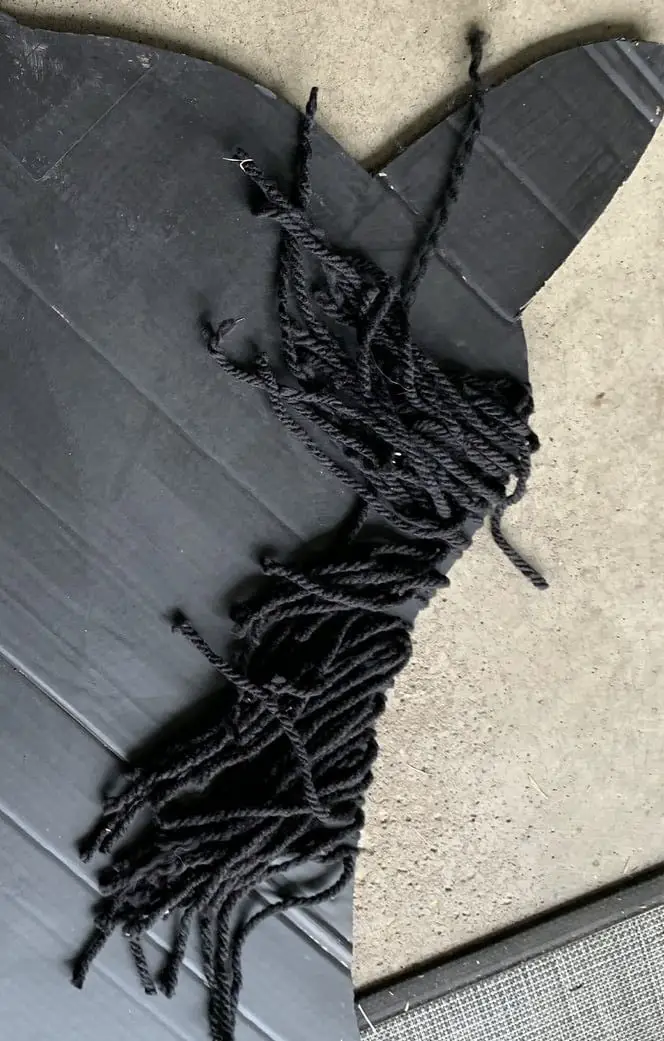
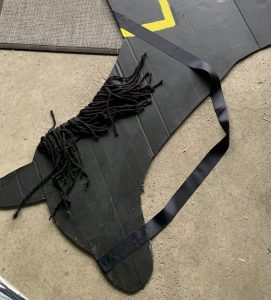
It is hard to make holes in cardboard, so I used a drill with a 1/4″ drill bit to make holes in the mane and the tail. I drilled random holes at the mane and all through the tail.
After drilling the holes was complete, we threaded black yarn through them. This was to make the mane and tail look more realistic.

Final Touches – Reigns and Saddle for the Horse Costume
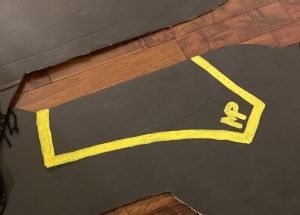
We needed to add some final touches. We did some googling to see what a Mounty and Mounted horse look like, and we found that the horse has black reigns and yellow trim around the saddle.
Using a small paintbrush and yellow paint, we painted the outline for the saddle.
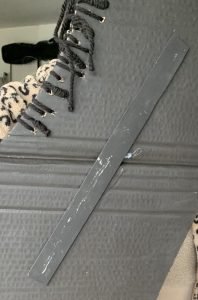
And finally, we needed to add some stabilizers on the inside of the horse to keep the head up. We just used some old paint stir sticks and painted them black. We just glued them onto the inside of the horse, over the bend.
Using ribbon and glue for the reigns, we just glued the ribbon down the muzzle of the horse head and then left some slack to resemble reigns. Finally, we glued the end piece onto the horse by the saddle.
Attaching the Horse to the wheelchair
Finally, we needed to attach the DYI Horse Costume to the wheelchair. Simple zip-ties were used to attach the horse to the frame of the wheelchair. We made some holes in the legs and the body as attachment points.
And that’s it! You’re done your DIY Wheelchair Horse Costume
Did you find this tutorial Helpful?
Did you find this tutorial on how to make a DIY Wheelchair Horse Costume helpful? If you are looking for other costume ideas, please check out some of my other projects below. I currently don’t have any other wheelchair costumes in my repertoire, but next year there will be another one added.
Don’t forget to sign up for my newsletters! You’ll get inside tips on upcoming posts and additional behind the scenes details about what’s happening on the site!