Why I Finally Made a DIY Snowboard Shoulder Strap Instead of Complaining Again
Every winter, I find myself doing the same ridiculous juggling act.
Three snowboards. A pile of helmets. Cold kids holding my hands. And me… somehow expected to carry everything without dropping a board on someone’s foot.
After one too many trips from the parking lot to the hill. feeling like a human pack mule, I finally said: There has to be a better way.
So I did what any crafty, slightly stubborn mom would do: I made my own DIY snowboard shoulder strap. And honestly? This is a significantly improved design compared to last time!
This simple little project has made getting to the hill easier, calmer, and way less chaotic, and today I’m walking you through how I made it (and how you can make one too).
🎥 I also made a video about making these snowboard should straps. You can watch the YouTube Video Here.
Before You Cut Anything, Let’s Think This Through
Before we jump into measuring, cutting, and sewing, there are a few questions you’ll want to ask yourself. These choices affect how your straps work now and whether you’ll need to remake them again next year (spoiler: you don’t want to).
How Many Snowboards Are You Carrying?
How many boards are you carrying? One board? Two? Three? Five?! This matters more than you think! It changes the strap length and your back pain.
Who’s Actually Carrying the Boards?
Are your kids carrying their own boards? Are you carrying everyone’s boards? (If you’re a parent, we both know the answer is probably “me.”)
I sized mine for me, because realistically, I’m the one hauling everything. The bonus? My kids can grow into these straps instead of outgrowing them every season.
What Kind of Bindings Do You Have?
Not all snowboard bindings are created equal. Some have a heel support in the back. Some don’t.
They measure differently, and I’ll show you exactly how to handle both so your straps don’t slide off at the worst possible moment.
Let’s Future-Proof This Thing
Kids grow. Snowboards grow. Your patience for remaking DIY projects every year does not.
We’re going to measure these straps so they work now and continue to work when your kids hit their next growth spurt.
Measuring Without Losing Your Mind
Here’s the golden rule for this entire project:
Measure loosely. Always.
You’ll be wearing gloves. You’ll be standing in the snow. Tight straps are not your friend.
Measuring Bindings with a Heel Support
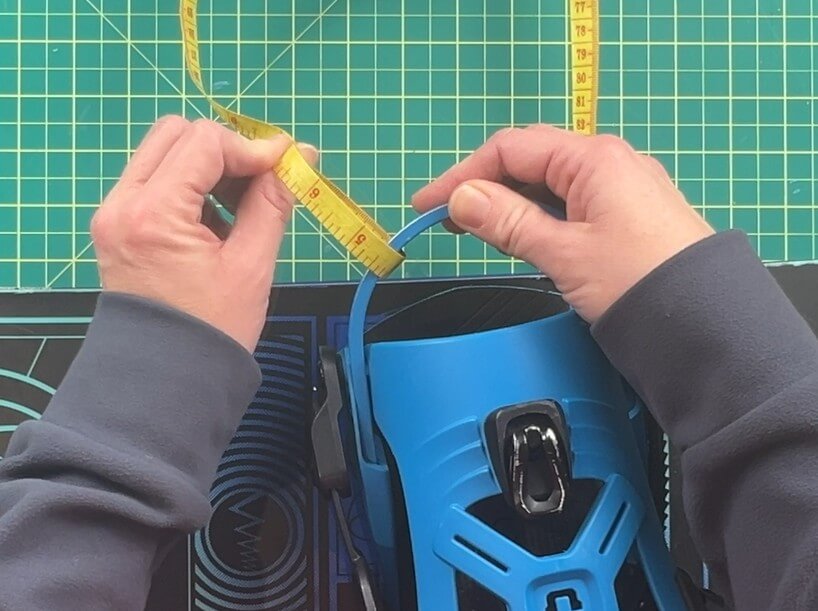
If your board has a heel support, wrap your measuring tape loosely through the heel support of the binding. You want it easy to buckle later, not a wrestling match.

For mine, that measurement came out to about 7 inches, and then I added an extra 4 inches to account for loops, hooks, and sewing space.
Measuring Bindings Without a Heel Support
No heel support? No problem.
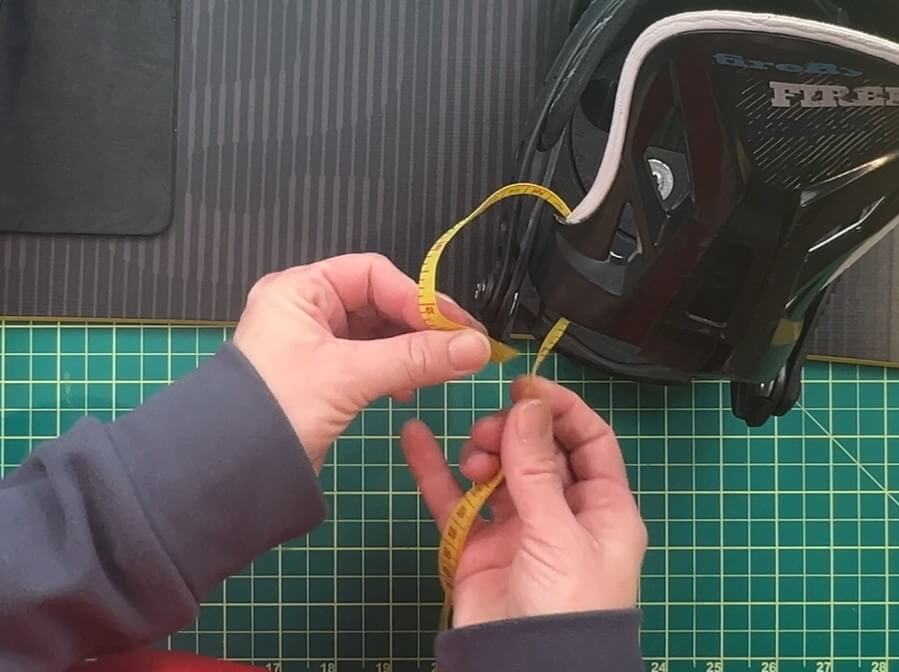
Find the solid part of the binding between where the binding connects to the board and the calf support connect. Measure loosely through the connection point. I usually leave even more slack here because there’s more stuff to work around.

Mine measured closer to 9 inches, again, add 4 inches extra space for sewing.
Measuring the Strap That Goes Over Your Shoulder
For the strap that actually goes over your shoulder, I recommend measuring two full lengths between your bindings. My one board had a 19″ separation between the bindings, so I needed 38″ for the shoulder strap. At this length, it also works well to carry it cross-body style like a messenger bag.
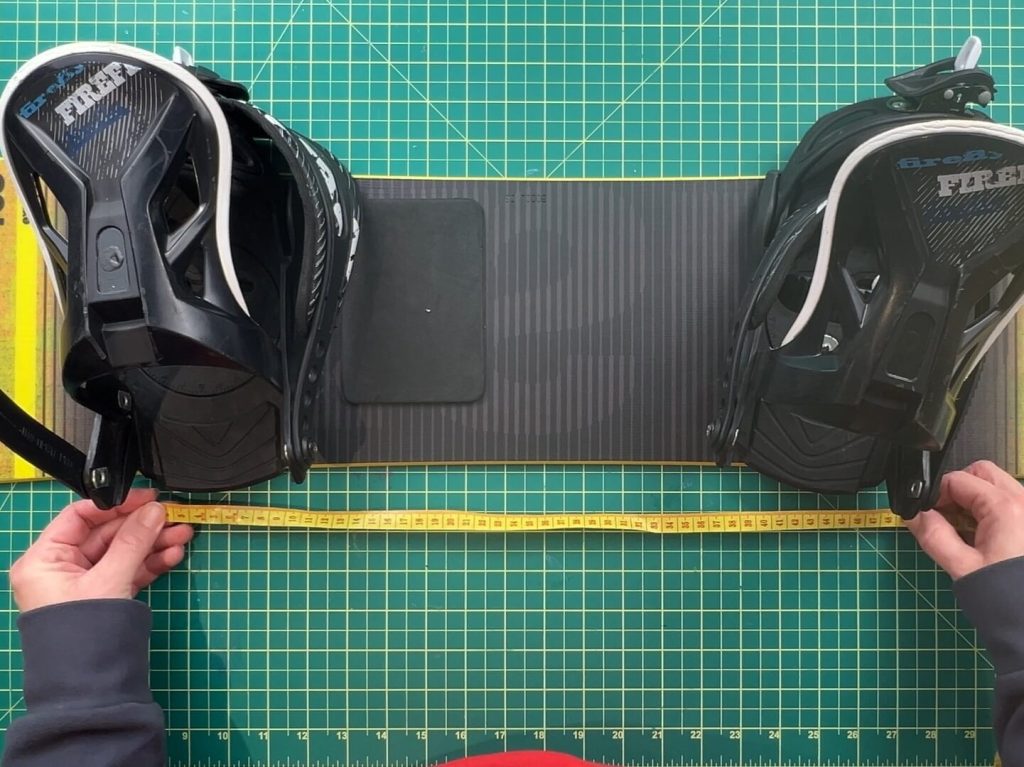
This gives you enough length to comfortably carry the board without it riding up into your armpit or smacking your knees with every step.
And yes — this is a great time to do a sanity check.
Before cutting anything:
- Run the webbing through the bindings.
- Slip your arm through it.
- Make sure the board stays put without pulling tight.
If it feels too long, you can always shorten it later. Too short? That’s a remake.
Carrying Two Boards at Once (Because Of Course)
When I first designed this, I thought I’d just run the straps between the bindings of two boards. Turns out… bad idea. That setup causes the boards to twist and scratch each other, which is not something I’m interested in doing to my edges.
Instead, I recommend:
- Measuring around the width of both boards together
- Adding a few extra inches for wiggle room
- Making sure no metal hardware sits near the board edges
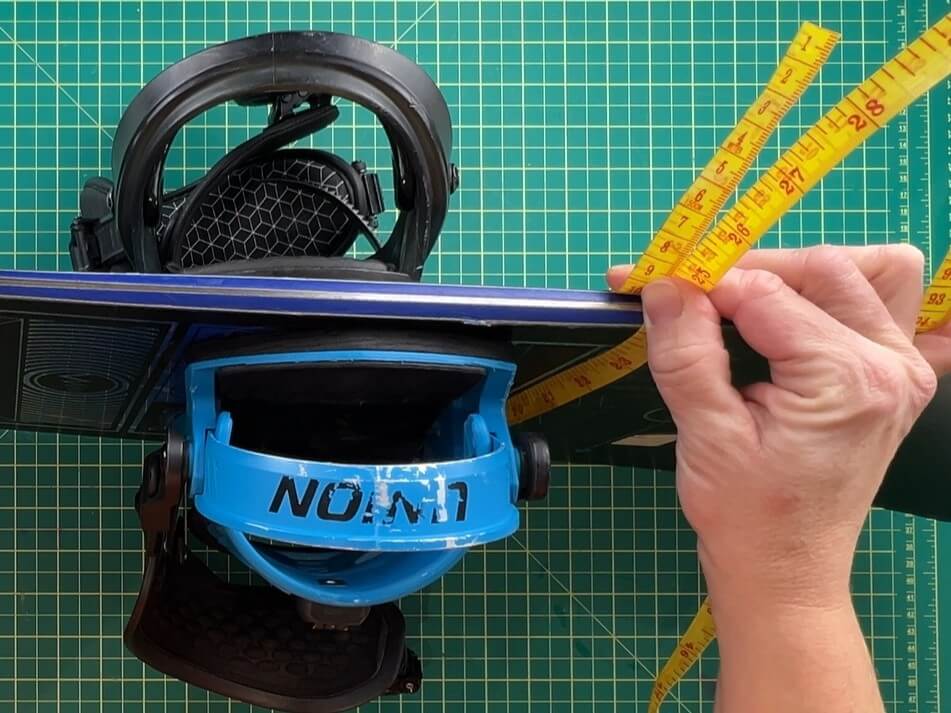
Trust me, dull edges make snowboarding way less fun.
Measuring the full length of the webbing for the snowboard Shoulder strap
Now that we have made all the measurements, we need to add them all up.
I will be using the the example from my board with no heel support.
The webbing needed for:
- The binding = 9″ + 4″ for loops and hooks
- There are 2 bindings, so we need to account for them twice.
- Two times the distance between the bindings = 38
For a total of ((9+4)+(9+4)+38) = 64 inches of webbing needed.
Supplies You’ll Need (Nothing Fancy)
As an Amazon Associate, I earn from qualifying purchases. This post contains affiliate links. I may receive a commission if you purchase an item from one of my links. This will not change the price you pay.
This is one of my favorite parts: this project is cheap.
Here are the supplies you’ll need to make a DIY snowboard shoulder strap:
- 1″ nylon webbing (measured to your setup)
- Trigger hooks (easy to use with gloves)
- Half loops
- Sewing machine
- Thread of matching color
- Lighter (to seal the webbing ends)
Quick tip: burn the ends of your webbing before sewing so it doesn’t fray over time.
Snow + wear + loose threads = eventual failure.
Putting It All Together (You’ve Got This)
Start by adding your loops before sewing on the hooks. Once the hooks are on, you won’t be able to add them later.
Pull 1.5″ of webbing through the loop of the hook. Sew it shut with a box stitch.
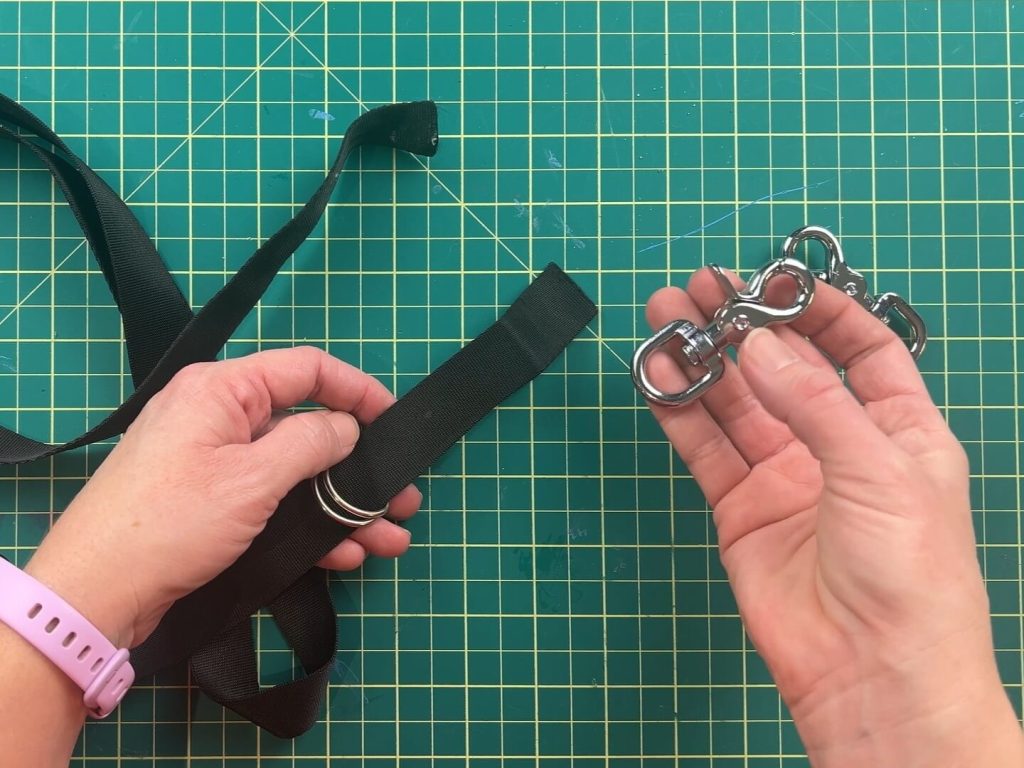

Next, measure out the distance measured from your binding. (In my case, we’ll use 9″ +4 ” = 13″). At the 13″ inch mark, pinch the loop and sew it into place. Again, use a box stitch if you can.

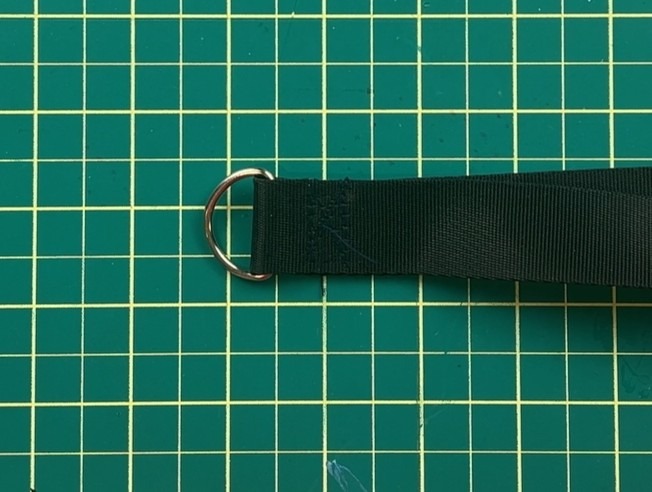
Before you continue, make sure you have the second loop on the webbing.
Now, staring at the other side of your webbing, put on the hook the same as above. Once the hook is on, measure again (13″) and set the loop into place.
Once both sides are sewn, clip the loops onto the hooks, run everything through your bindings, and…
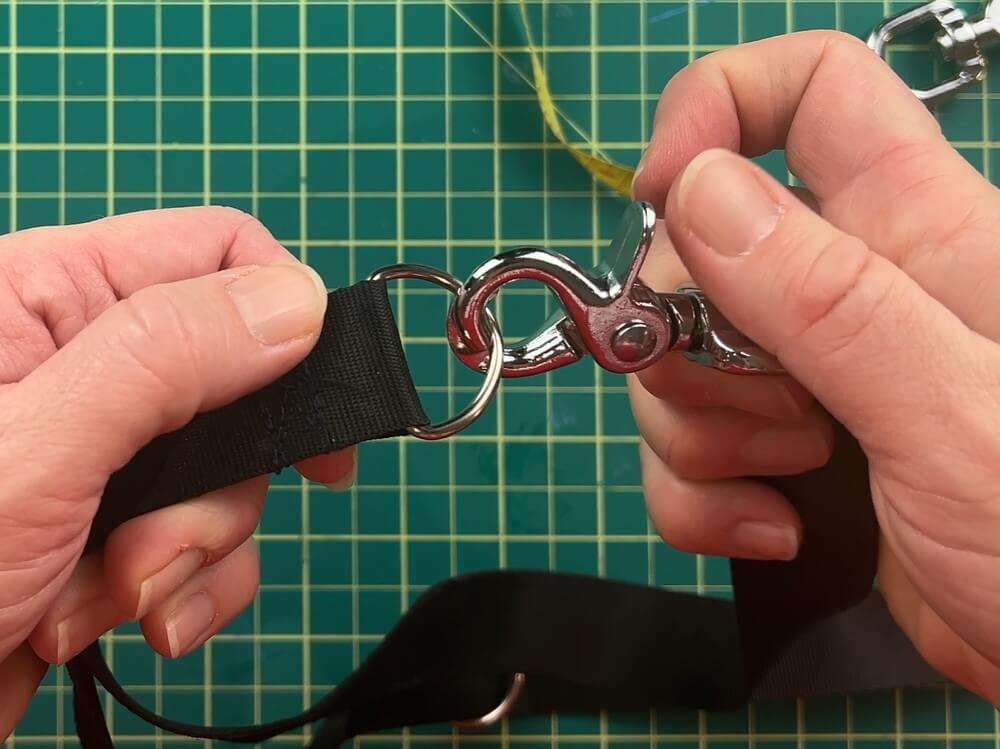
That’s it! Your Snowboard Shoulder Straps are Complete!

Final Thoughts (From Someone Who’s Remade These Before)
I’ve made snowboard carrying straps before ( you can see the previous version of it here). And with that, I have learned a few things that I want to share with you.
- Bigger is better. Kids grow, and so does their equipment. If you size the straps a bit larger, they will have room to grow with your kids and their growing equipment.
- I find that trigger hooks are easier with mittens than clip hooks. I would love to use carabiners, but they fall off, so that’s not an option for me.
- For now, this version works better than my old design because I left extra space for them when the board get longer. But we will see in time if that actually worked out.
- When sewing:
- Leave about an inch to an inch and a half of space.
- Use a box stitch with an X or lots of back-and-forth stitching.
- Avoid sewing too close to metal hardware (your sewing machine will thank you).
- This strap is going to get pulled, dragged, and yanked all winter. One straight stitch won’t cut it.
Did you enjoy this DIY Snowboard Shoulder Strap Project?
Did you enjoy this DIY Snowboard Shoulder Strap Project? If so, let me know. Also, if you made this snowboard shoulder strap, let me know how many boards you are carrying. One? Two? A small snowboard army?
If you enjoyed this craft, be sure to check out my other sewing crafts here.
🎥 I also made a video about making these snowboard should straps. You can watch the YouTube Video Here.
Happy Crafting and Happy Snowboarding ❄️🏂