Whenever possible, I like to reuse gift bags. If it is still in good enough shape, it goes into my never-decreasing pile of gift bags to be reused one day. When a gift bag is given for the first time, it has a matching tag, and most people will write the standard to and from on it. I toss those in the garbage right away. Then when I reuse the bag, I simply make new gift bag tags with Cricut. So, let’s get started!
As an Amazon Associate, I earn from qualifying purchases. This post contains affiliate links. I may receive a commission if you purchase an item from one of my links. This will not change the price you pay.
Supplies Needed to make Gift Bag Tags with Cricut
This is a quick and easy craft to make your gifts pop just a bit more, so here is what we need:
- Your Cricut Machine – you can use any model of the Maker, Explore Air and even the Joy. I use my Cricut Explore Air 2.
- Card Stock – Any scrap piece of card stock will do. But I like to match mine with the gift bag I’m reusing. I will either use a plain solid color or a patterned cardstock to match.
- Pen that fits your Cricut – you can use your Cricut Markers or check out this post on what other pens and markers you can use with your Cricut Machines.
- Ribbon – For tying the gift tag to your bag.
- About 5 minutes
Let’s Get Started Making our DIY Gift Bag Tags with Cricut
Okay, this is a quick and simple process, but it’s fun and easy.
Design your Simple Gift Bag Tag
Open up Cricut Design Space and make a new project.
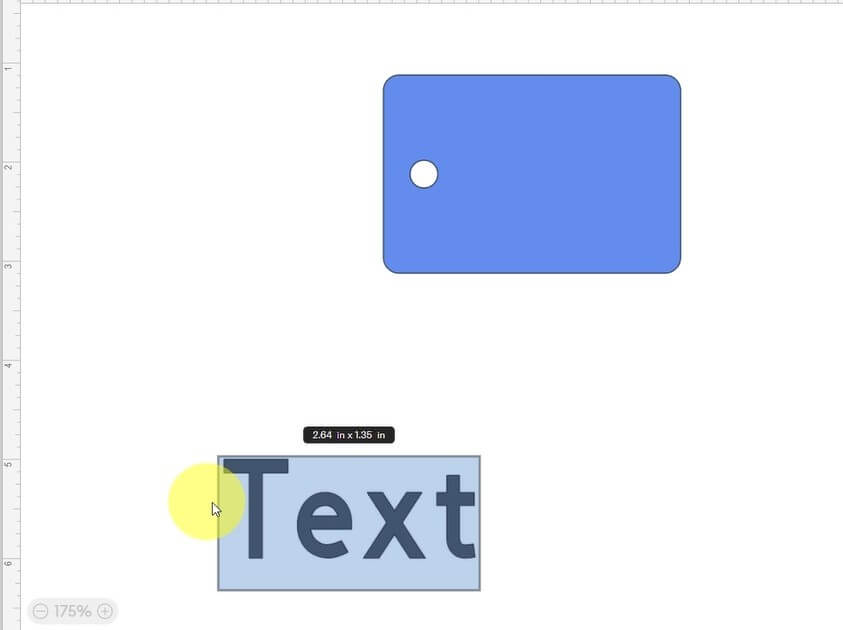
Next, we need to select the Shapes icon and select the rectangle with rounded corners. Place the rectangle on your canvas. You want to adjust the size to be about 3” x 2”.
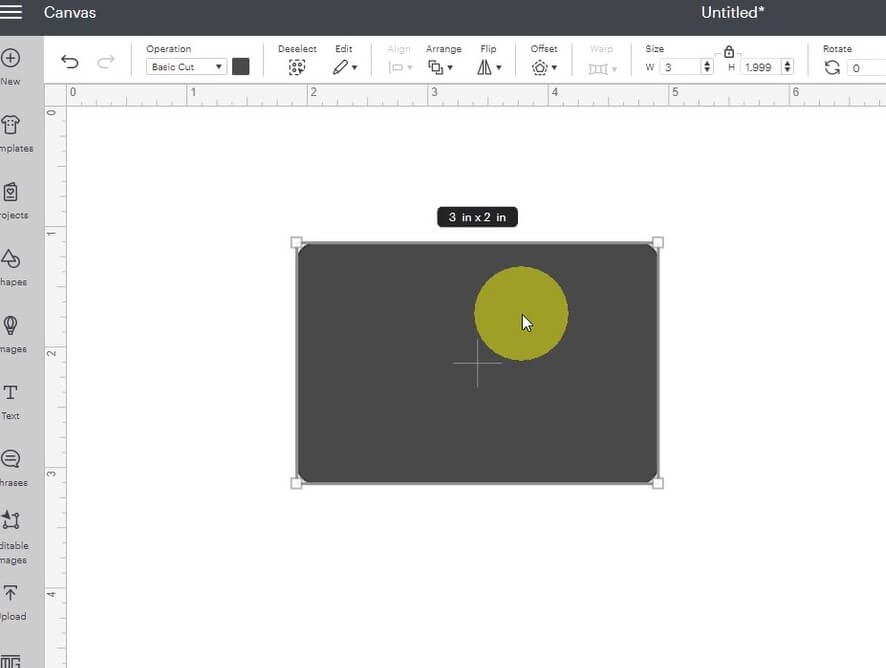
Back in our shapes menu, select a circle. Adjust the size to 0.25”. Place the circle on the left side of the rectangle, about 0.25” from the edge. If the circle is not visible above your rectangle, using your Arrange buttons, adjust them so the circle is visible on top and the rectangle on the bottom. Then, using your Distribute buttons, adjust the circle to be centered vertically on the rectangle. The placement doesn’t need to be perfect, but just so that you like it.

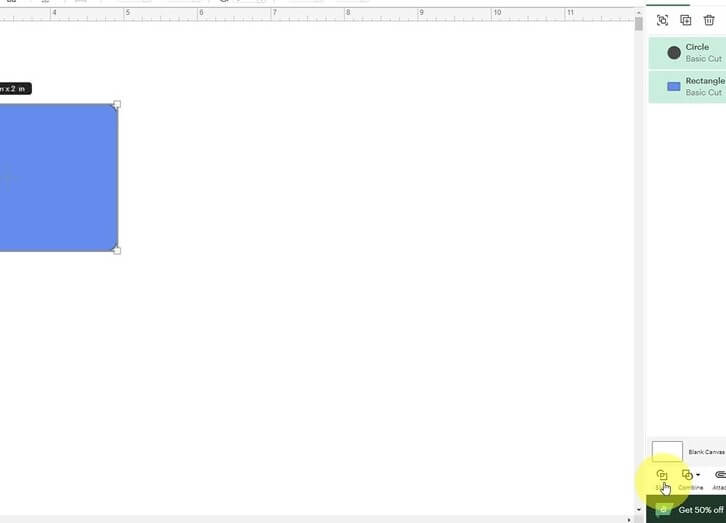

Once happy with the location, select both the circle and the rectangle. Select Slice button so that the circle can leave a hole in the rectangle. Now, delete the two circles and leave only the rectangle with a hole.
Add Text to your gift bag tag
Now that we have the general shape and size, it is time to add a quick To and From to the card. So, select the Text Icon. Once the text box appears on the canvas, select it and type To: and From: with names following it.
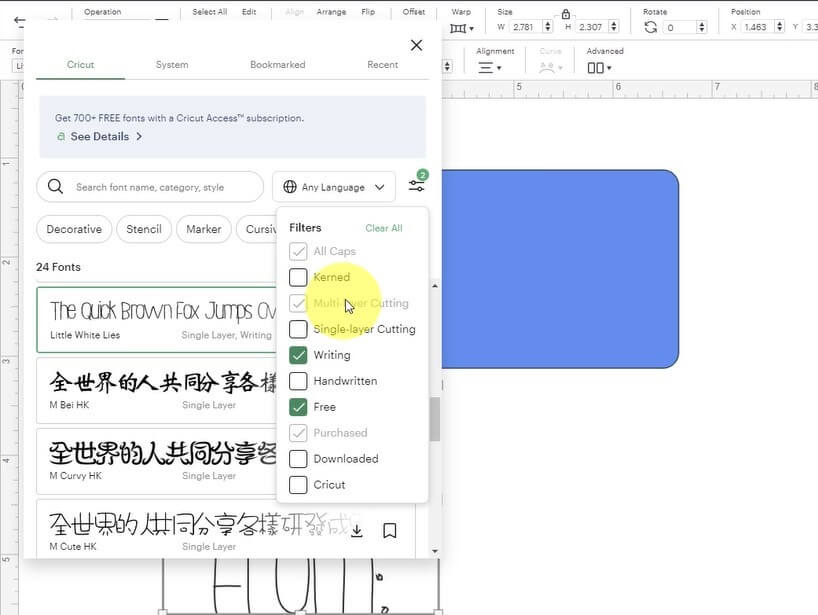
Once you have finished typing, make sure the text is selected and go to the Font drop-down menu. Search for a text that you like. To help narrow your search, select the filter button (two lines with circles) and select Free and Writing. This will narrow down the font selections so you can have a free single-line written font. Select one that you like. I like to use Quinn Type
Depending on the font you select, you may need to also go to the Style drop-down menu and change it to Writing.
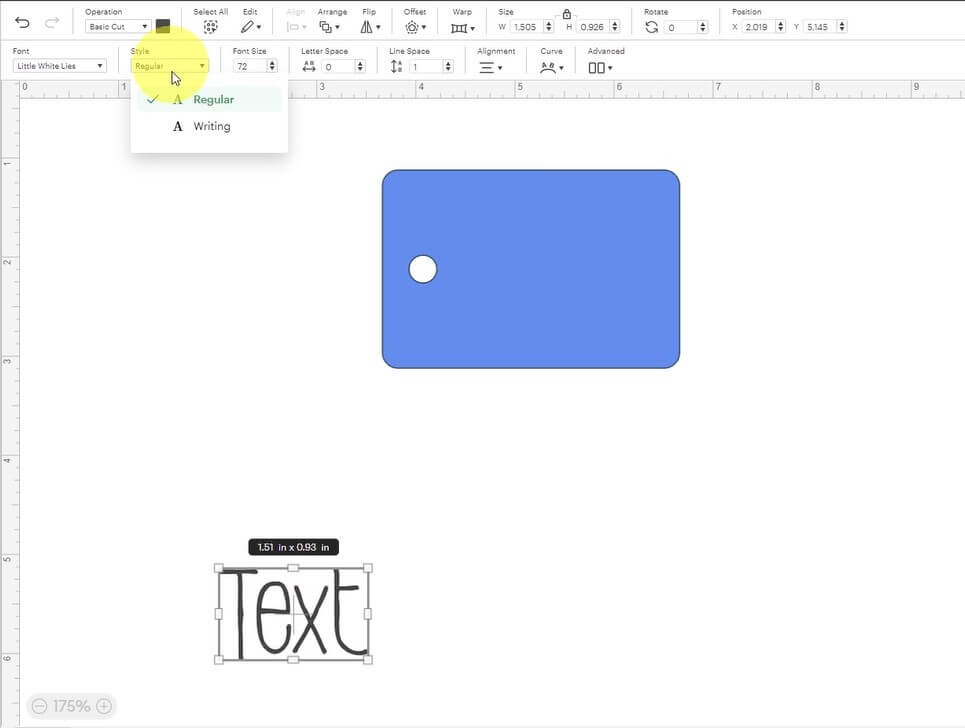
With your text written, place it over the rectangle we made previously. You may need to adjust the font size to fit into the walls of your rectangle. If it is falling behind the rectangle, with your Text selected, Select the Arrange drop-down menu and adjust the text to be on top of the rectangle.
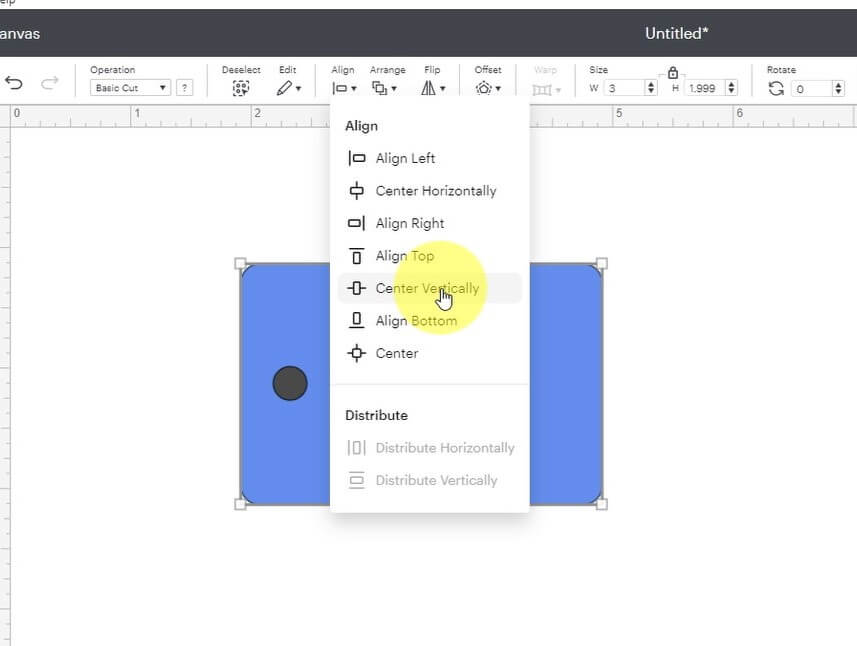
Select both the text and rectangle and using the Align menu, you can adjust the location of the text with respect to the rectangle. Or you can manually move the text around the rectangle and place it where you like.
One final check to do with the text is to go to the Operation drop-down menu and make sure your text is set to Pen.
Finally, select the Attach button to attach the two items together.
Cut out your design
Once happy with your design, you can select Make It and send it to your Cricut Machine to write and cut out your gift bag tag.
You will need to have a pen inserted into your Cricut so that it can write the To: and From.
Also, I recommend selecting a paper for your gift card that matches or complements the gift bag.
Attach your gift bag tag to your gift
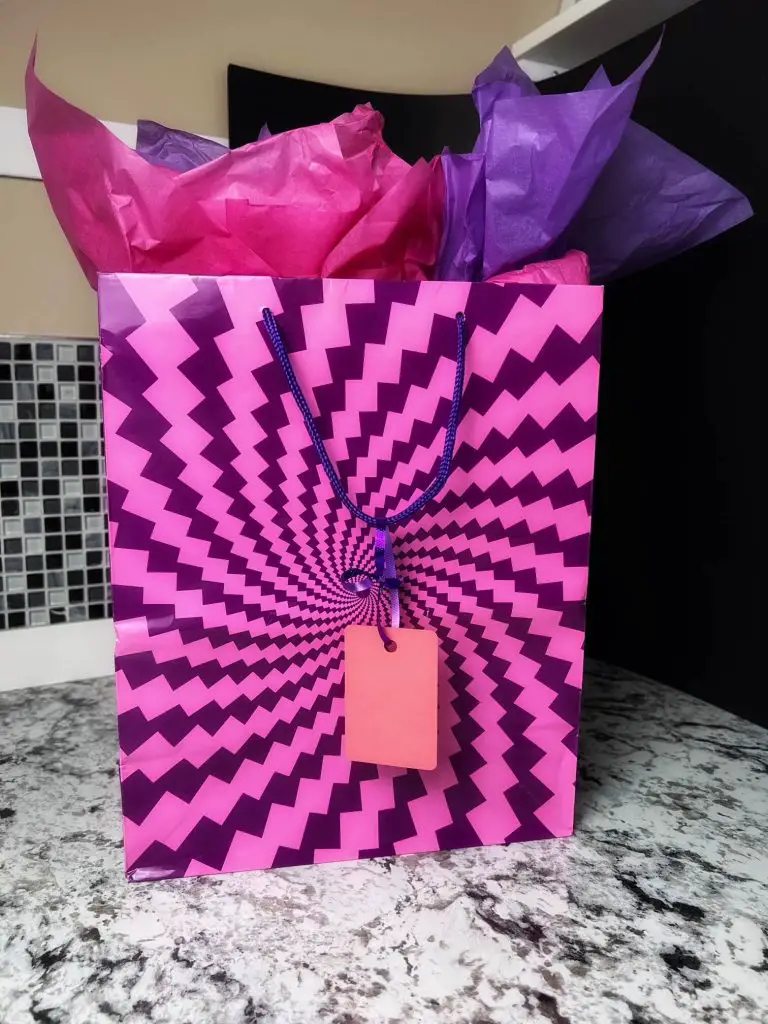
Once the gift bag tag is cut out, it is time to attach it to your gift bag. Cut a piece of ribbon, attach it to the handle of the gift bag and slip the ribbon through the gift bag tag. Tie a knot and you are done!
And that’s it! Your Gift Bag Tags with Cricut is done!
Things I learned while making gift bag tags with Cricut
I make gift bag tags all the time. I have terrible penmanship, so this little trick saves me stress. But, having said that, here are some things I have learned:
- Font in Cricut Design Space can be finicky. Some fonts that are free today are not free tomorrow. And some fonts just don’t work. So if you find a font that you like be sure to write it down and keep it handy. This will save you a lot of time trying to find it when you need to make a tag quickly.
- Although the Cricut can make nice simple cards, even the most simple project requires at least 5 minutes. So make sure you plan your time accordingly. Otherwise, you will be left tagless.
- I demonstrated making a very simple rectangle tag. You can use any of the free shapes that are included in Circut Design Space and simply add a hole. Or you can even weld several shapes together to make unique gift bag tags. I find that the simple rectangle is quick and effective.
Did you enjoy this craft?
Did you enjoy this quick craft? Let me know in the comments below! If you made it, let me know how it turned out!
If you liked this craft, be sure to check out my other paper project here.
And if you like to design your own crafts, check out my how-to design project here.