If your house has caught the 6-7 fever, you’re not alone! This viral trend has made its way from social media into homes and classrooms everywhere, so why not bring it into your craft room too? In today’s project, we’re turning the 6-7 trend into a fun and modern piece of wall art, the DIY 6-7 Canvas Poster!
This DIY 6-7 canvas poster combines simple painting techniques and Cricut vinyl decals to create a trendy, personalized design that’s perfect for a bedroom, office, or playroom. It’s quick, customizable, and the perfect craft for anyone who loves staying on top of what’s trending, with a creative twist!
Supplies Needed to make this DIY 6-7 Canvas Poster
As an Amazon Associate, I earn from qualifying purchases. This post contains affiliate links. I may receive a commission if you purchase an item from one of my links. This will not change the price you pay.
To make your own DIY 6-7 canvas art, you’ll need some supplies. Below are the supplies that I used, but as with all craft projects, you can customize them to your liking.
- Canvas: I used a 10″x 20″ stretched canvas. That’s what I had lying around, but any size canvas will work.
- Acrylic paint: I used 3 shades of blue; however, you can use any colors you like or even just one color.
- If you are not using a cutting machine to make your 6s and 7s, you can use paint to paint the numbers onto the canvas. You will simply want to select colors that pop on the canvas.
- Paintbrush: You only need 1 medium-sized flat brush
- Cutting Machine: I used my Cricut Explore Air 2 for this craft. I’m not good at drawing letters and numbers by hand, so using my cutting machine makes this project easier for me. You can use any cutting machine.
- Permanent vinyl: I used Black, white, and light blue to match my blue-painted canvas. If you are using a cutting machine, choose vinyl that matches the painted canvas.
- Weeding tools & transfer tape – optional.
- Paper towel or rag for cleanup
How to Paint a Canvas with a Color Gradient
My vision for this project was a canvas with a blue gradient to produce an ombre look.
Start by pouring generous amounts of each paint color directly onto your canvas — darkest at one end, then medium, then lightest. Using a single brush, blend the colors by brushing side to side across the canvas to create a smooth ombre gradient.
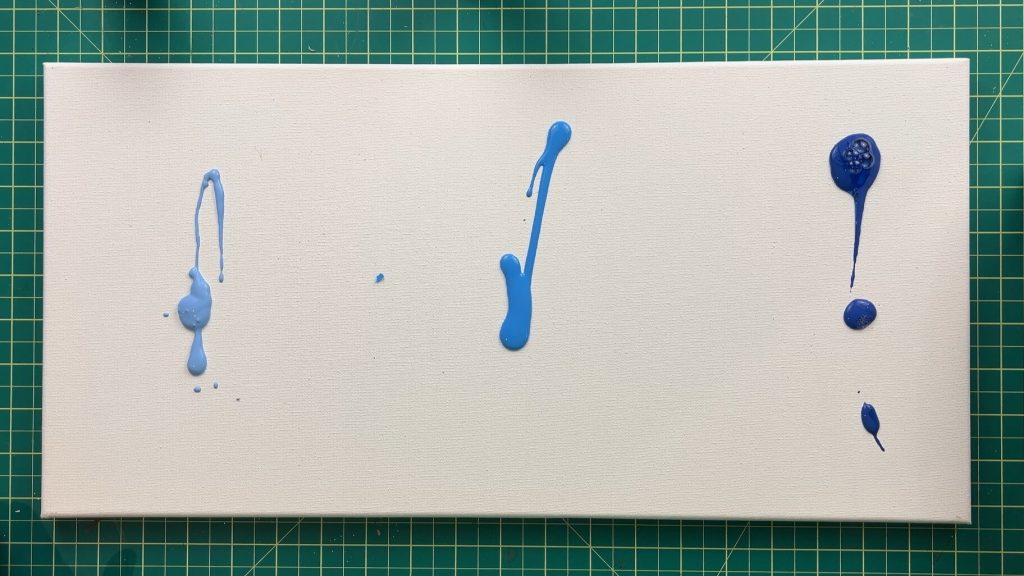

Don’t worry about being perfect! Gradients look best when they have a little variation! Be sure to paint the edges for a clean, finished look. You do not want to start or finish a brush stroke mid-canvas. That will leave brush marks on the canvas.

Once your canvas is fully covered, let it dry completely before adding any vinyl or painting on the numbers.
Designing 6 7 in Cricut Design Space
Open Cricut Design Space and start a New Project.
Use the Shapes tool to create a rectangle sized to match your canvas. For my project, I’m making a 10″ x 20″ rectangle. This helps you visualize your design layout. I like to change the color of the rectangle to match my canvas to help.
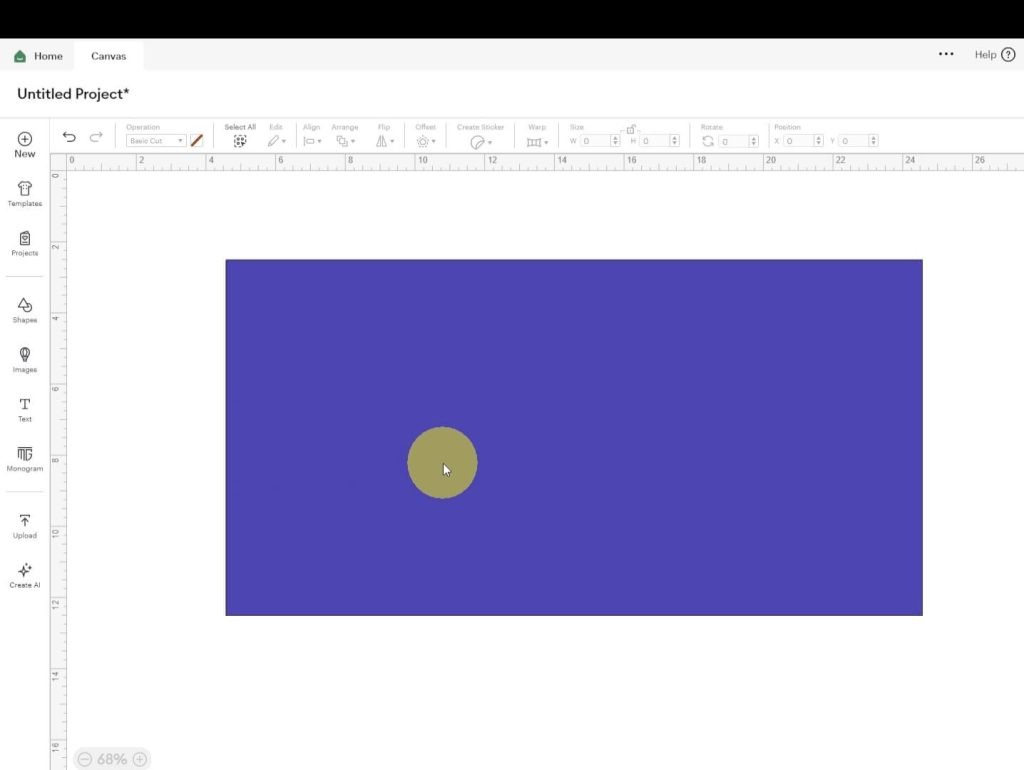
Next, use the Text tool to add the numbers “6” and “7”. Each number should be its own text element. Duplicate and resize them to create a variety of sizes and rotations. While making duplicates, I change the color in the Color Pallet in Cricut DS. Arrange them randomly across your mock canvas — some straight, some tilted — to give your final piece a natural, artistic flow.
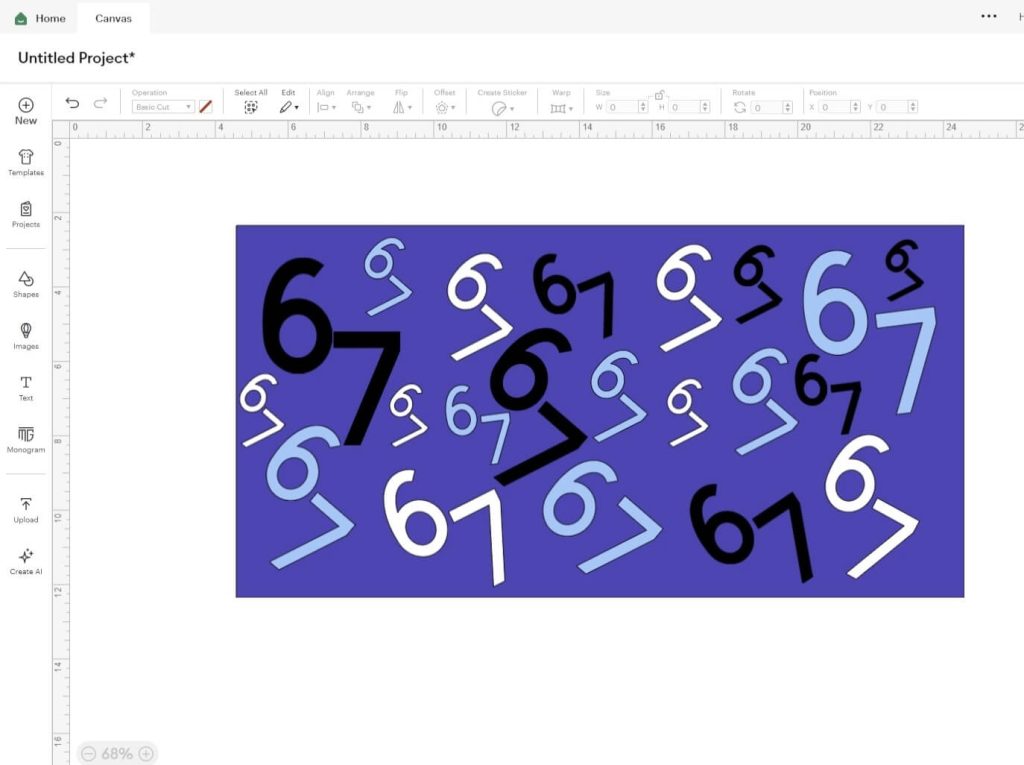
Once you’re happy with the layout and color combinations, select the rectangle that you made and Delete it. We do not want to cut it out. Next, click Make It, stick your vinyl onto the mat, load the mat into your machine, and let your Cricut do the cutting!
Adding Your 6 7s to the Canvas
Once your paint is dry and your vinyl is cut, it’s time for the fun part — decorating! Decide which direction your canvas will hang (horizontal or vertical). Then begin placing your 6s and 7s all over the canvas like stickers. Alternatively, you can use transfer paper to place them on, but with simple one-digit designs, I find placing them like stickers is faster and just as effective.
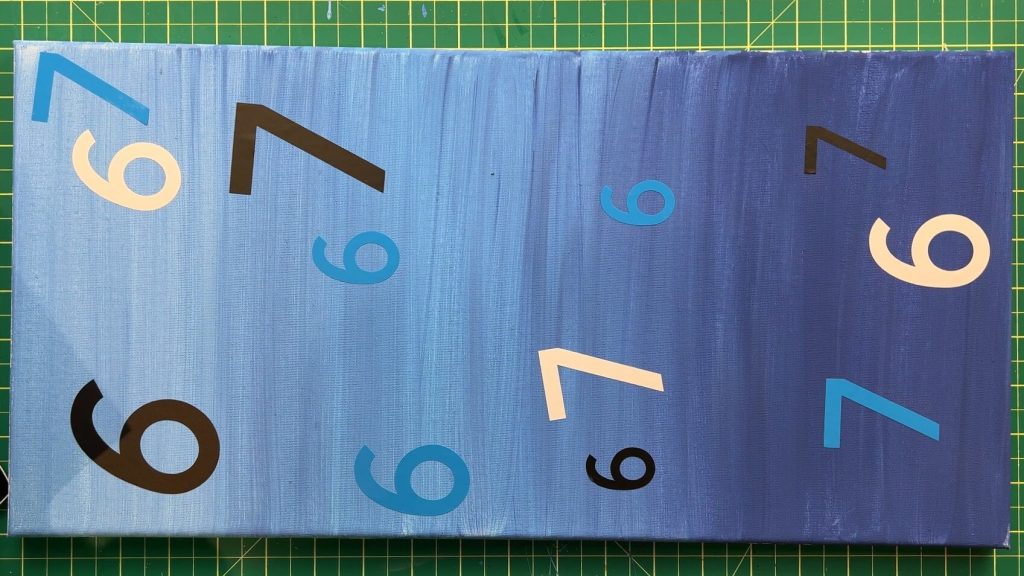
Alternate your colors and spacing for a balanced, dynamic look. Don’t worry about symmetry — the charm of this piece is its playful, random layout. Press each vinyl number firmly to make sure there are no bubbles or wrinkles.
If you prefer, you can skip vinyl entirely and paint the numbers 6 and 7 directly on your canvas for a hand-painted finish. Either way, the result is uniquely yours and totally 6-7-approved!
And that’s it — your 6-7 Canvas poster is Complete!
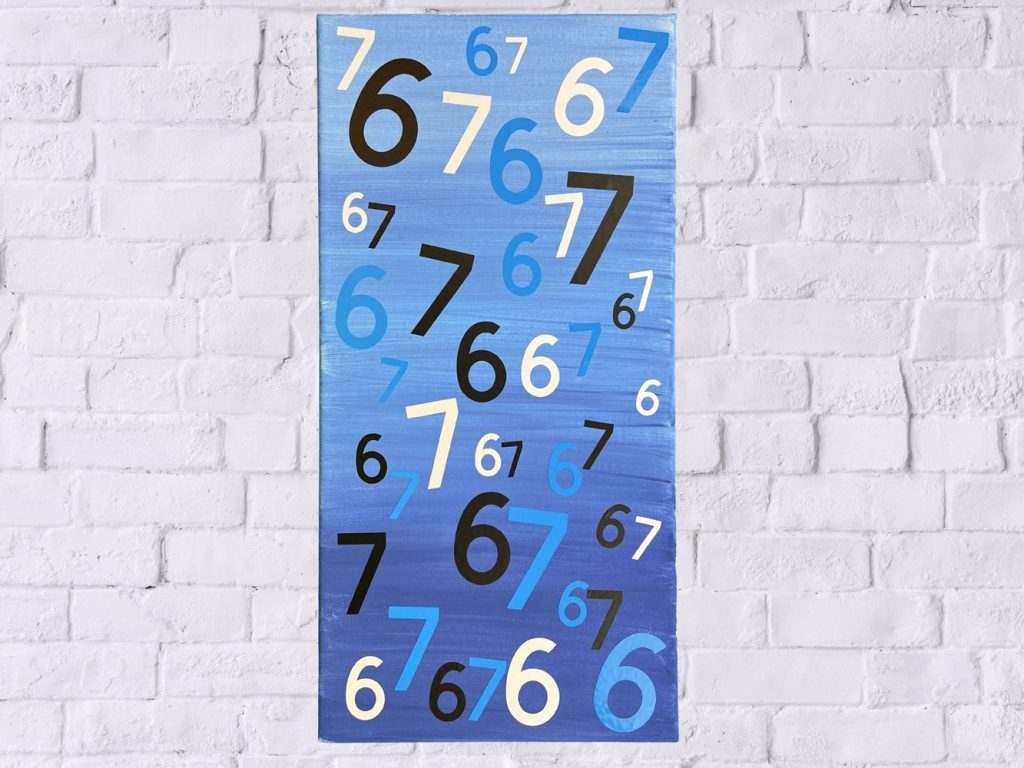
And that’s it — your 6-7 art poster is finished! What started as a funny online trend is now a bold and stylish art piece ready to hang. Whether you make it for yourself, your kids, or just for fun, this craft is a great way to mix creativity with what’s trending online.
Try experimenting with different colors or background gradients to match your space or mood. However you style it, you’ll have a handmade piece that sparks conversation and perfectly captures the spirit of the 6-7 trend.
Things we learned along the way!
This was a fun project! But, we can’t forget to discuss the things I learned making this craft! So, let’s jump in:
- I am terrible with drawing numbers, letters, or even straight lines. That is why I use my Cricut. But you don’t need a cutting machine for this craft! You are more than welcome to paint it by hand or even use a marker.
- When I was painting this canvas, I needed to add more paint a few times. When painting ombre canvases, I like to place my paint next to the canvas in order and location of where I placed them. That way, if I need to add more, I select the correct color.
- Also, if you are like me and use a lot of paint, be sure the paint you are using has enough paint in the bottle! I almost ran out, so I had to balance it out with one of the other colors. But the last thing you want to do is run out of paint mid-way through the project!
- So, funny story – and if you watch the video (you can do that here), I talk about paint spray. When I was painting the canvas, back and forth, I must have been really excited about painting because paint was flying all over the place. So much so that it got all over my shirt. And, not having been this crazy with painting in the past, I was not wearing appropriate painting attire. And, I got acrylic paint all over my shirt….. So, I did a quick Google search and learned that you can get (most) acrylic paint out of cotton by using isopropyl alcohol and dish soap, and some elbow grease.
- When painting this canvas, do not start or finish a brush stroke mid-canvas. That will leave brush marks on the canvas.
Did you enjoy this DIY 6 7 Canvas Project?
Did you enjoy this DIY 6 7 Canvas Project? Or, as I call it, from Meme to Masterpiece? Let me know if you tried it out and how it turned out!
If you enjoyed this project, be sure to check out other Canvas projects here or vinyl projects here.