
Want to make cute origami hearts but have zero origami experience? You’re in the right place.
This beginner-friendly, cute origami heart tutorial is forgiving and only requires one piece of paper. No fancy folds. No stress. Just a handmade heart that actually looks like a heart when you’re done.
So, let’s jump in! ❤️
🎥 I also made a video about these cute origami hearts. You can watch the YouTube Video Here.
Supplies for Cute Origami Hearts
As an Amazon Associate, I earn from qualifying purchases. This post contains affiliate links. I may receive a commission if you purchase an item from one of my links. This will not change the price you pay.
One of the best things about this project? The supply list is tiny.
What You Need
- 1 square piece of paper – you can use origami paper, which folds easily, or you can use 12″ x 12″ cardstock like I am to create bigger hearts
- Glue (optional) – I like to use glue at the end of the project to hold this all together, but it is not required.
That’s it! If your folds don’t always stay put (same 🙋♀️), a small amount of glue can help keep everything secure.
👉 Are you a “no-glue origami” person or firmly on Team Glue? Let me know in the comments.
Best Paper for Making Cute Origami Hearts
You can create these hearts in various sizes, depending on the type of paper you use.
Paper Size Options
- 12″ x 12″ cardstock → creates cute origami hearts about 6 inches tall
- 6″ x 6″ origami paper → perfect for small decorative hearts
For this tutorial, I’m using 12″ x 12″ cardstock to create large hearts. Keep in mind that cardstock is thicker, so the folds require more effort than origami paper.
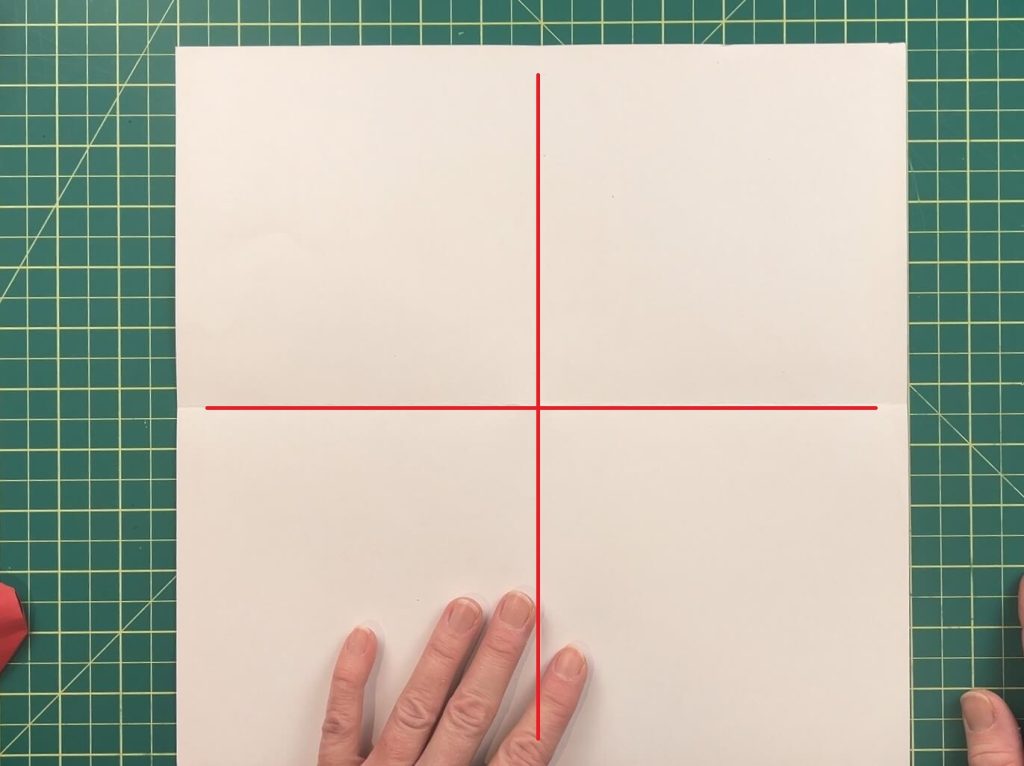
Step 1: Fold the Paper (Design Side Down)
Start by placing your paper design side facing down. This ensures the pattern ends up on the outside of your finished heart.
- Fold the paper in half.
- Fold it in half again.
You should now have two folds in your paper. This will divide your paper into 4-smaller squares.
Step 2: Fold in the Sides
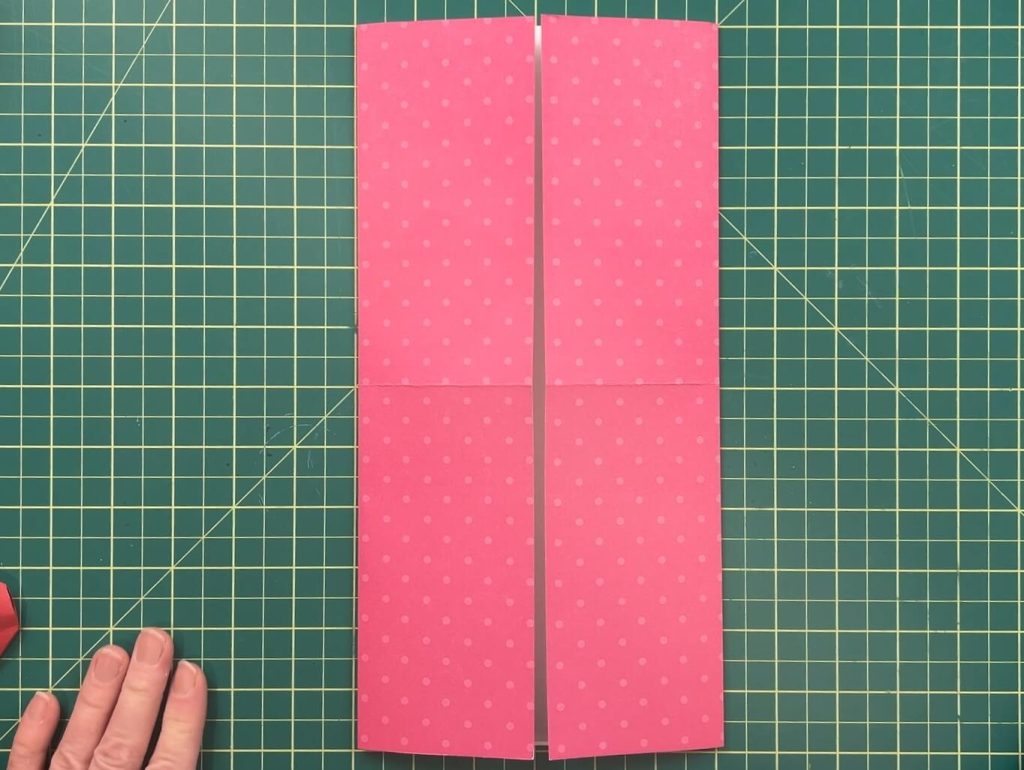
Next, bring the outer edges inward.
- Fold both sides toward the center seam.
- This creates a long rectangle, and the design will be on the outside of the paper.
Repeat the folds evenly on both sides.
Step 3: Create an Arrow On Both Sides
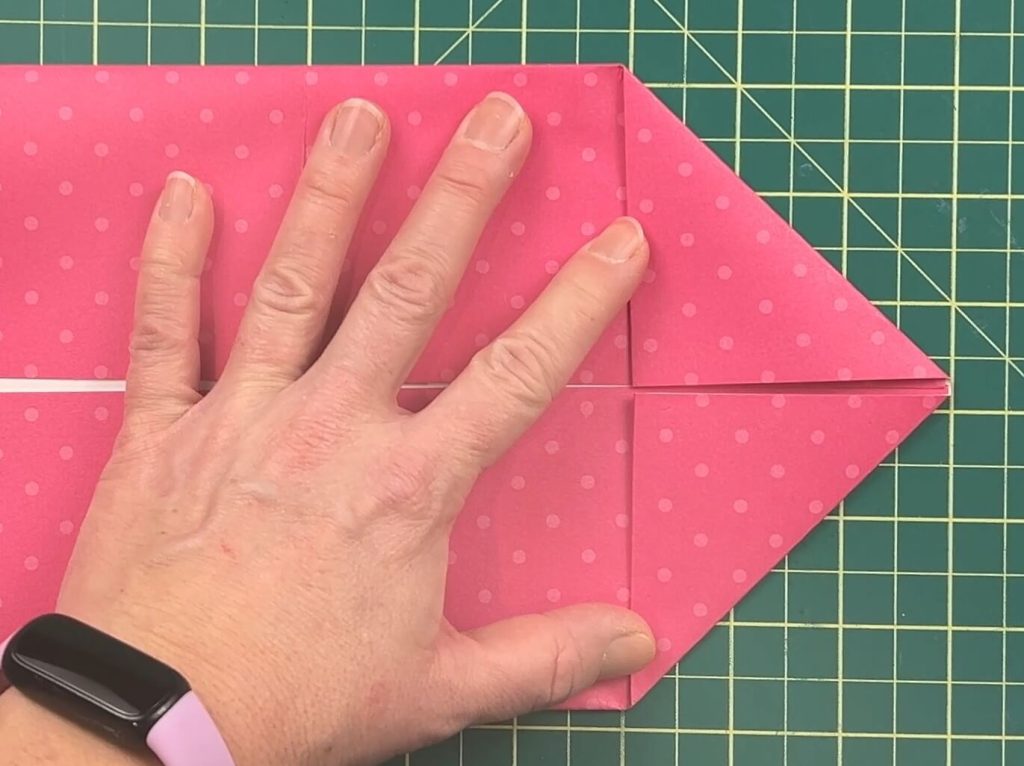
Working on one end at a time, we want to make an arrow by folding the corner of the paper into the folded center of the paper.
Step 4: Create a Second Wider Arrow
Unfold your arrow shape, then:
- Fold each corner into the crease you just made.
- Repeat on the opposite side.
This step creates a wider arrow outside the first one, which helps form the heart shape later.
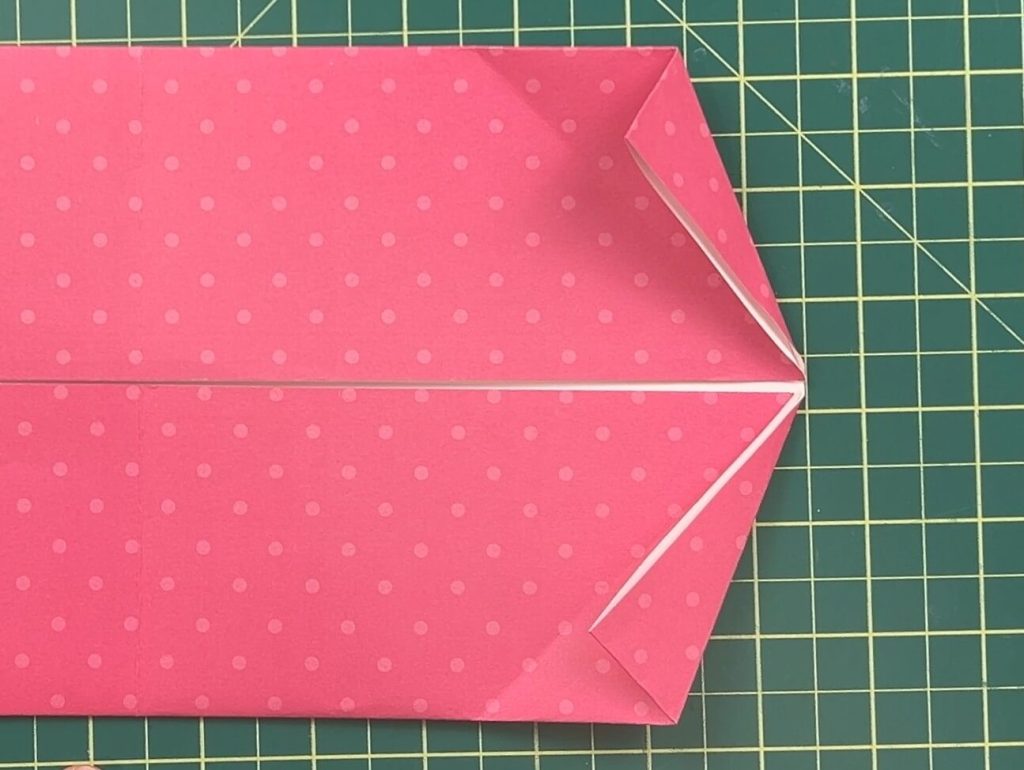
Now, repeat Step 3 and Step 4 on the other end of the paper.
👉 If you’re making this along with me, drop a comment — I love seeing what you’re working on.
Step 5: Fold the Large Arrow Inward
Now we are going to start working some origami magic to make this paper start looking like a heart.
Working on one side only. Unfold the wide fold that you made so the paper is flat.
Open the folded paper to show part of the white paper inside. Working with the large (first) arrow, fold the paper inwards at the crease line.
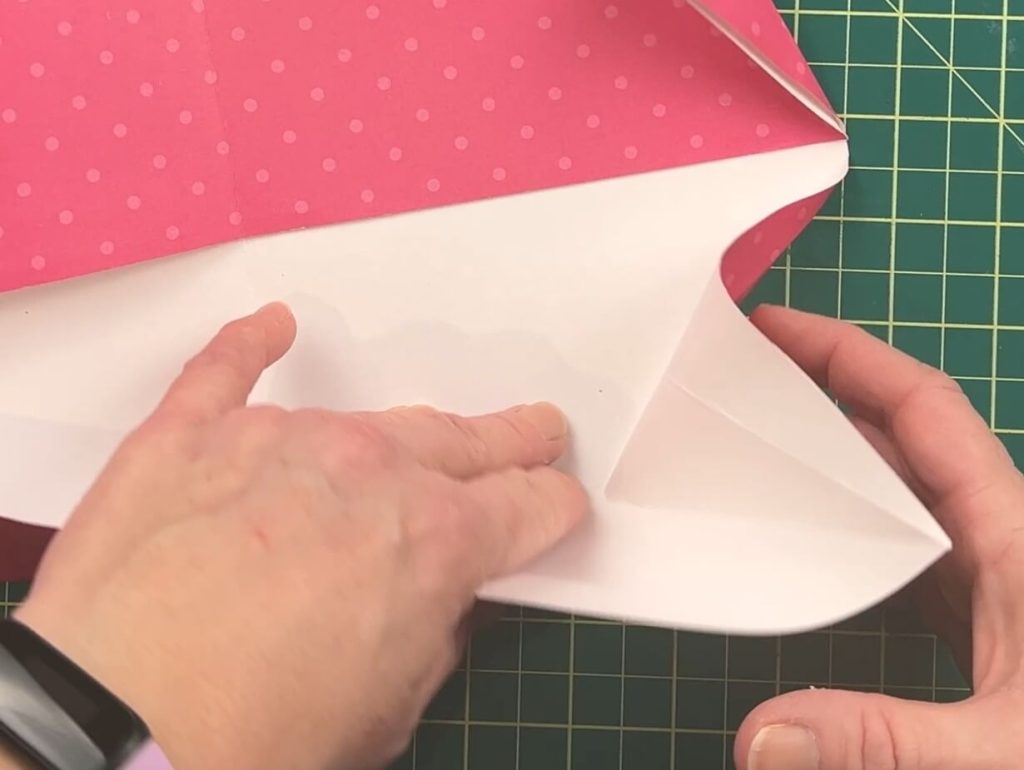
And repeat this inner fold for the second half of the arrow. This will make the original arrow, but with all sides hiding inside the paper.
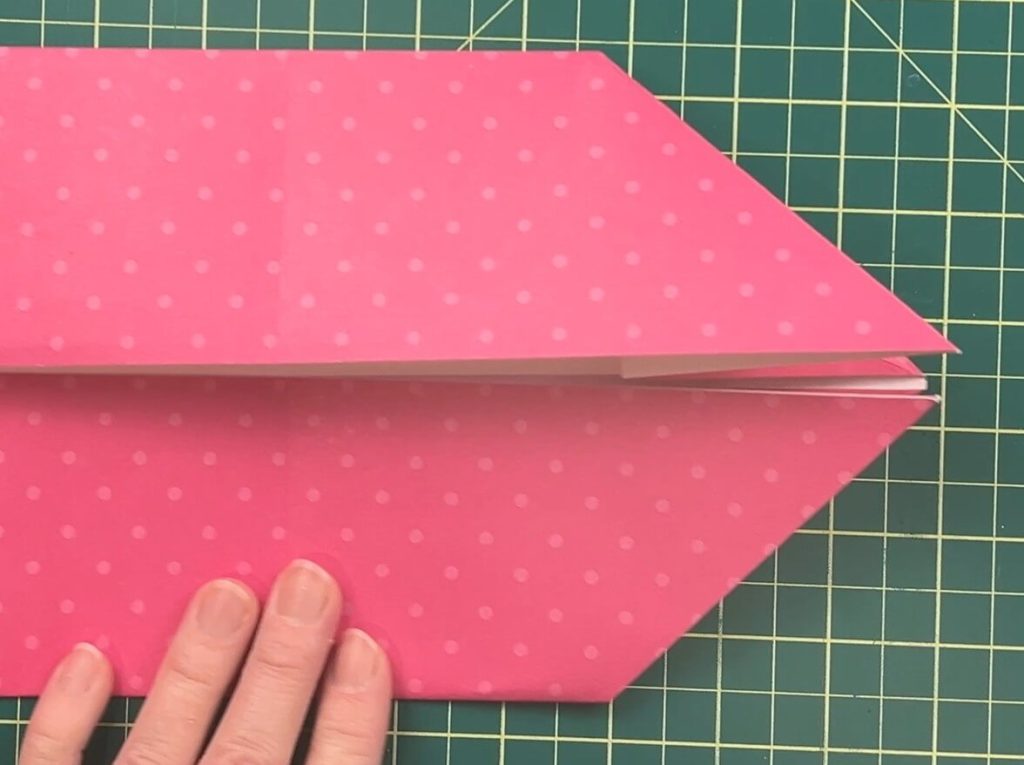
Next, fold the pre-creased sections inward underneath themselves. This step helps secure the tip of the heart and keeps everything aligned. Repeat this inner fold on the second half of this arrow.
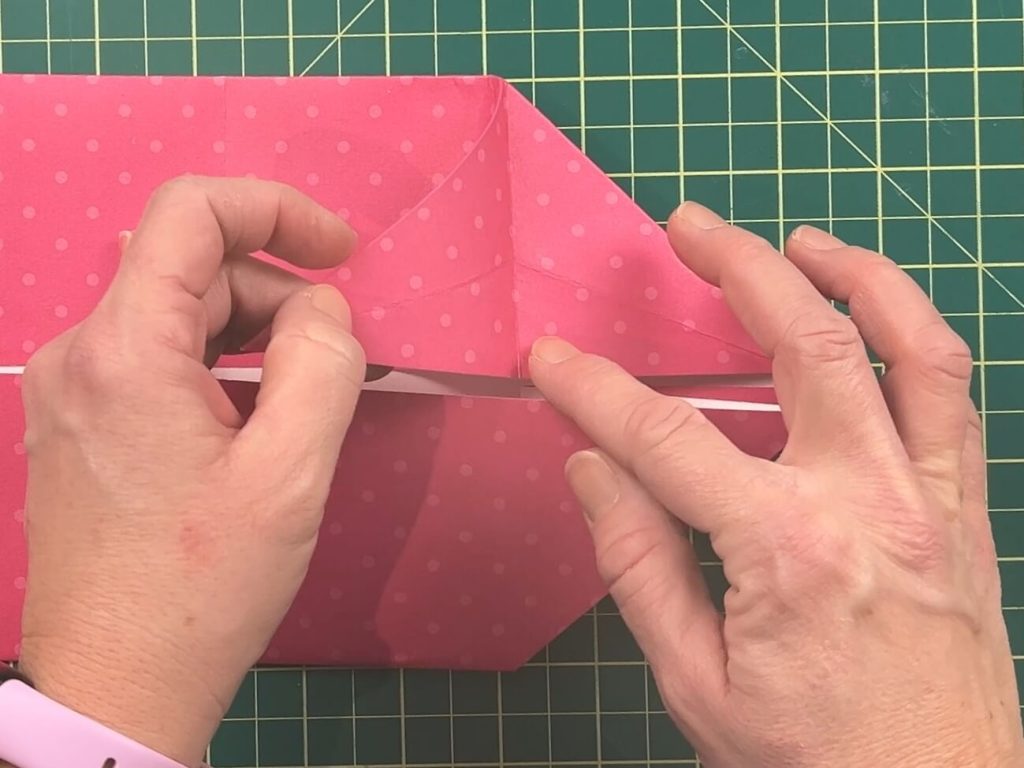
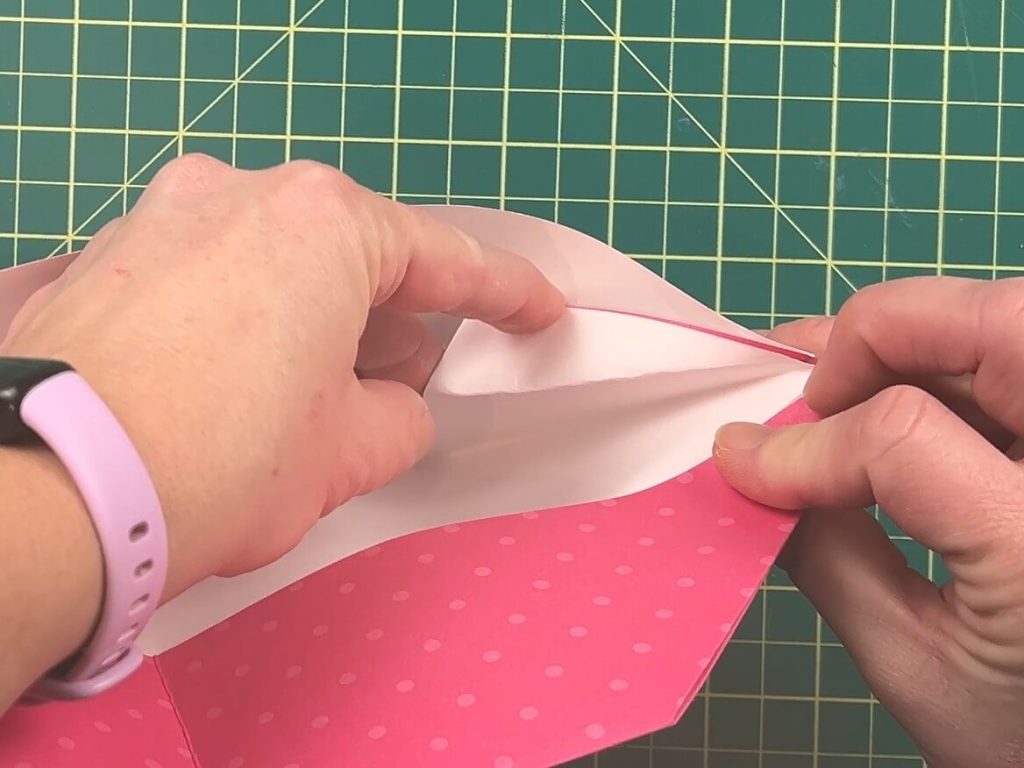
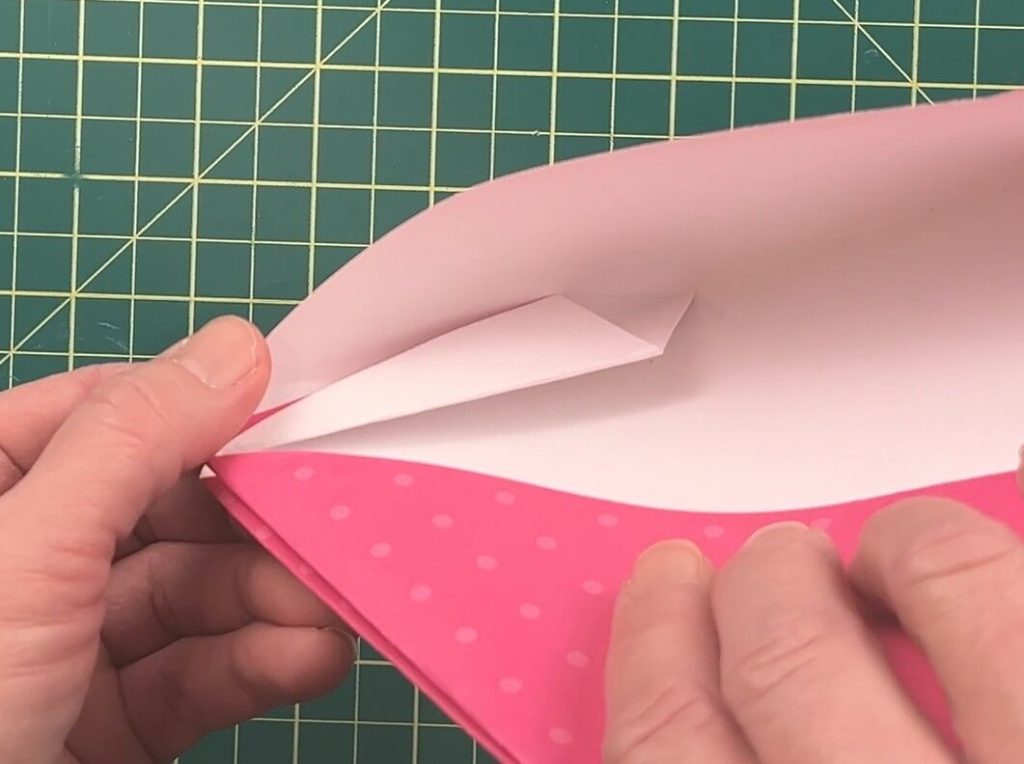
This completes one side of our heart.
Step 6: Shape the Bottom of the Heart
Now we will work on the other side of our paper, with our other pre-folded arrows. We will perform a similar set of folds, but in reverse.
Again, open the paper to see the white inside. This time, we are folding the wide arrow inwards. And repeat on the second half of this arrow.
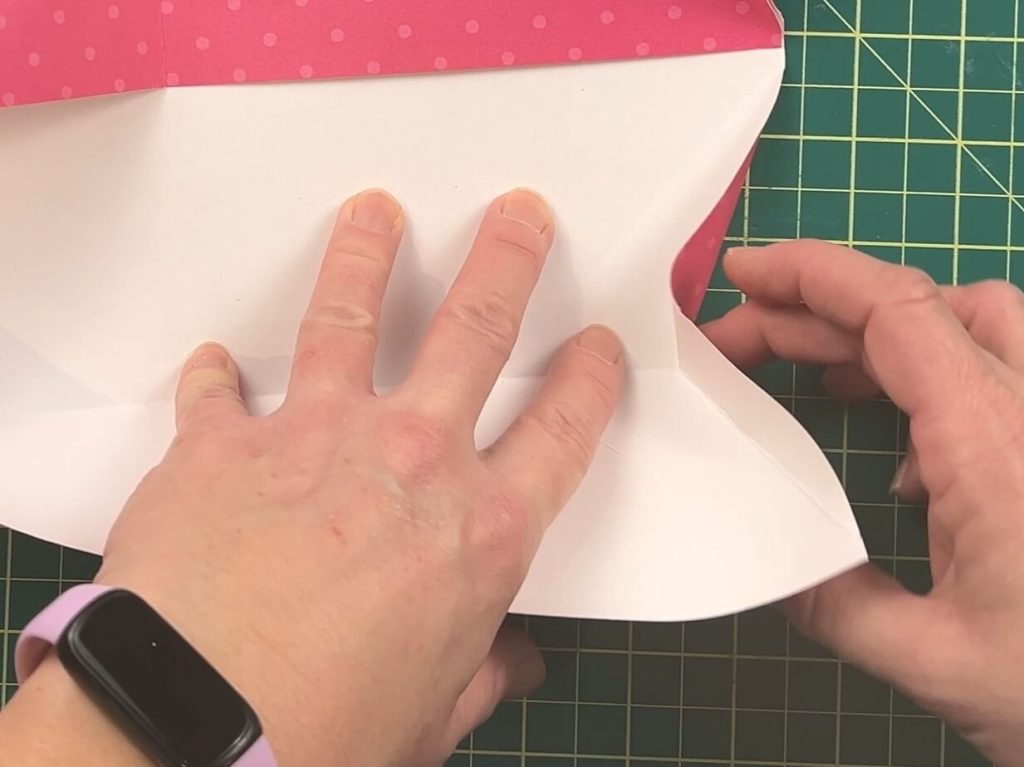
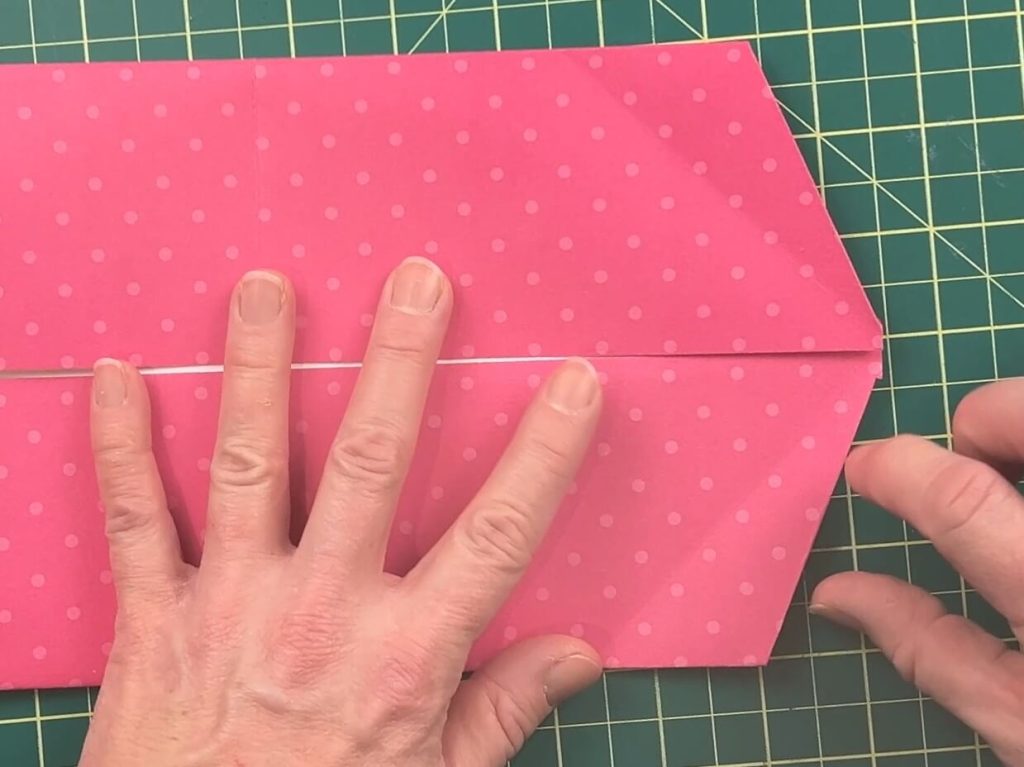
Now, we will fold the arrow again, bringing the arrow inwards, so that we have the shape of our first arrow.
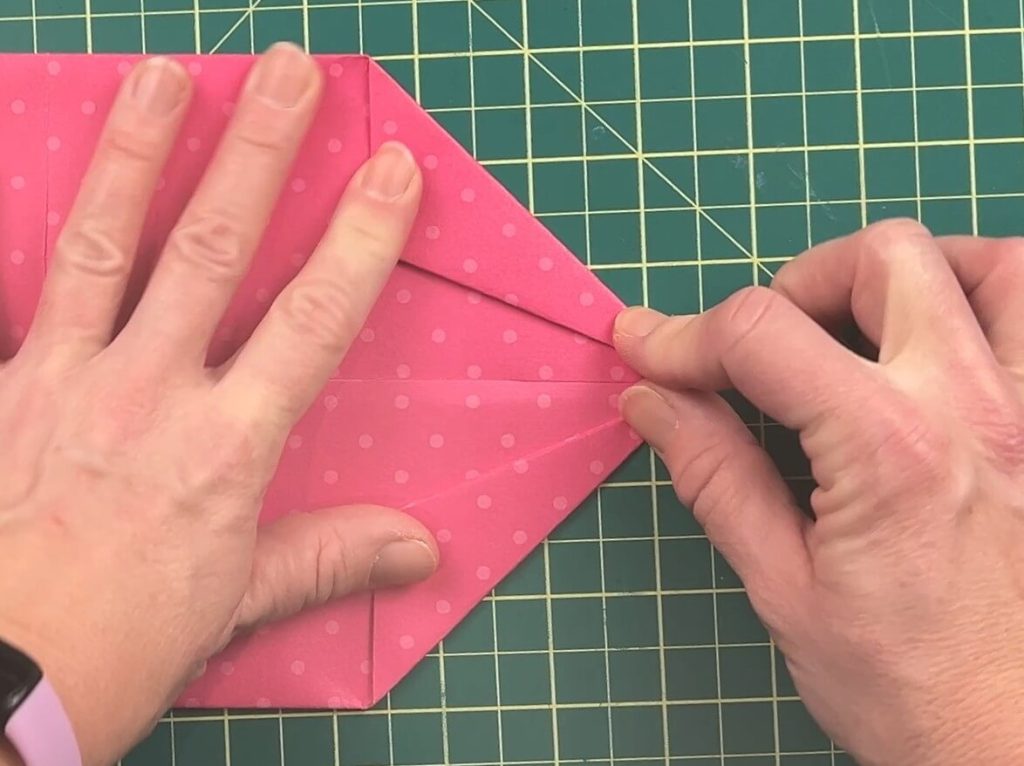
At this point in the project, you should have a shape with an arrow pointing both ways, as shown here.
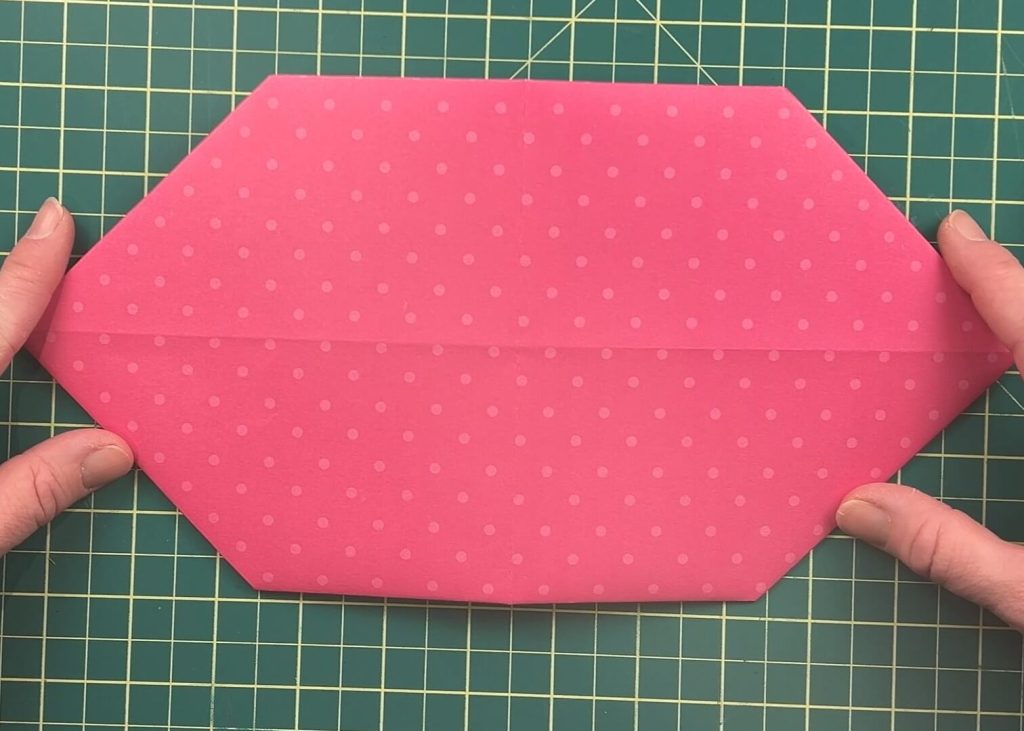
Step 7: Shape the Bottom of the Heart
Now, we want to take the two-sided arrow and fold it in half, lining up the points from both sides of the paper.
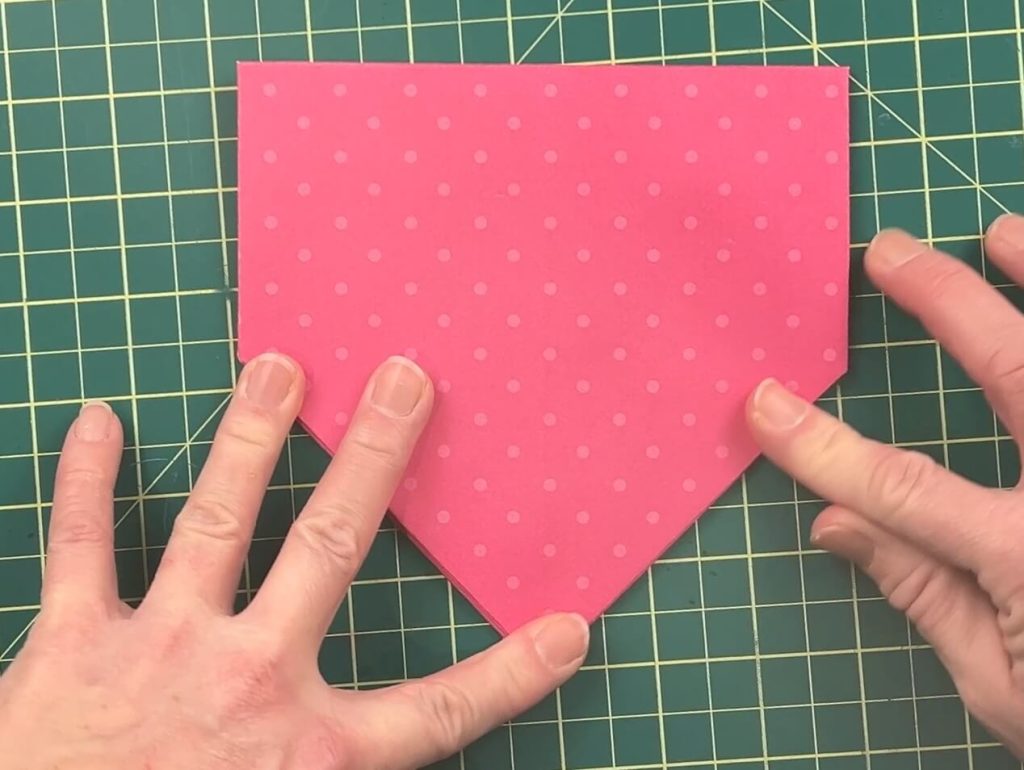
Now things are going to start looking a bit more like a heart.
Step 8: Shape the Top of the Heart
This part is a bit challenging to describe, so bear with me. With the flat side of the heart facing upwards, we want to fold the top corner at the 1/4 mark. You can measure this by hand or just eyeball it.
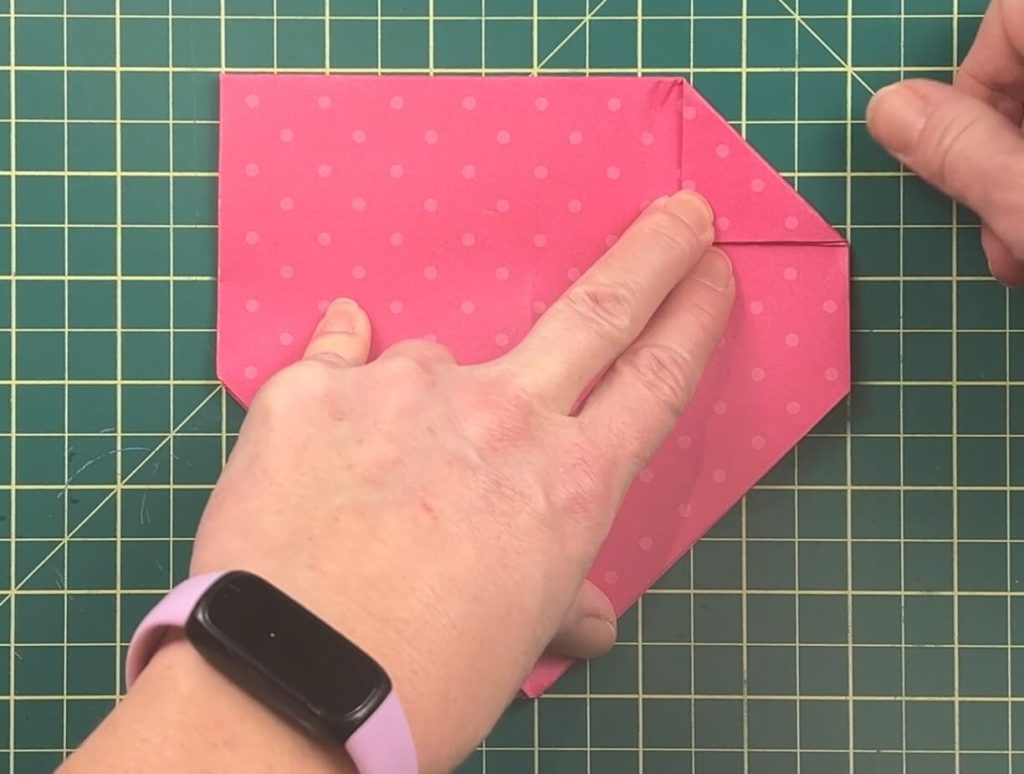
And repeat this fold on the other side of the heart.
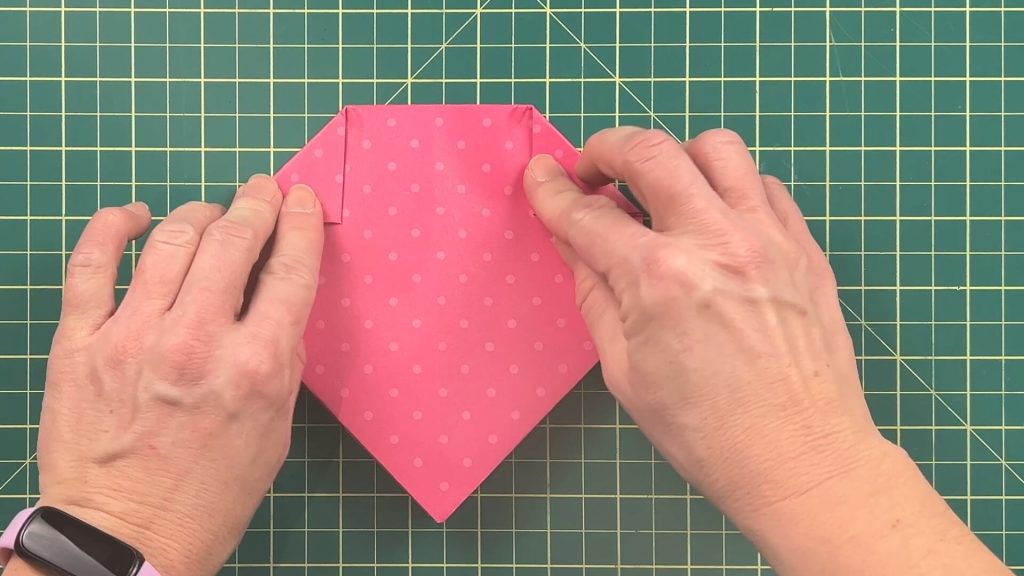
Next, we will fold the paper from the tip of the point we just made to the middle fold that was in the paper.
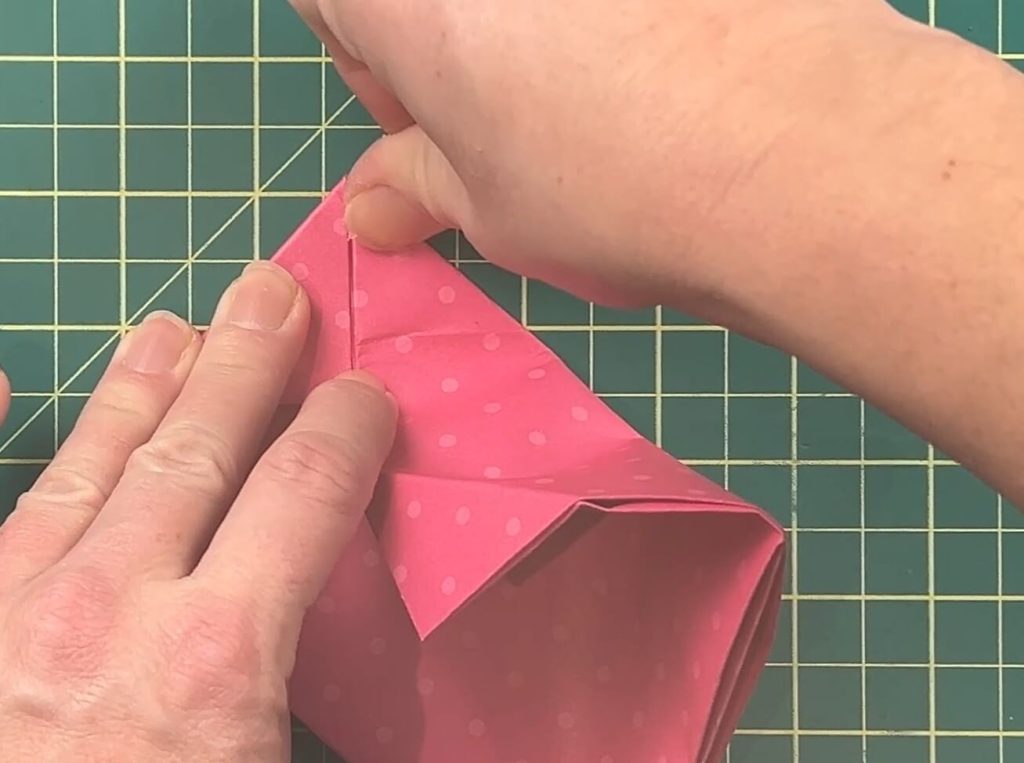
This will give us half of an M on our folds as shown in this image.
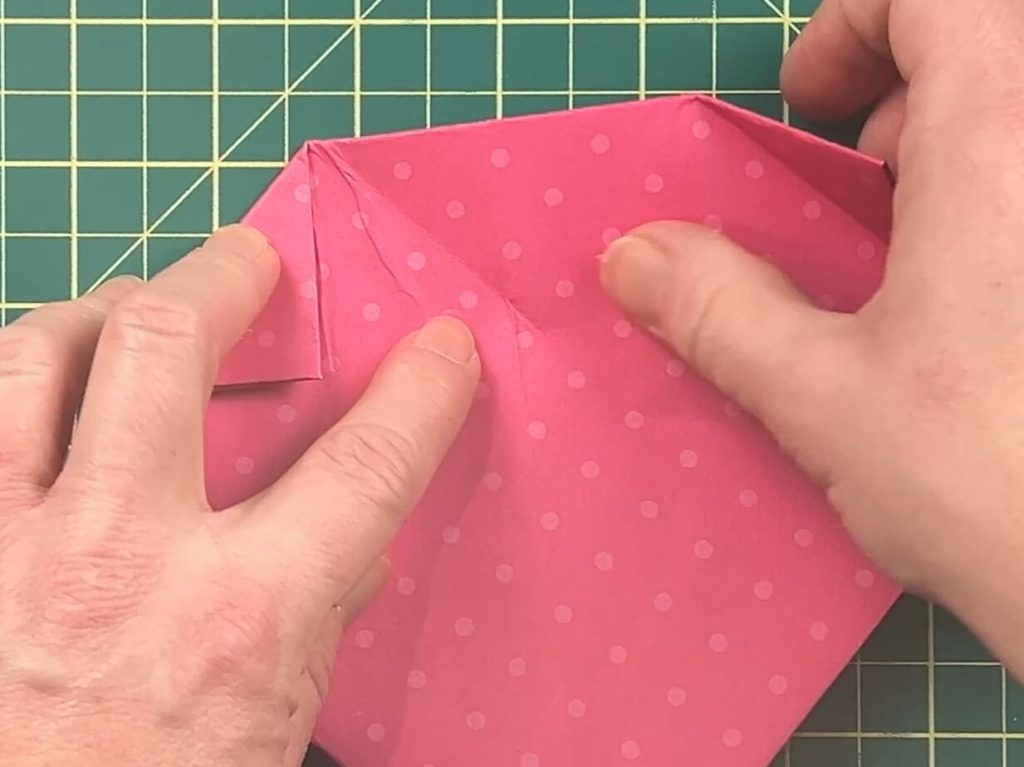
And we now repeat the same fold on the other side, from the tip to the center line. When you open this fold, you should have a crease in your paper that resembles an M.
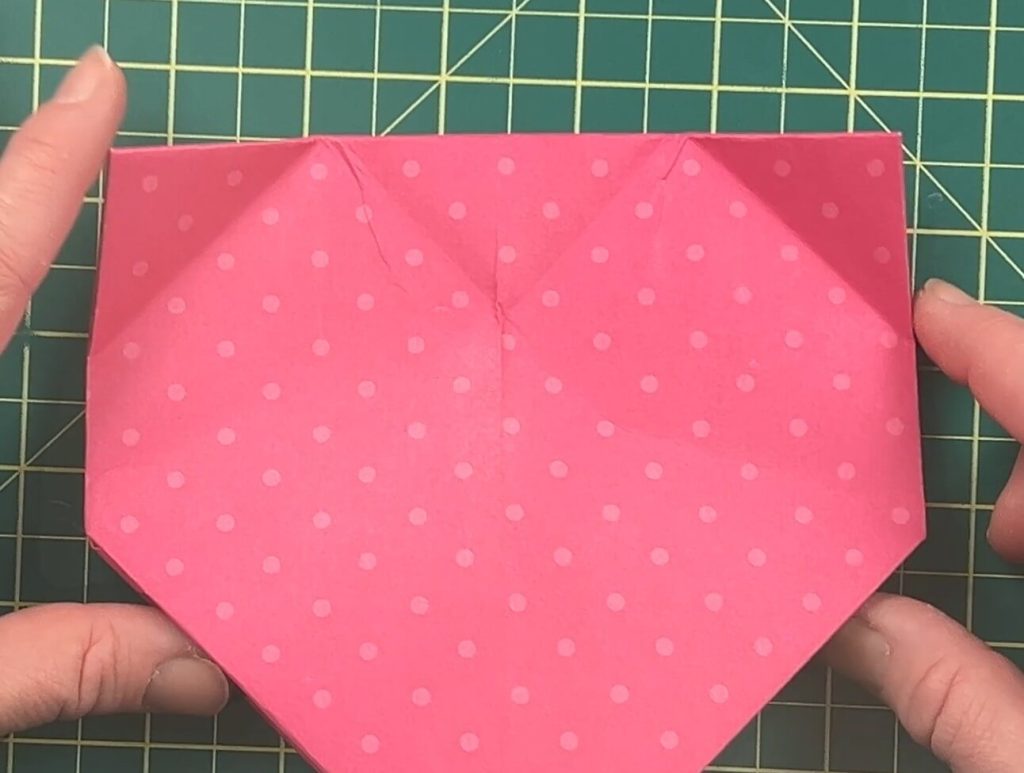
Step 10: Inward Folds for the Top of the heart
Now that we have created all our folds, it is time to start adjusting them in the correct direction so that this project looks like a heart.
Working from the sides, flip the paper over so that your original folds and crease lines are pointing upwards, and fold in the outer fold. And repeat on the other side.
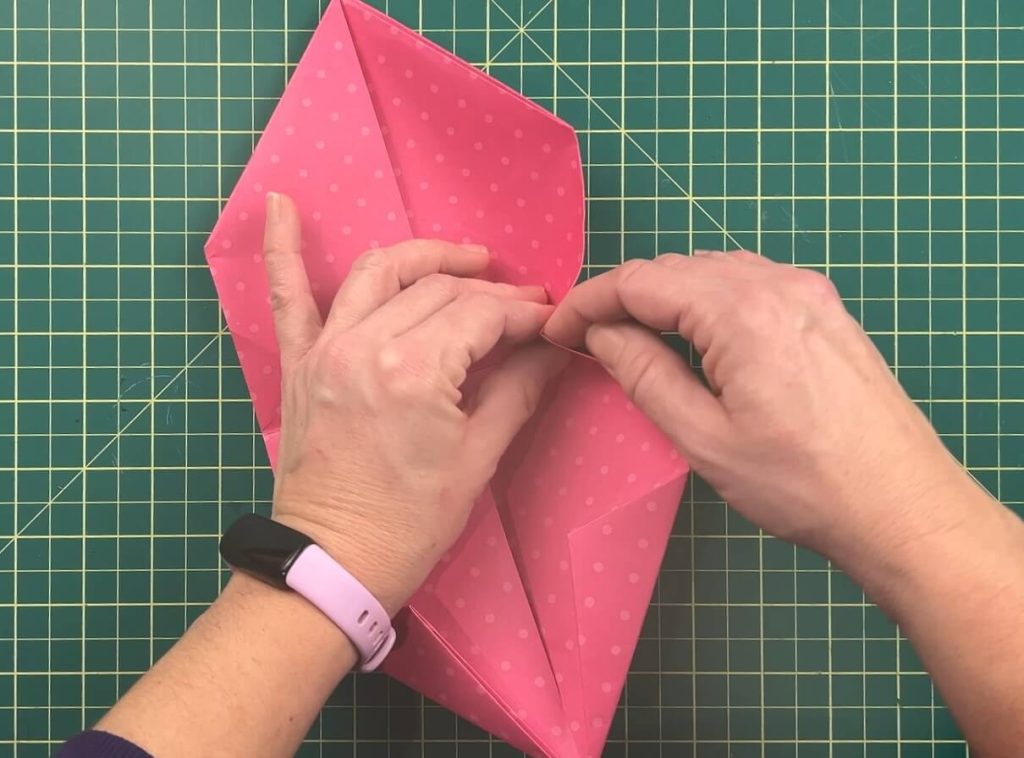
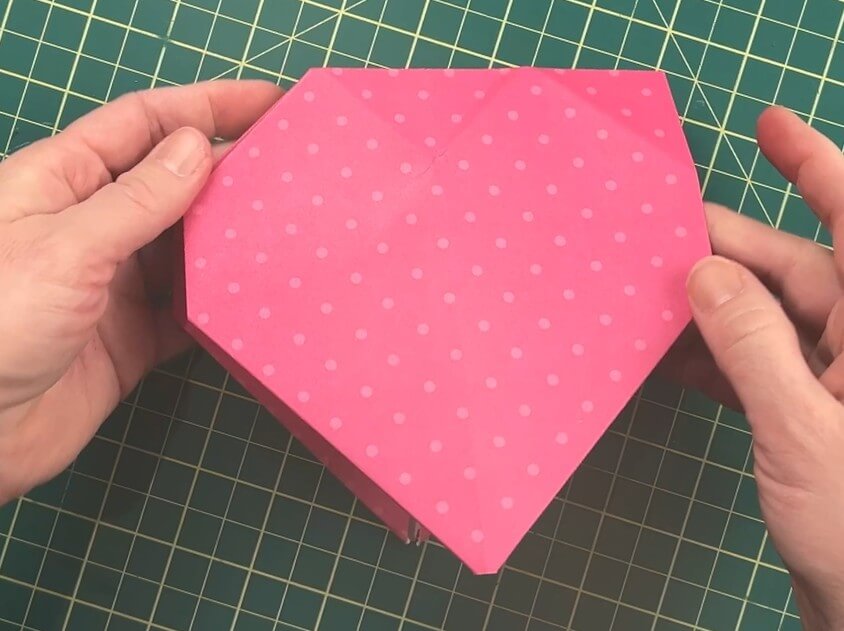
Next, we need to work with the inner folds for the bump of the heart. They are a bit tricky, and we want to massage them so that they fold down into the body of the heart. As we already have fold lines here, this helps to make this a bit easier. Make sure you work on all 4 fold lines in this area.
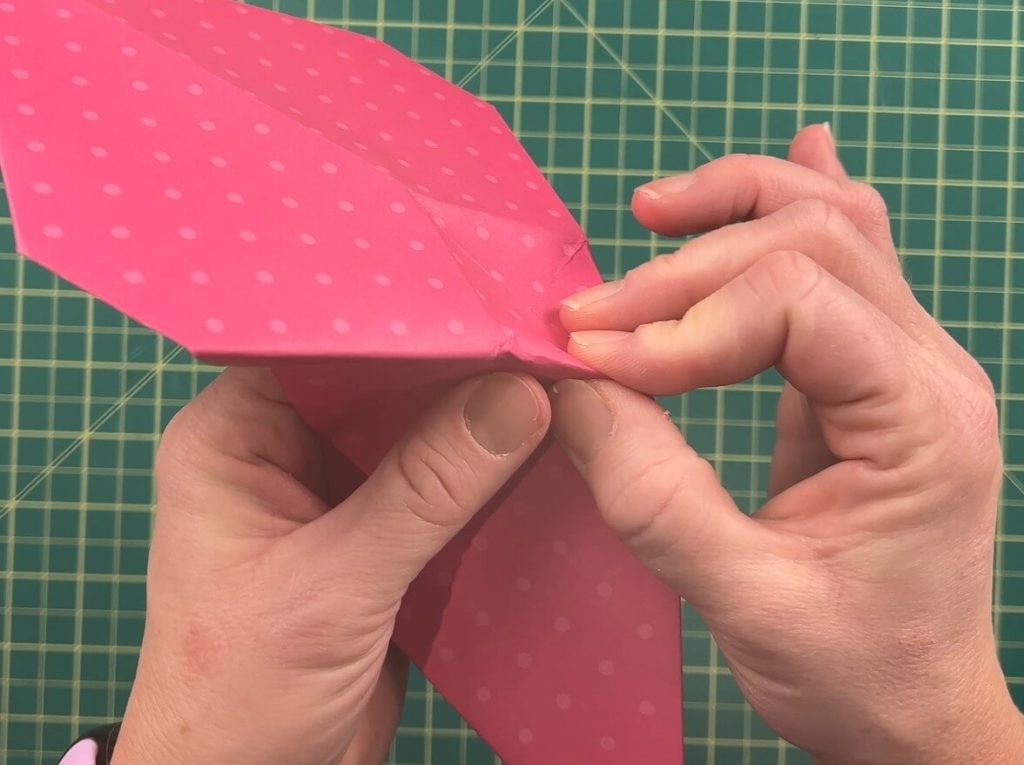
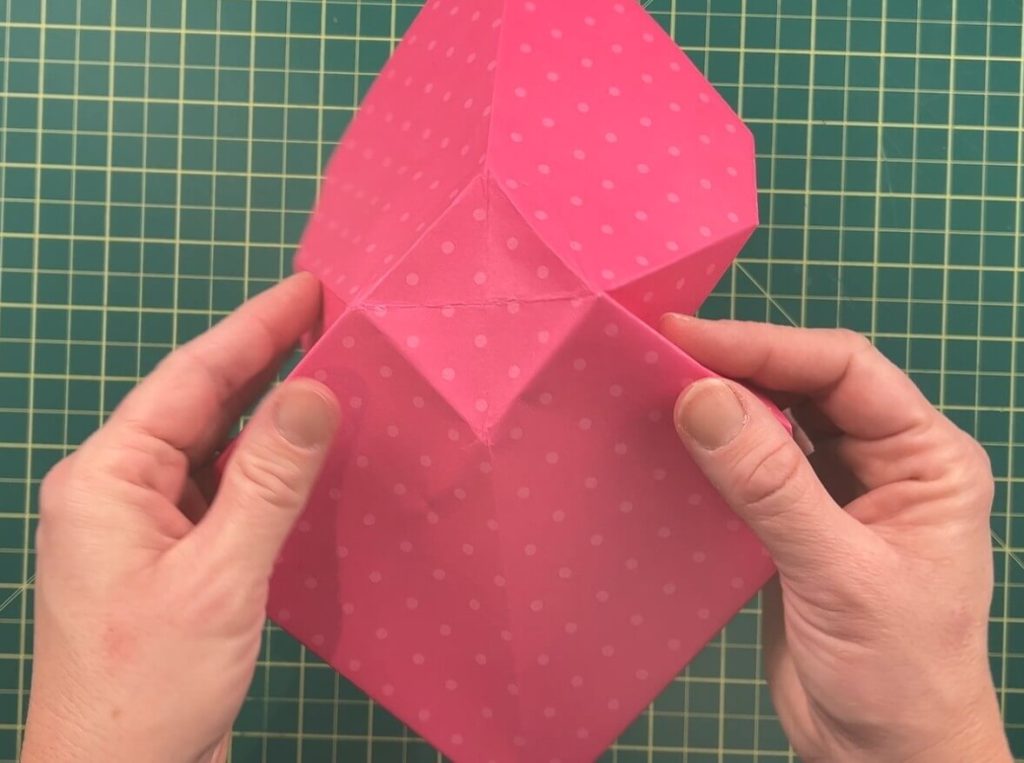
Once we have pulled the side folds into the heart and massaged the middle folds, our heart should be taking shape, and it should look like this image here.
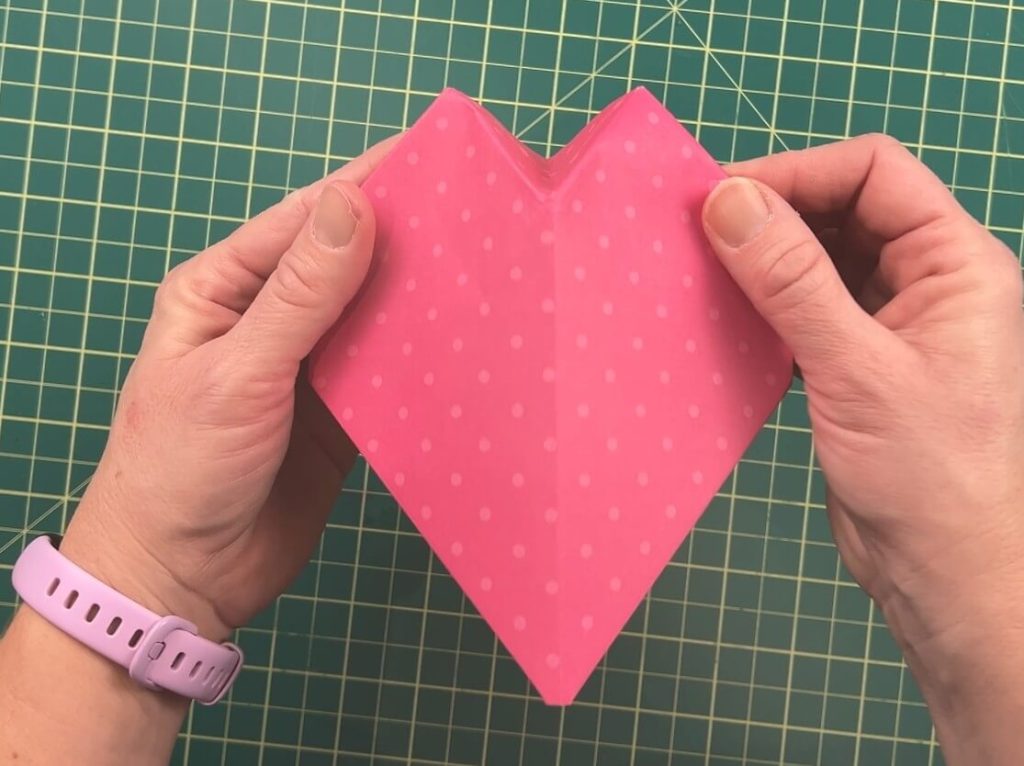
Step 11: Closing the Heart
Now for the final steps. Closing the heart. This is simple. We take the bottom tabs of one half of the heart, and we insert them into the other half of the heart.
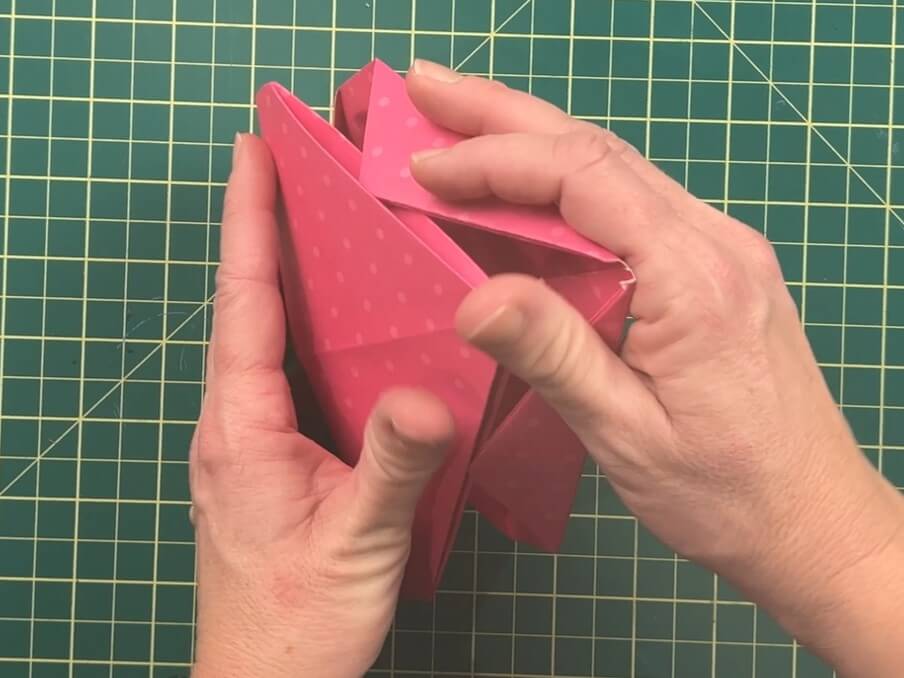
If you’re using glue (like me), there are two spots to add glue.
Add glue to both of the inner humps of the heart. Then hold the glue bits shut for a moment to allow the glue to dry.
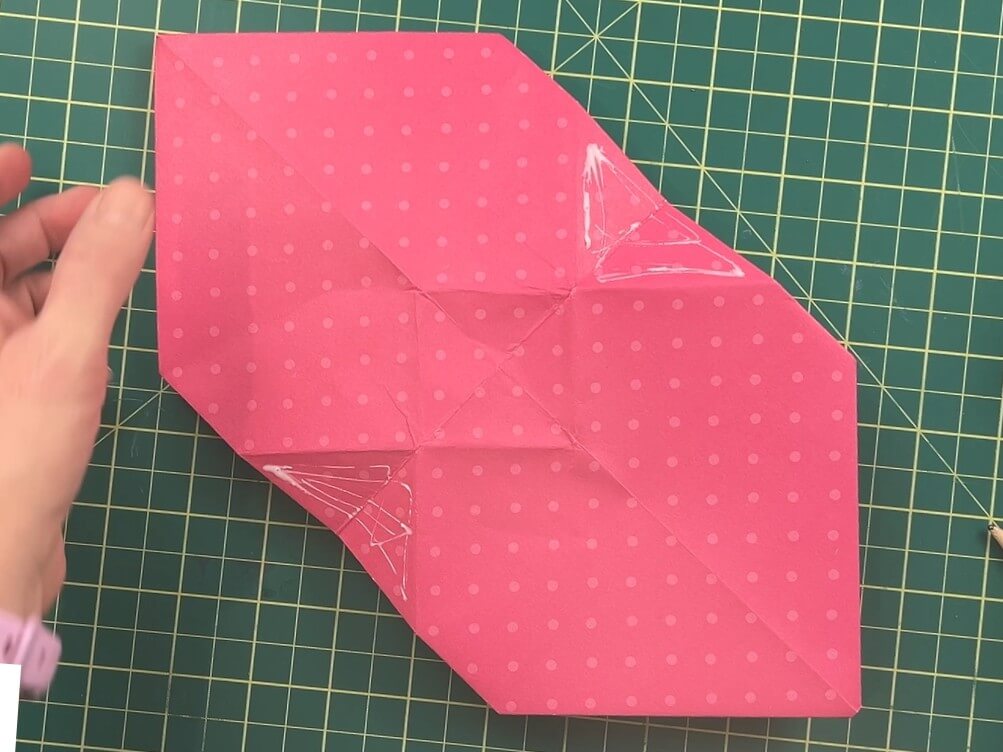
Then, we add glue to the tabs/slots at the bottom so they hold in place there as well. And then tuck the tabs into the slots.
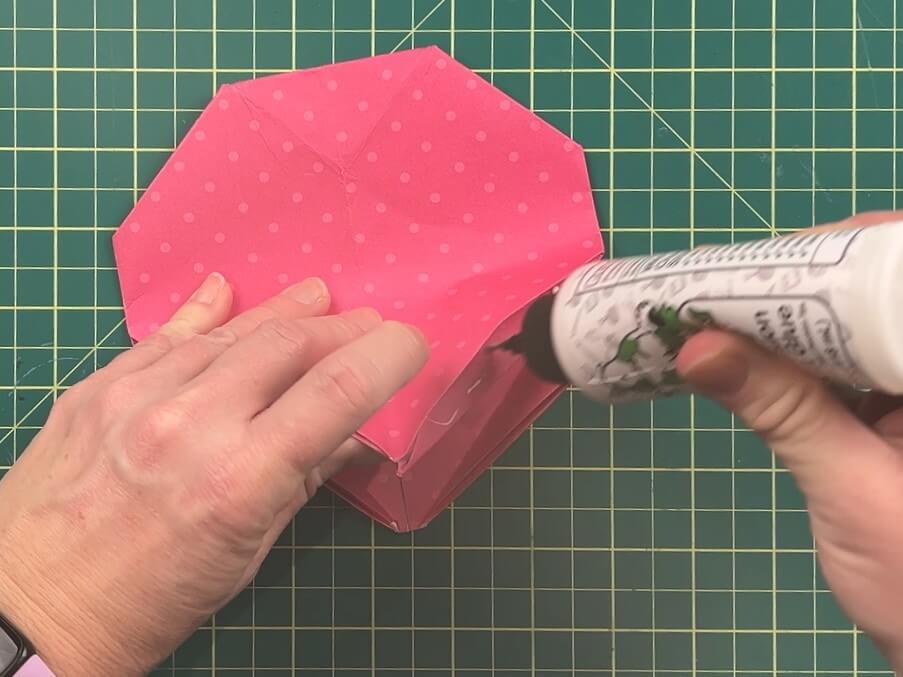
Your heart doesn’t need to be perfect — handmade crafts are meant to look handmade.
👉 Did you use glue, or did your folds hold on their own? Tell me below!
Step 10: Finish and Open the Heart
Once everything is secured, you will have a 3D paper heart. If you have any spots that are a bit bent or not folding correctly, you can slide a pencil or knitting needle into the side hole to pop the paper into place.
And there you have it! Your origami heart is complete 🎉
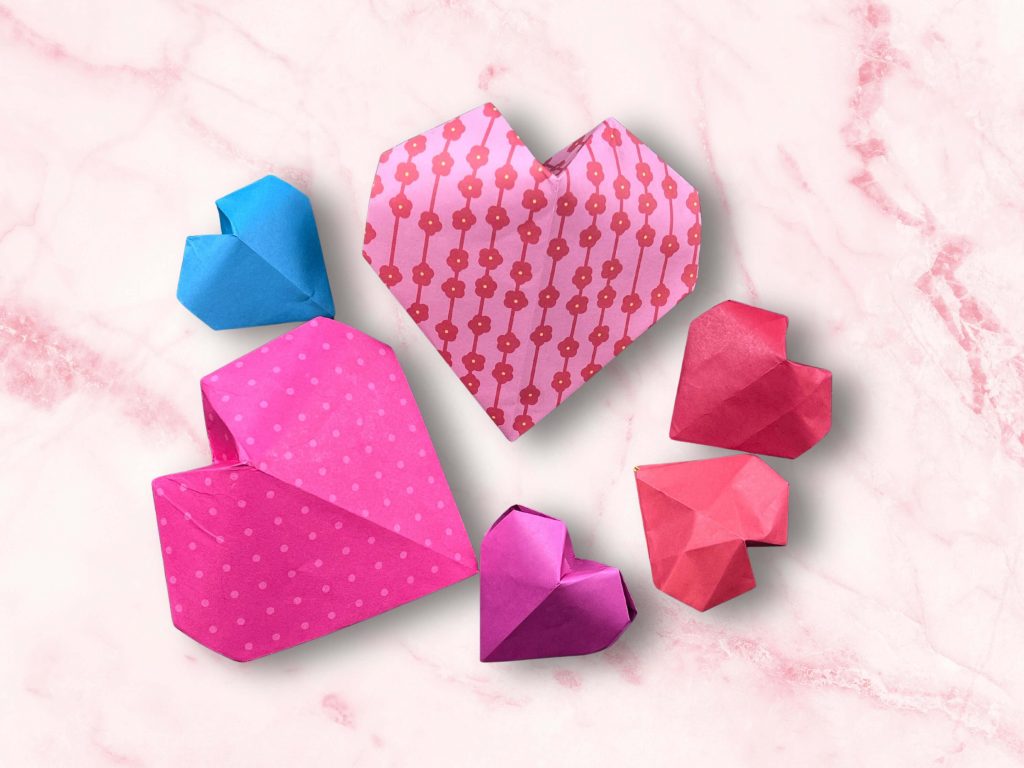
Things I learned while making these Easy Origami Hearts:
No project is complete without some final thoughts and lessons learned.
- Folding cardstock paper is harder than working with origami paper, but I like the look of the larger hearts. 12″x12″ cardstock will produce an almost 6″ heart, but 6″x6″ origami paper will make a smaller heart, about 3″ in size. I prefer the larger hearts, regardless of harder folding.
- You do not need to use glue. These hearts will stay shut without it, but things like to move around my house, so glue makes sure the hearts stay shut.
- These hearts are cute and easy to make, and I will definitely be making more!
- I’m not 100% sure what I will do with all these hearts! They may end up as embellishments on gifts, or maybe I’ll make them into a heart garland, or maybe a heart mobile? We’ll have to wait and see!
Did you enjoy making these cute origami hearts with me?
If you tried this tutorial, I’d love to hear how it went.
Leave a comment below and tell me:
- What paper did you use?
- What size heart did you make?
- And whether glue saved the day 😄
If you want to make other paper crafts, check them out here.
If you want to focus on Valentine’s Day crafts, you can read about those here.
🎥 I also made a video about these cute origami hearts. You can watch the YouTube Video Here.
Happy crafting ❤️✂️


8th step 3rd picture is really hard to understand
Hi! In this step, you are folding the at the tip of the fold you just made, towards the center of the heart. It is a bit hard to see as it is a tricky fold. I also have a video for this heart, that you can watch here, perhaps it is better visible/explained there. https://youtu.be/Z1pYl1gCWdo