I have to be honest with you, I have been putting off finishing the craft for a while. I am not sure why but for such a simple craft, it has taken much longer to get done…. But it is done! We can now have a ladies’ night doing a Sublimation Sip and Paint!
If you need help getting started with sublimation, you can check out how I converted a regular Epson ET2850 printer into a sublimation printer. This is the less expensive way to start your sublimation journey.
As an Amazon Associate, I earn from qualifying purchases. This post contains affiliate links. I may receive a commission if you purchase an item from one of my links. This will not change the price you pay.
What do you need for sublimation Sip and Paint Project?
The supplies for this craft are a bit more specialized than my previous crafts, so we have a whole list of items needed:
- Sublimation printer – You can convert a new printer into a sublimation printer, as I have done here, or buy a sublimation printer.
- Sublimation paper – I use this product that works well.
- Heat Press – this is for applying the sublimated design onto the canvas. I do not recommend using an iron.
- Rigid Canvas Board – We are using rigid canvas boards for this craft. We are not using stretched canvas that has a wooden frame in it. You can buy rigid canvas here, or you can pick up some cheap ones at your local dollar store.
- Butcher Paper/Craft Paper – This is needed to help the moisture come out of the sublimated substrate (aka paper)
- Teflon Sheet – this is to protect your heat press pads from the glue in the rigid canvas.
- Heat Tape – This is to hold your picture in place.
- A picture/image you want to sublimate for sip and paint.
- Heat-rated gloves for high temperatures. The canvas is HOT when you remove it.
- 30 to 40 minutes for your first time, but less as you get better.
Let’s get started making our Sip and Paint
Let’s find a Image for Sublimation Sip and Paint
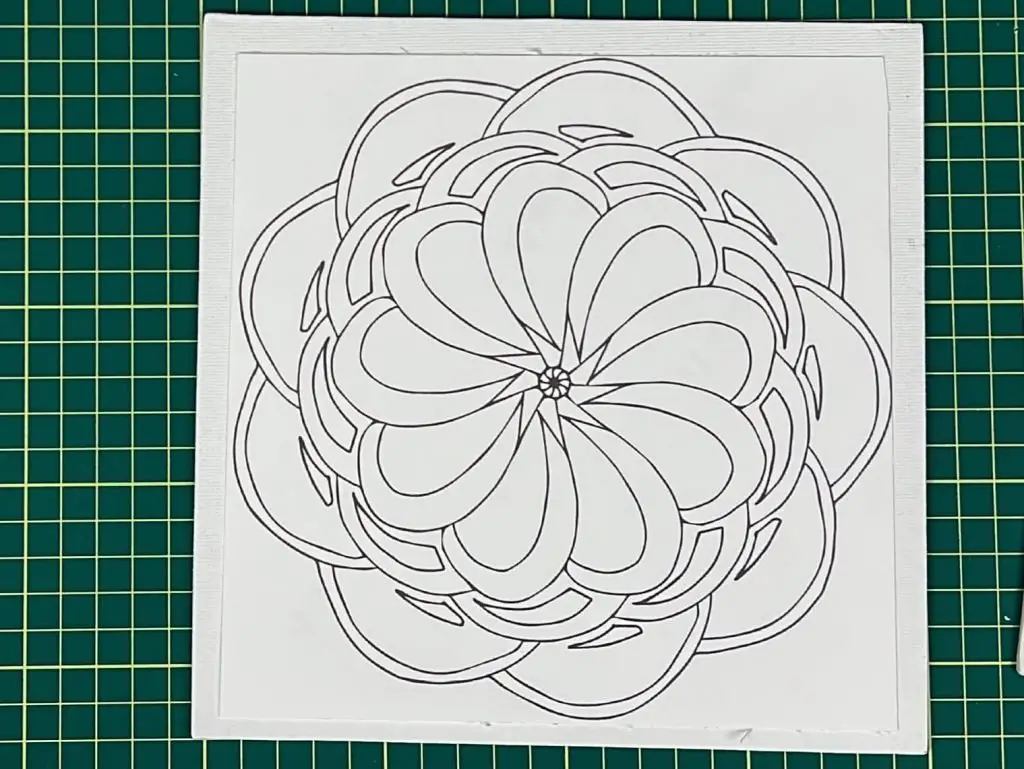
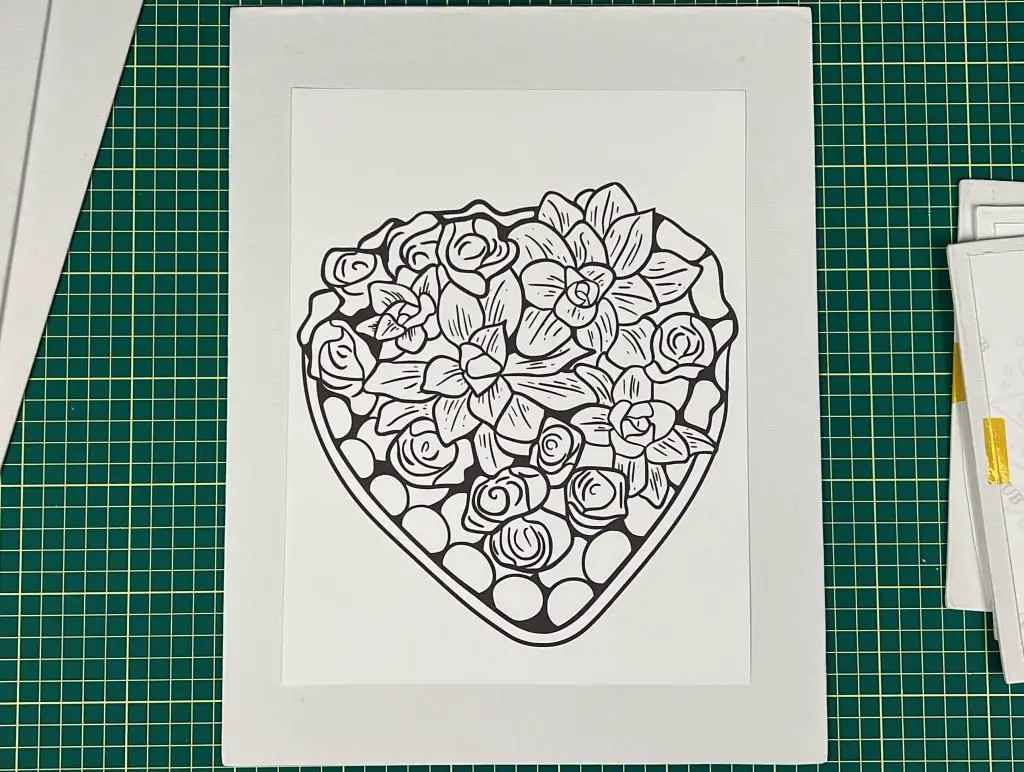
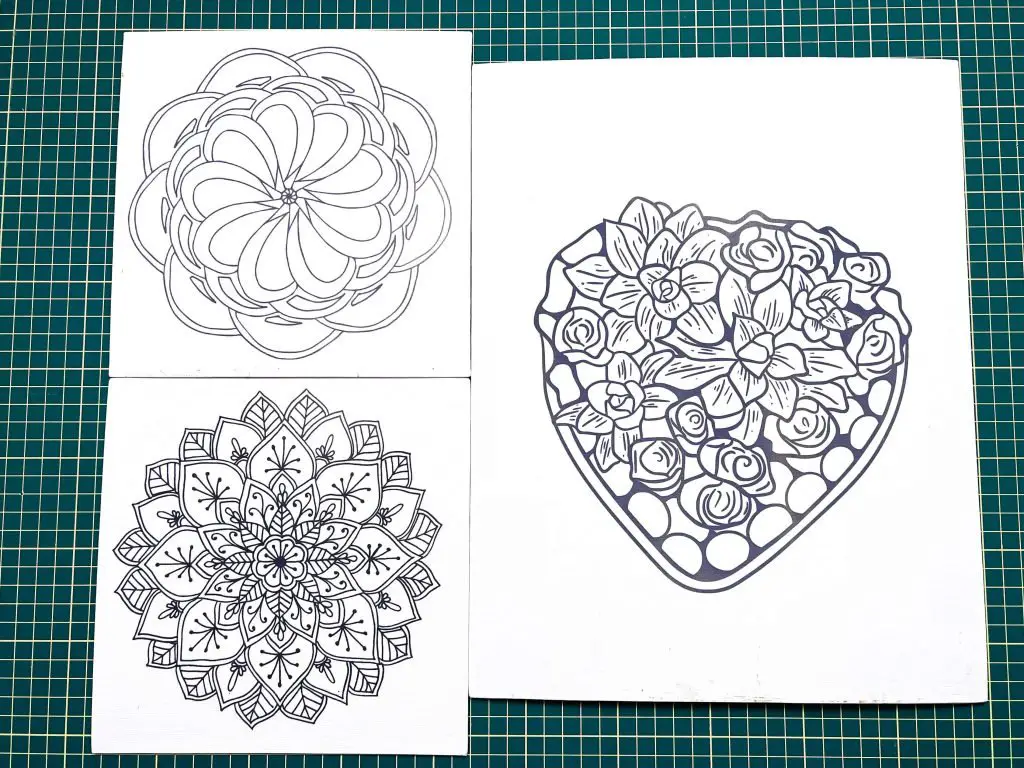
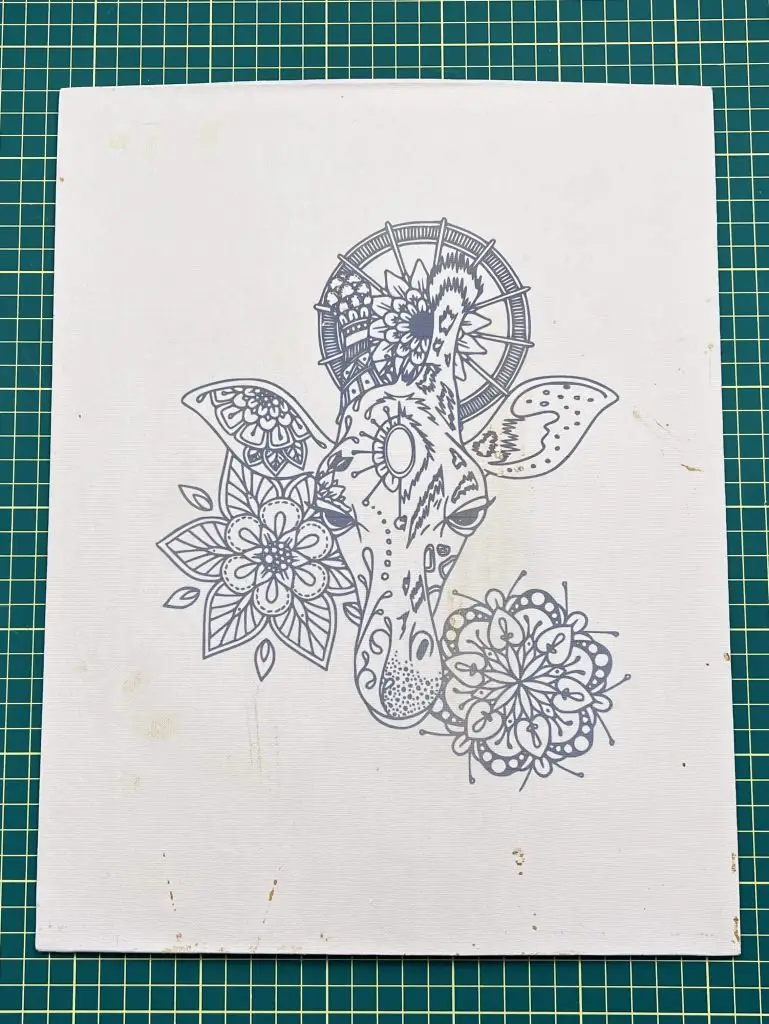
The first thing you need to do when starting a sublimation sip and paint project, is you need to pick out some images that you want to use for your canvas. There are lots of options where you can get free designs, or you can purchase them. It all depends on what design you have in mind.
In this project, I use free images, so I have listed a few sites that I have used.
You can also go to google, type in a design idea you want, and look under images. For example – Free Flower Silhouette.
Something to keep in mind when looking for images for sublimation sip and paint designs – you want the image to be a silhouette, a design that is outlined in only black. The whole concept of the sublimation sip and paint is that you are painting an existing image, and the lines are only there to guide you.
Sizing your Sip and Paint Image
Once you have selected the images you want, you need to size them to fit on your printer and your canvas.
So, let’s jump over to our canvas for a moment. You should have picked up some rigid canvas by now, but if not, here are some things to keep in mind when buying canvas:
- You want the whole canvas to fit into your heat press – it is ideal to only press the image once. So if your heat press is 15″x15″ your canvas can be any size smaller than that. Likewise, if your heat press is 9″ x 9″, you want your canvas to be smaller than that.
- Painting can take a long time, so the larger the canvas, the more time is required to paint. So for less experienced painters, smaller canvases with less complicated images might work better.
- Your printer (and printer paper) will also be a factor. I am using 8.5″ x 11″ paper. So, even if I stretch the image to the edges of that paper, that is as large as the image will be. You can feed longer paper into some printers, or even break the design up into 2 pages, but that will require more work, and for now, we are trying to keep things simple.
For this project, I used 2 different canvases, I used an 8″ x 8″ canvas, and a 11″ x 14″. With the smaller canvas, the images go to the edges of the board, but with the larger canvas, I was planning to leave white space around the image to paint.
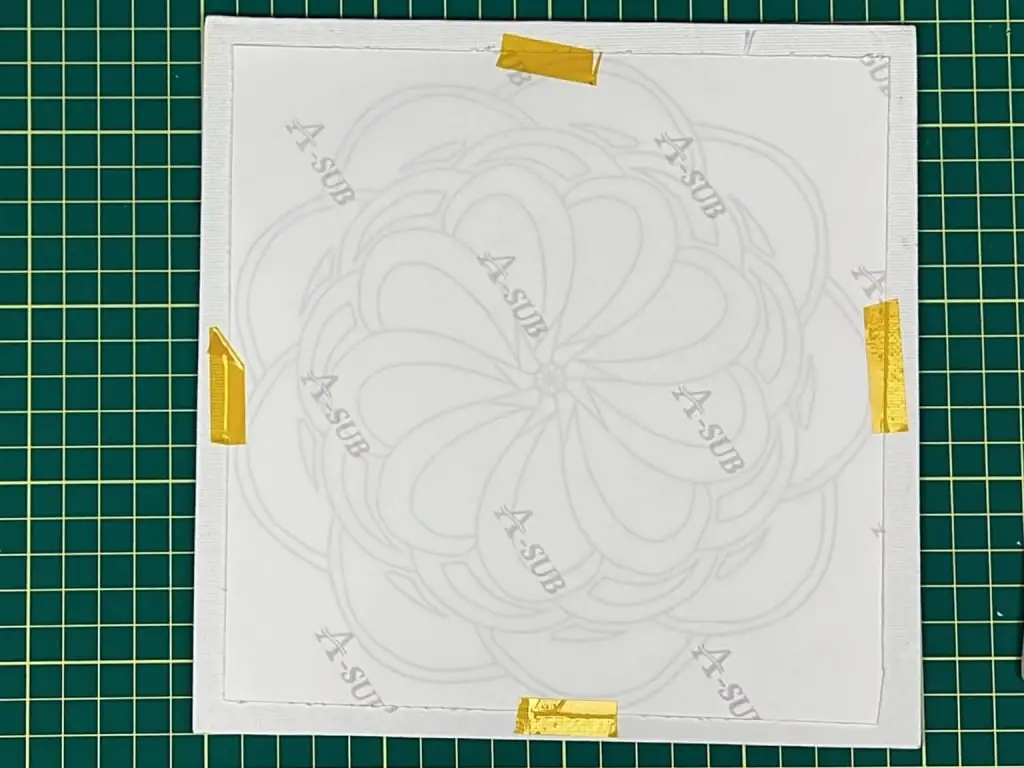
One final note before you print – if your image has words on it, you need to MIRROR the picture in your print settings. This will allow the words to come onto the canvas the correct way.
Make sure you have sublimation paper in the printer and that it is inserted correctly. I did a test run with regular white paper to see which way the prints come out. You want the print on the side of the paper with no words -typically sublimation paper has words or a decal on the back of it.
Once your image is sized base on your canvas, you can print it out.
You will notice that when the image has been printed, it will look very dull. This is normal. The substrate absorbs the ink and is released when heated.
You can trim off any excess paper from around the image at this time also. Any print imperfections will sublime onto the canvas, so double-check for any stray lines or dots on your print.
How to Prepare your Canvas for sublimation Sip and Paint
The nice thing about using sublimation for sip and paint is there is no canvas prep work required. You get to put the printed design right onto the canvas!
Sublimate your Image on to the canvas
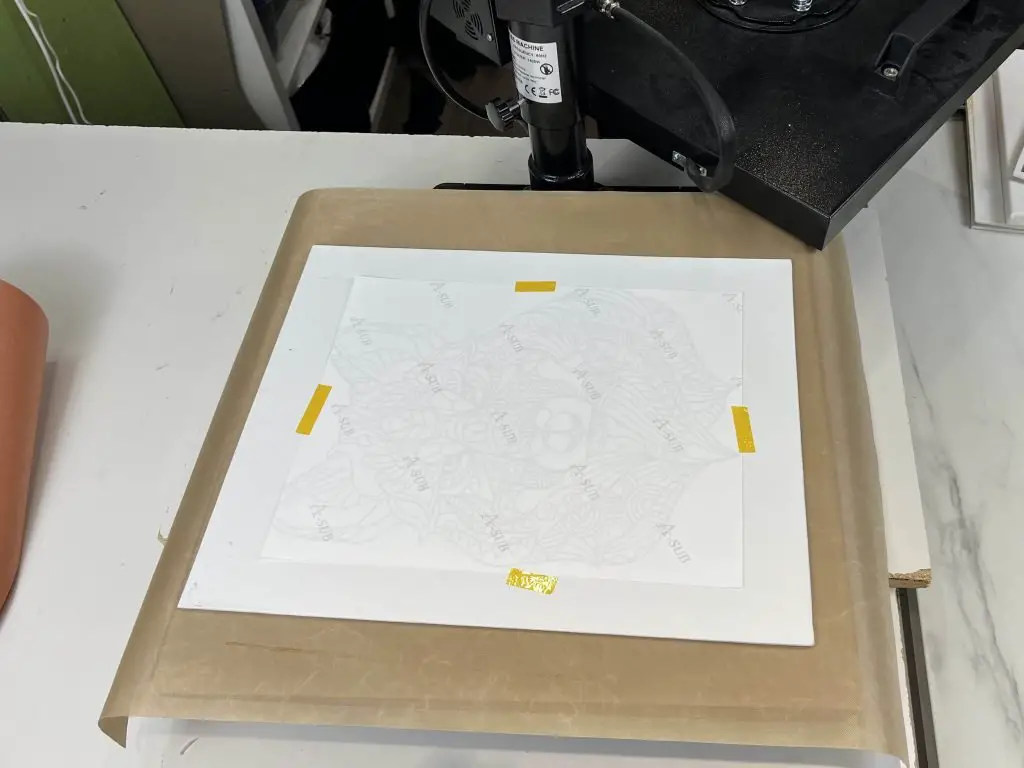
Place your image onto the canvas. You want the image to be facing the canvas, not facing up at you. Use some heat tape to tape the image onto the canvas. You do not want the image moving around in the last seconds before you press it.
Turn on your heat press and set the temperature to 365-380F. This temperature will work for sublimation. If your temperature is too high, the glue on the canvas will melt, and your canvas can warp. It may take some trial and error on the first few sublimations to see what the perfect temperature for your heat press is.
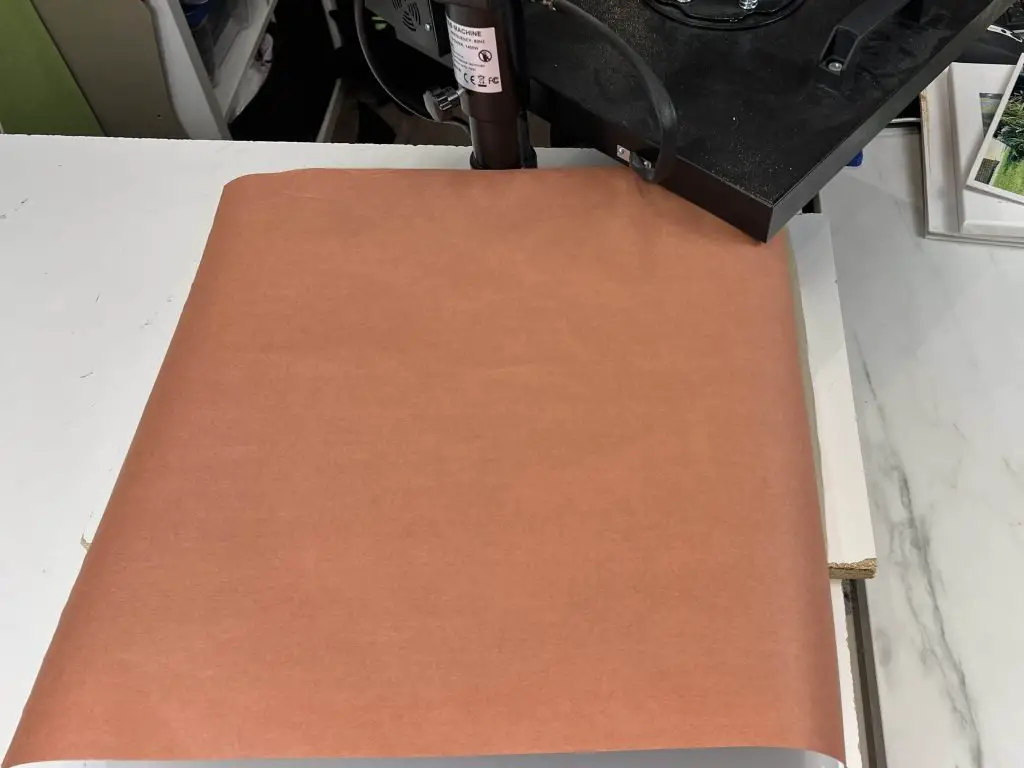
Once you are happy with the location of the image, put it onto your heat press and cover the canvas and image with butcher paper. You need the butcher paper to absorb the moisture from the sublimation substrate.
Hold the heat on the canvas for about 15-30 seconds. Again, for the first time you are doing this, it will require some patience so you can figure out how long you need to keep it hot with your heat press and substrate.
Take the canvas off the heat press and inspect the print. REMEMBER THE CANVAS IS HOT! Inspect the image by lifting a corner of the substrate and seeing if the color has transferred. Do not allow all of the tape to be removed, as you will lose your spot on the canvas if you need to reheat. If you are unhappy with the color quality, you can put it under the heat press for an additional 15 seconds.
Remember, this is for a sip and paint party, so the black does not need to be very vibrant as you will be painting this whole canvas.
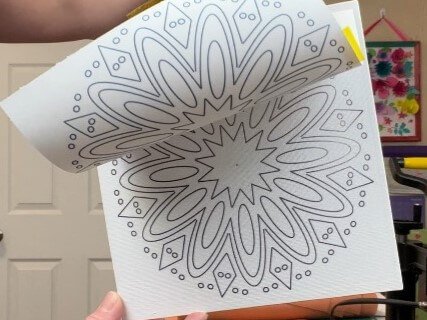
Once you are happy with the color, remove the substrate and tape, and your sublimation is done!
And that’s it! Your sublimation Sublimation Sip and Paint is Done!
Frequently Asked Questions about Sublimation:
What program do you I used to edit photos for sublimation:
I use a variety of different programs to edit my pictures. I have used MS Word, MS Publisher, Paint, Snapseed, iPad Photo, and others. Whatever photo editing program you are comfortable using will work.
Why does my Image look dull when I print it?
You will notice that when the image has been printed, it will look very dull. This is normal. The substrate absorbs the ink and when heated it releases the color very vibrantly.
Can I use sublimation paper that is bigger than 8.5″ x 11″?
Yes, you can. So long as your printer can support larger paper and so long as you have larger sublimation paper than 8.5″ x 11″.
Can I sublimate larger images than 8.5″ x 11″ if that is the largest I can print?
If you have a printer that only supports 8.5″ x 11″ paper, you can still make larger photos, you will need to cut the photo into pieces and sublimate the prints together on the canvas.
What Material Do you need to sublimate on?
You can sublimate on a variety of other fabrics and materials, such as:
- 100% polyester or blends of polyester up to 50% polyester. Below that will produce less than stellar results.
- nylon,
- spandex
- lycra
- laminate
You cannot sublimate onto 100% cotton directly. There are ways around this, and I go into them in other crafts, but for now, we are going to say no.
Why do I see smoke coming out of my heat press when sublimating? Is it normal to see smoke coming out of my heat press when sublimating?
You may see what looks like smoke coming out of your heat press when you are sublimating. This is not smoke but steam. The ink is being heated, and the moisture from the ink is steaming out of the paper.
But you need to keep an eye on this because if you are doing a large sublimation, there will be a lot of steam, and it can set off your smoke alarms.
Can you reuse butcher paper when sublimating? Can you reuse craft paper when sublimating?
I do not recommend reusing butcher paper for more than one sublimation. The reason you use butcher paper is to absorb moisture. So if you use it once to absorb the moisture, during the next press the butcher paper will have less capacity to absorb and may ruin your project.
Also, if you reheat butch paper too many times, it can start to stick to your canvas.
What happens if the butcher paper sticks to my canvas?
If you have reheated your butcher paper too many times, it can start to stick to your canvas. This is not a huge deal and there are a few solutions.
- Just leave it as it is. You are going to paint these images, so you will paint over any imperfections in the canvas, as well as the residue butcher paper.
- You can use a Q-tip or cotton swap with rubbing alcohol and rub the stain off. This requires some elbow grease as the rigid canvas is not smooth, so you will need to rub a bit to get into the divots of the canvas.
Why does my canvas have brown marks?
There are a few reasons why your canvas might be turning brown when sublimation.
- Your butcher paper is sticking to your canvas. This is because you have heated the paper too many times, or you have heated it too long and it is starting to melt onto your canvas.
- You might see brown marks at the tape adhesion point. If so, you are using a tape that is not rated for your heat setting, and it will melt and leave a mark.
- You touched the sublimation paper/substrate or the canvas with greasy/dirty hands. Oils from your hands will leave marks on the paper and canvas and when heated they will also heat up and leave marks on the canvas.
- You are using an inexpensive canvas that was dirty when you bought it. That dirt is melting onto the canvas when you heat it.
What Happens if my canvas warps? Can I straighten my canvas if it warps in the heat?
If you have heated your canvas for too long, or it is of less quality, your canvas might warp. That’s ok. It happens to the best of us. While the canvas is still warm (or even hot), place it under a heavy flat object. Big books work great for this. Let the canvas cool under this weight, and it will come out straight when you need it.
Can you reuse sublimation substrate? Can you use a sublimation image for more than one canvas?
Yes, you can! If you are going to use the same image for multiple sip and paint canvases, you can use the same piece of sublimation substrate (ie: the paper you printed your image on). I have sublimated the same image 3 times, but you could be able to do it more times. The nice thing about the sip and paint sublimation projects is that you are only using the lines as guides for painting, so the black doesn’t need to be very vibrant on any of the images.
Did you Like this sublimation sip and paint Tutorial?
Did you like this sublimation sip and paint tutorial?? Let me know in the comments below! Let me know if you tried it and how it went!’
If you liked this sublimation project, check out my other sublimation projects below: