I’m in the mood for spring flowers, and colorful crafts. I started making this card when it was still snowing outside… mind you, it was a long winter this year. But I needed something fun and bright to cheer me up, so I decided to make this Spring Has Sprung Card. Yay! Flowers and Spring!
As an Amazon Associate, I earn from qualifying purchases. This post contains affiliate links. I may receive a commission if you purchase an item from one of my links. This will not change the price you pay.
Supplies Needed to make the Spring Has Sprung Card
Cards are fun to make but can require many supplies. This one needs a hodge-podge of new and scrap supplies. So, let’s look at what we need to make this project awesome:
- Spring Has Sprung Card Design – I have designed a file for the card that you can get here. But the concepts are simple and easy to recreate if you have time.
- Cardstock – You will need several sheets of cardstock in several colors. This is what I used:
- 8.5″ x 11″ light purple cardstock
- 8.5″ x 11″ green cardstock – only 1/2 of a sheet is required
- 8.5″ x 11″ light blue cardstock – only 1/2 of a sheet is required
- 8.5″ x 11″ dark blue cardstock – only 1/2 of a sheet is required
- 8.5″ x 11″ dark purple cardstock – only 1/2 of a sheet is required
- 8.5″ x 11″ pink cardstock – only 1/2 of a sheet is required
- 8.5″ x 11″ orange cardstock – only 1/2 of a sheet is required
- 8.5″ x 11″ yellow cardstock – only 1/2 of a sheet is required
- Cricut Pens – I have a mixture of Cricut Pens and off-brand pens. If you want to learn about using non-Cricut pens, you can read this article here.
- Black Pen
- Green Pen
- Crafting Glue – I use my Bearly Art Craft Glue, but any craft glue will work.
- Optional supplies
- Permanent Black Vinyl and Transfer Paper – This is what you need if adding the sentiment in vinyl instead of with a pen.
- Double-Sided Foam Tape – If you want to add more volume to your card, use double-sided foam tape instead of glue.
- Cutting Machine – I used my Cricut Explore Air 2. However, if you are not a Cricut user the file will work on any other cutting machine software.
- Cutting mats – These are needed to cut cardstock on a Cricut Machine.
- Scoring Stylus or Scoring Wheel – If you have an Air Series Cricut Machine you will need a scoring stylus, if you have a Maker Series Machine you will need a scoring wheel.
OK, now that we have all our bits and pieces, it’s time to get this project started!
How to Make the Spring Has Sprung Card
Ok, let’s jump in and start making this cute Spring Has Sprung card!
Using the Spring Has Sprung SVG File
As I mentioned above, I have designed a file that you can use for this. You can get a copy of that file here.
Importing the Spring Has Sprung SVG File
Once you have the file saved to your computer, you will need to perform the following steps:
- Unzip the file –
- Right-click on the file with your mouse and select Unzip
- Select a location where you want the file to be saved.
- Hit Enter and your file will be unzipped and saved.
- Upload the file to Cricut Design Space.
- Select the Upload Icon on the left side of your screen.
- Select the Upload Image button.
- Select the File from the location where the file was saved from above.
- Select the file from your DS Recently Uploaded documents. There should be a green rectangle around it.
- Hit the Add to Canvas button.
Once the Spring has Sprung Card SVG file is on your Design Space Canvas we can make some minor modifications so that the design cuts out perfectly on our Cricut.
Making the required modifications to The Spring has Sprung Card SVG File
Adjusting the File Size
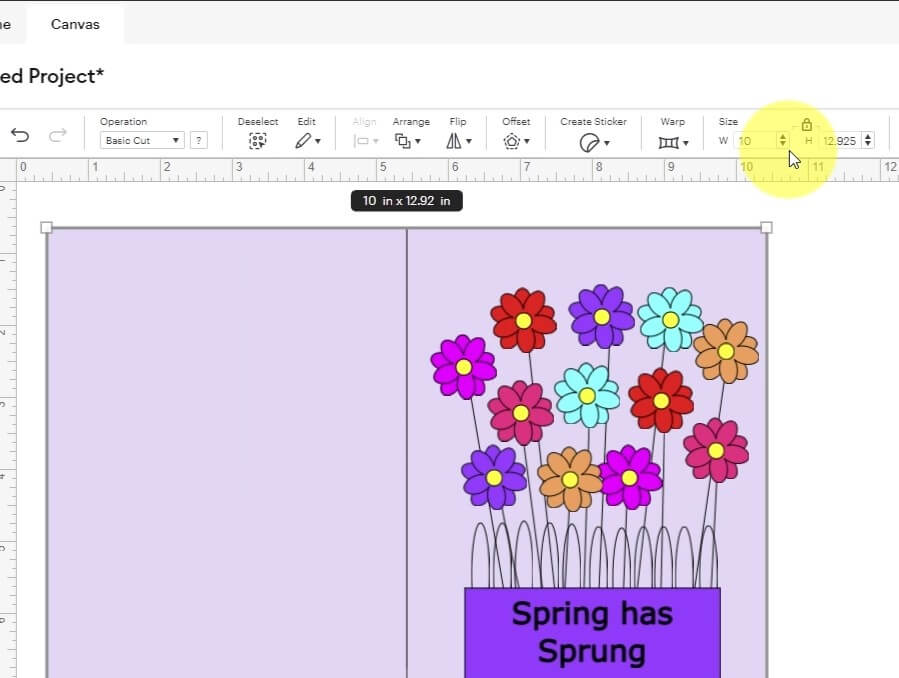
Select the design that has been uploaded onto your Canvas. Before you do anything, we need to verify the size. Typically when I design files, Cricut likes to change the sizes. We want to change the width of the whole design to 10″. This will adjust the design so that it cuts out nicely as a 5″ x 7″ card.
Once the size is adjusted, we can select the Ungroup button. This will allow us to work with individual items.
Modifying the spiral
The spiral needs a quick modification to work well in Cricut Design Space. If you look at the spiral you will notice a line that closes the end of the spiral. Sadly, when this comes into DS, it comes in as two items.
Select the spiral and the line and Attach them together.

Working with the Text in the Spring Has Sprung Card
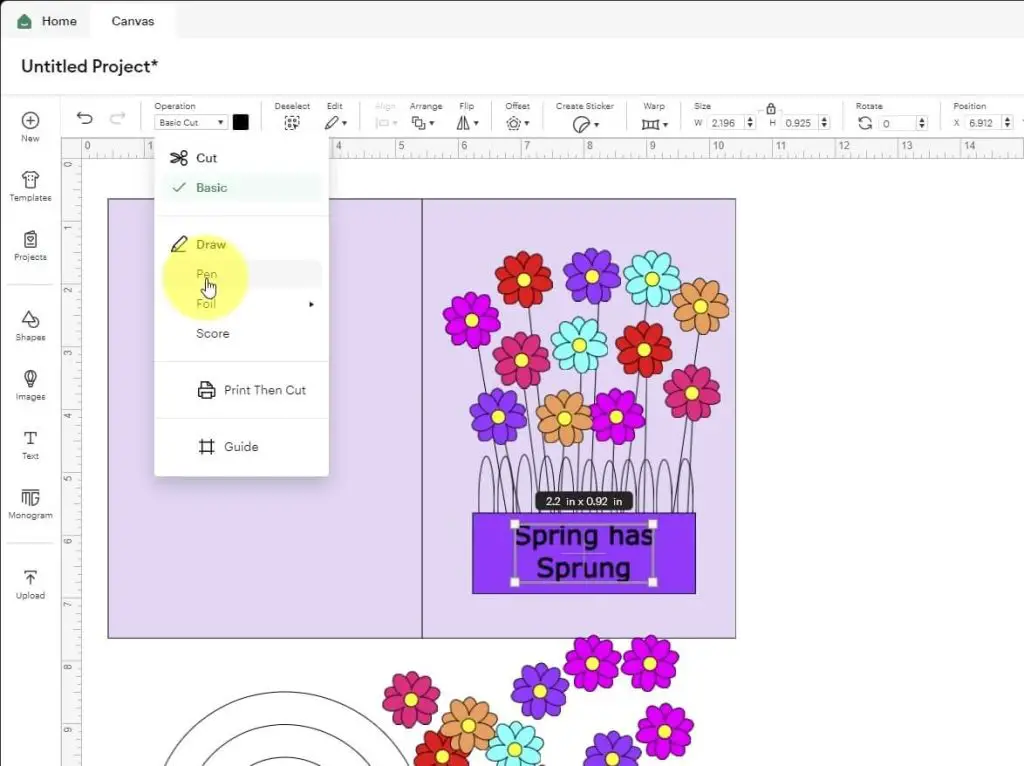
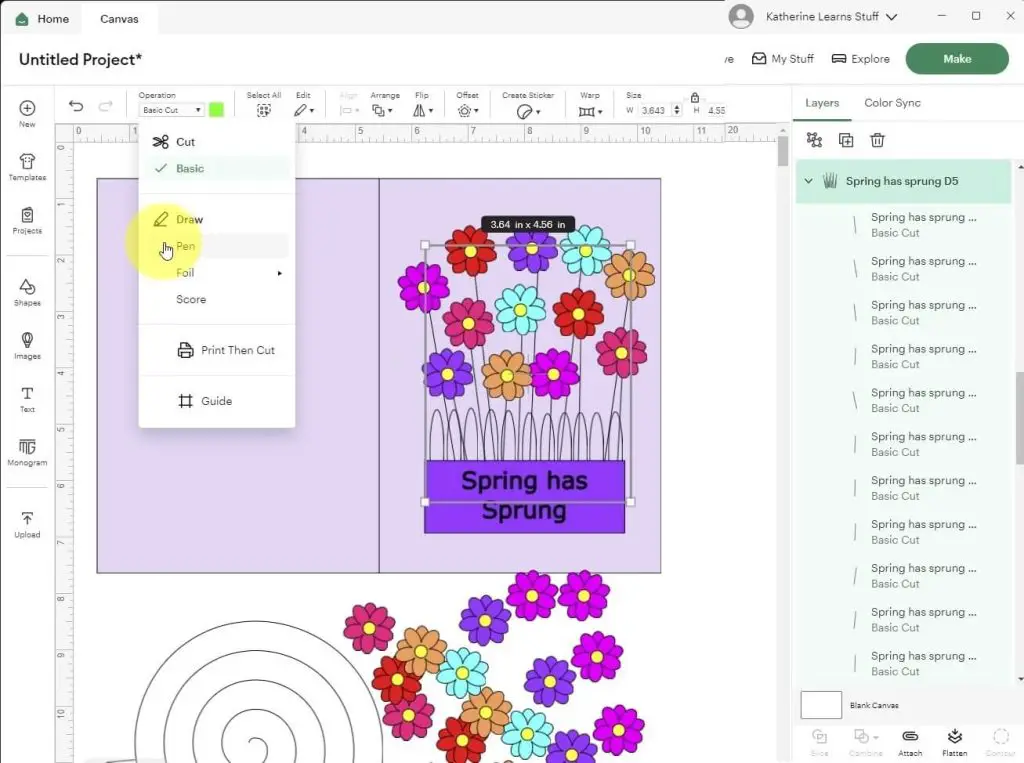
The flower box has the phrase Spring Has Sprung written on it. My initial idea was to have this done in vinyl but then I got lazy and had it written in pen. If you also want it written in pen select the text, change the Operation from Basic Cut to Pen in the Operations Drop-Down Menu, select the flower box and the text and click Attach. Now, the text will be written on the flowerbox instead of being cut out as individual letters.
Changing Flower Stems from Cut Lines to Pen Lines
In the design, there are numerous stems for the flowers. When these lines are imported into Cricut Design Space, they come in as cut lines. We want to select all these lines (12 in total), located on the Layers Panel on our left side. Hold shift and click your mouse to select them all at once. Once you have all 12 lines selected, go to your Operations Drop-Down Menu and change the lines from Basic Cut to Pen.
You can also choose the color you would like them to be. In the case of this card, they will be green.
Finally, you need to select these lines again, then select the card itself and click the Attach buttons so that the lines draw on the card.
If you can’t see the lines on the card, select the card, click the Arrange Menu, and select Move to Back to bring the card behind the lines.
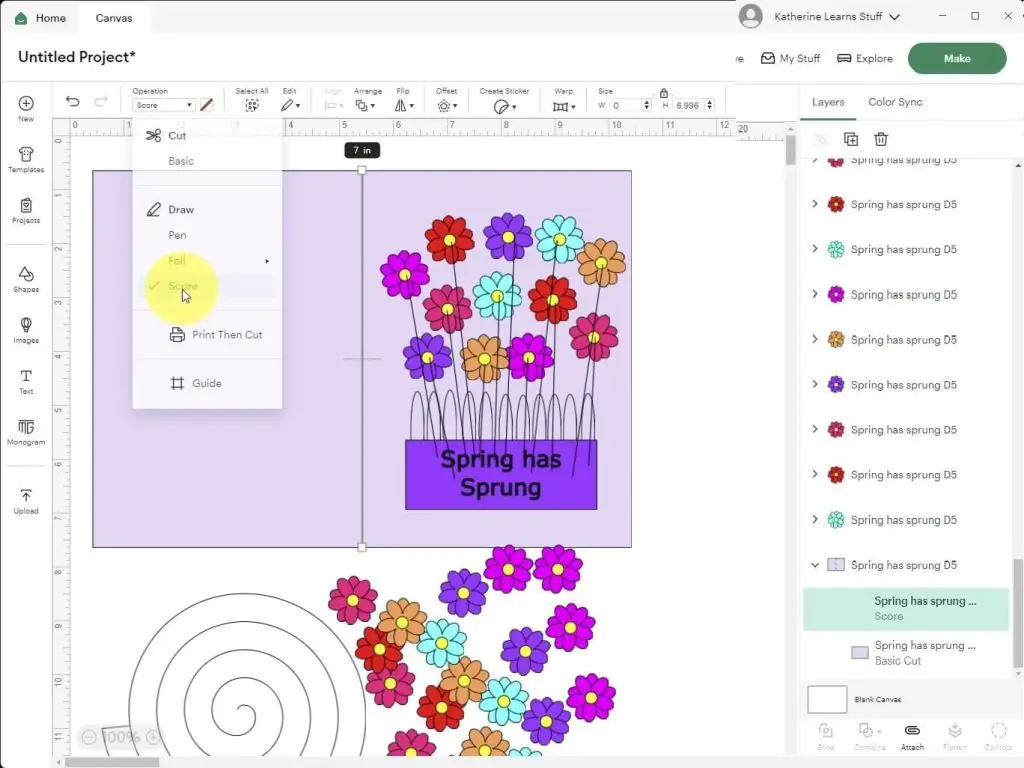
Attaching the Score Lines
The final change that we need to make on this card is to attach the score line to the card. As usual, any line that comes into DS comes in as a cut line. Select the line that goes through the middle of the card, go to the Operations Drop-Down Menu and change the operation from Basic Cut to Score. Finally, grab the score line and the card, and Attach them together.
Now that all our modifications are complete, it is time to send this cute Spring Has Sprung card to Make so it can be cut out!
Assembling the Spring Has Sprung Card
Reviewing the Cut Pieces of this Card
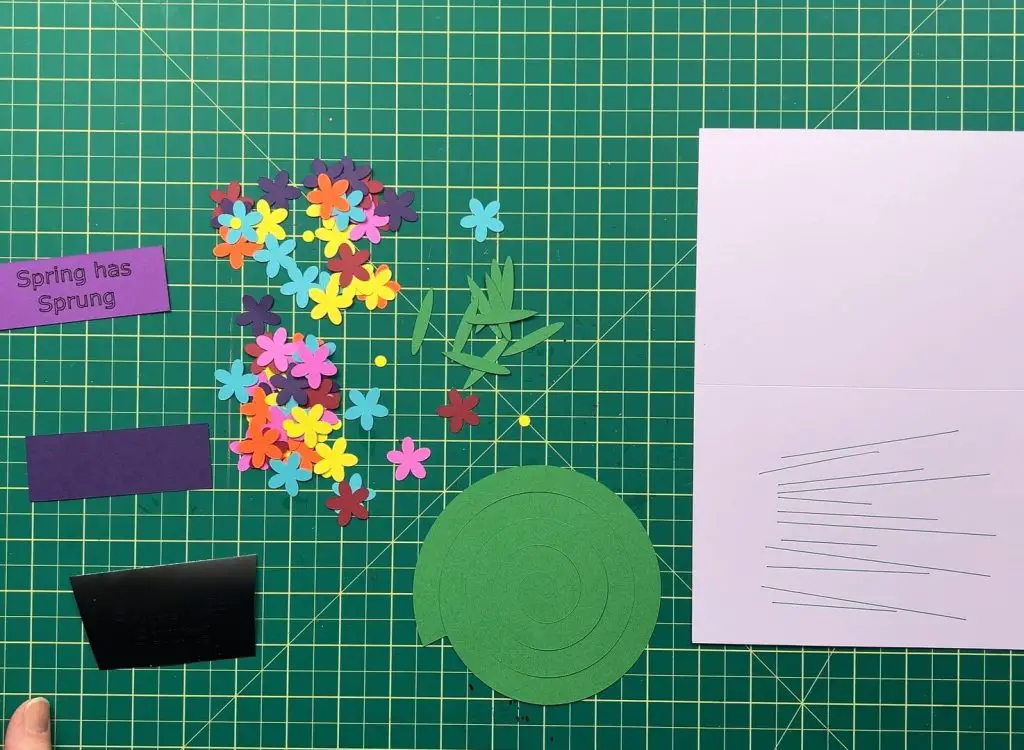
As always, I like to do a quick review of the pieces we should have before we get carried away. This way we can all be on the same page when we move forward.
We should have the following pieces:
- 1 card body with a score line and 12 drawn on flower stems
- 1 green spiral
- a bunch of green leaves
- a whole lot of flowers of different colors and matching yellow centers for the flowers
- Flower box – either with text written on it or a plain rectangle. If it is plain, you should also have text cut out in vinyl.
Ok, now it is time to start putting this card together!
Assembling the Flowers
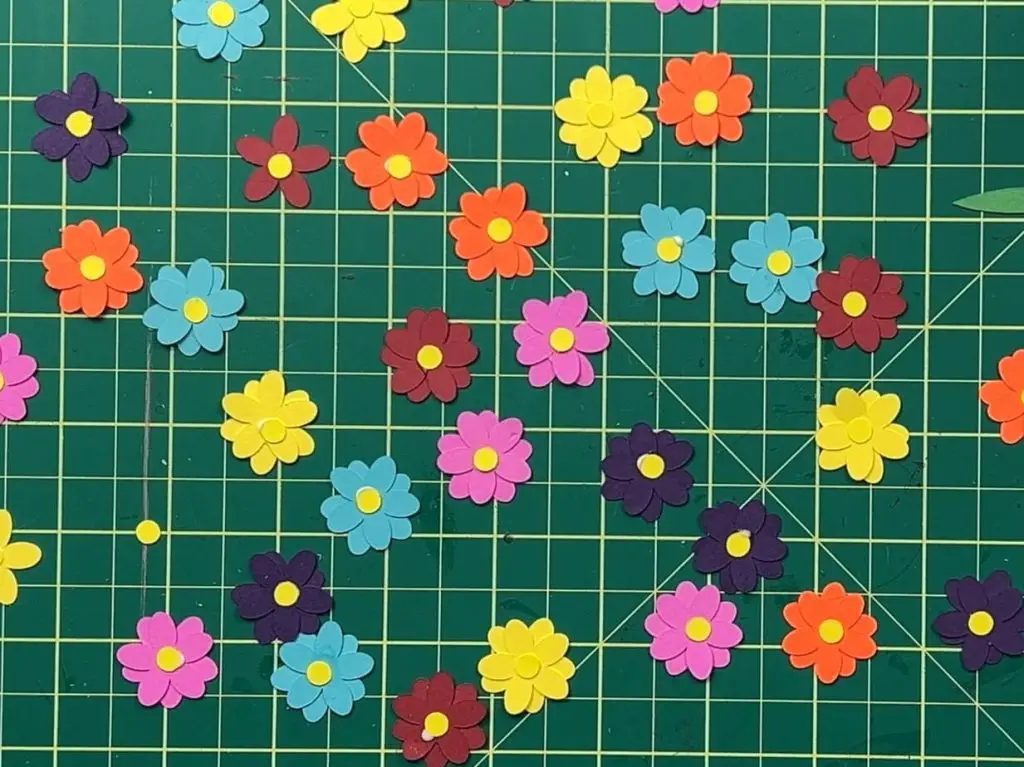
There are a lot of flowers included in this design. There is good reason for that. They have to go outside and inside the card. My idea for the flowers is that each flower has 2 sets of petals and one center. If you do not want to have 2 petal pieces for each flower that works also.
But as I’m using 2 petals. Glue the petals together and then glue the yellow flower center on top. I am keeping the colors consistent, orange with orange etc., but again, you can mix and match if you prefer.
Attaching the Flowers to the front of the card
Once the flowers are glued, it is time to attach them to the front of the card. First, we must fold the card on the score line and then we are ready to begin.
The front of the card has 12 stems. Select 12 flowers and glue them onto the front of the card.
I used 2 of each color, but you can mix and match to your liking.

Making the Flower Box
If you cut out your letters in vinyl for the flower box, weed them and transfer them to the purple flower box.
If you had the letters drawn onto the flower box you can fill in the letters if you like, or leave them open.
Once the text is ready on the flower box, glue on the green leaves. These are glued on the back of the box at the top. You do not have to use all the leaves, but there are enough to cover the whole top of the flower box.
Additionally, you can curl the leaves so they pop a bit more.
These leaves are designed to give the card a bit more personality.

Once the leaves are glued onto the back of the flower box, glue this at the bottom of the flower stems on the front of the card. If you want to add more depth to this card, use double-sided foam tape to attach the flower box to the card instead of glue.

Ok, I’m going to tell you a secret. If you want, you can say “Ta-da, the card is finished!” But if you want to add more to the card, as I do, keep reading.
Attach the Spiral inside the Spring Has Sprung card
Ok, we are getting close, but we still have a few items that need completing. And these are the fun bits!
We get to attach the spiral inside the card.
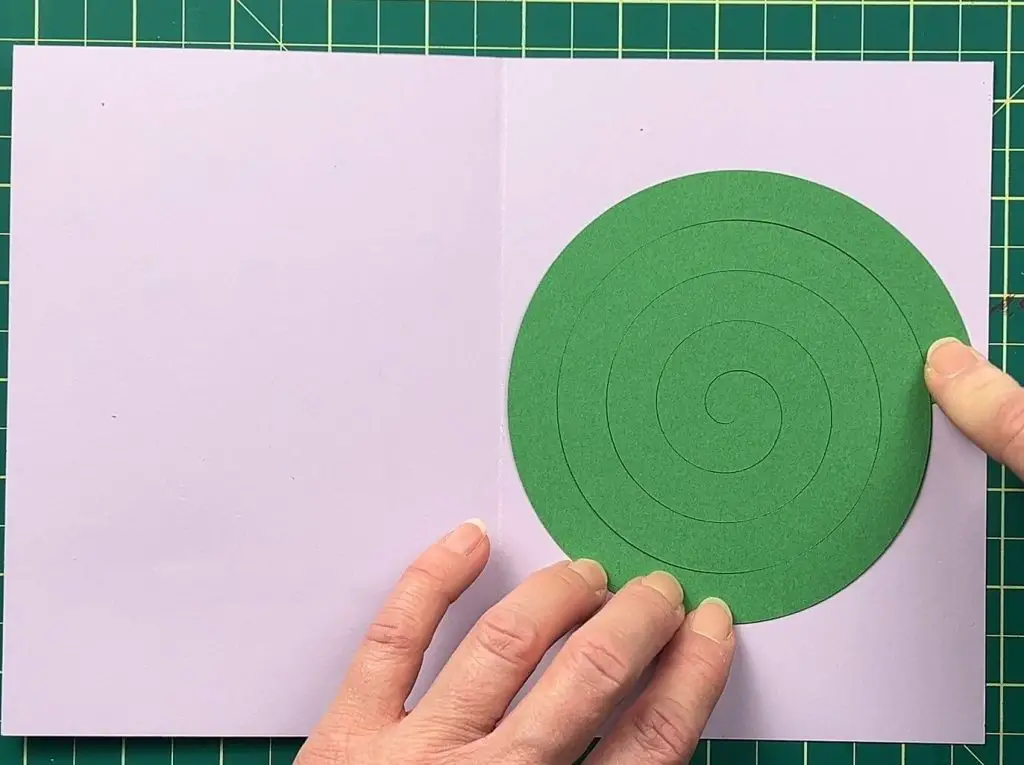
First, open the card and place it on your work area. Next, place the spiral onto the right side of the card. Apply a dab of glue to the outer edge/end of the spiral. I applied glue to the back of the spiral. If you apply it to the front you will need to do the opposite later.
Press the spiral down onto the card so the glue adheres.
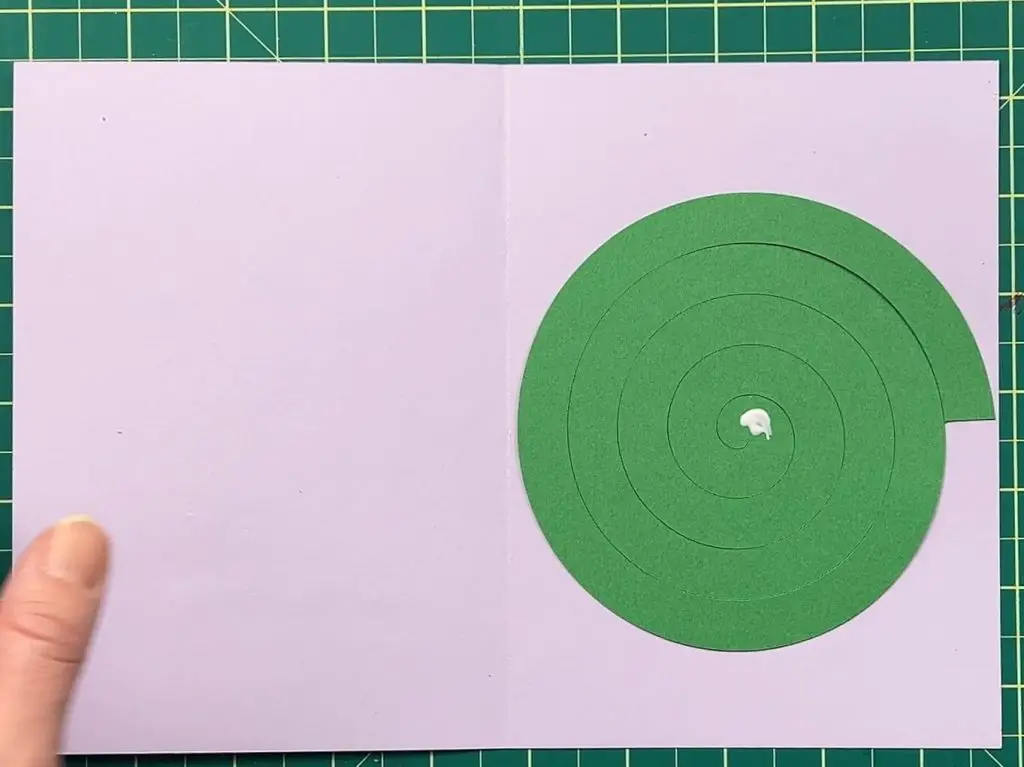
Next, apply a small dab of glue in the center of the spiral. Be mindful not to place too much glue and do not place it near the edges. On this spot, place the glue on the top of the spiral. However, if you placed the glue on the top in the step above you will need to place it on the bottom side this time.
Close the card so that glue can adhere the spiral to the front of the card.
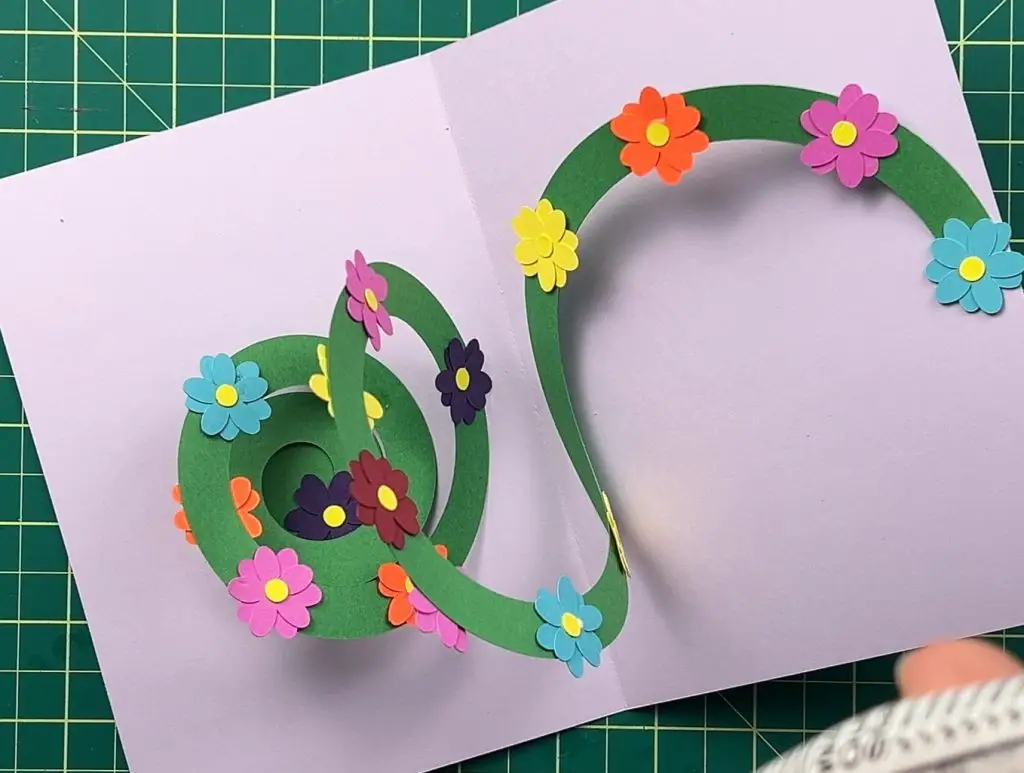
Applying the Flowers onto the Spiral
Ok, this is the last step! It is time to glue the flowers onto the spiral! You want to glue flowers onto both sides of the spiral. Place them in any order and color combination you like. There are lots of flowers and more than enough to place many flowers on both sides.
Now, all that is left is to write a sentiment inside your card and give it to someone you love!
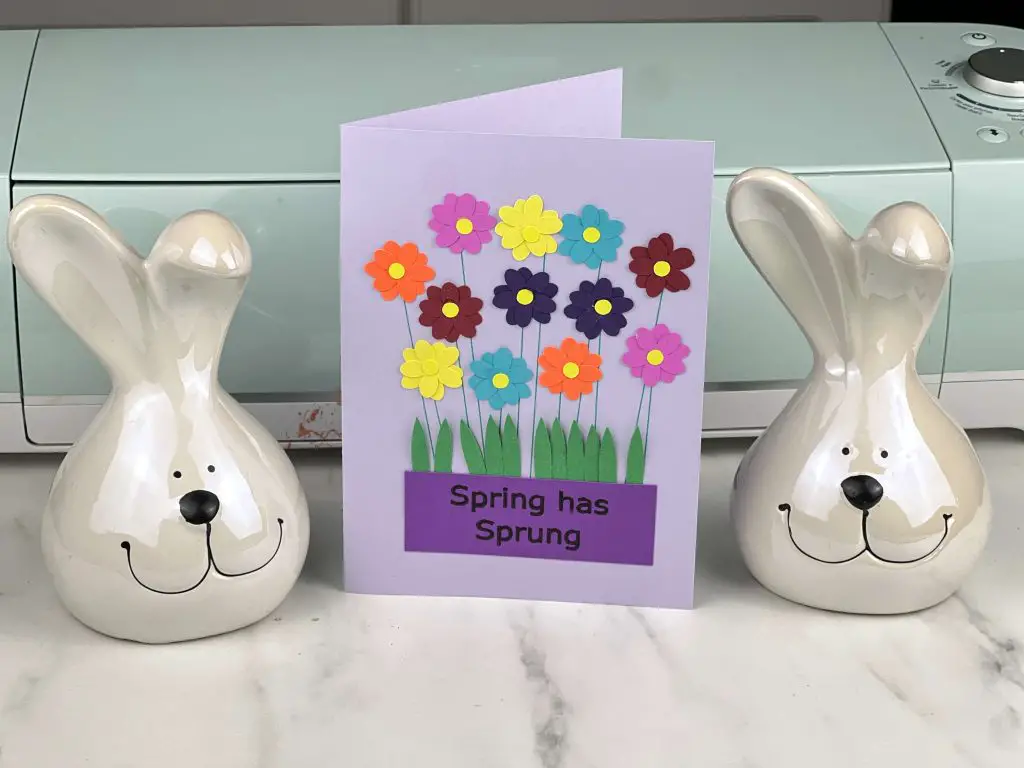
And that’s it! Your Spring Has Sprung card is complete!
Things I learned while making this Spring Has Sprung Card
This card was fun to make. And I will be making some more to give out to my family members, to brighten up their days. But like with all crafts, there are a few things to talk about after the fact:
- I really wanted to make the letters on the card in vinyl. And I was all set on doing it. But of course, the vinyl and I weren’t getting along, and I just couldn’t be bothered to try cutting it out again. So instead I colored the letters in. They turned out nice, but I would have preferred vinyl.
- When I glued the spiral into the card, I glued the outer edge of the spiral to the right side. In hindsight, I think the spiral would have looked better if the outer edge of the spiral was on the left side. Oh well, maybe next time.
- This is a cute card and I love it, but there isn’t much space for a sentiment inside. So the recipient of this card will have to get a short message. 🙂

Did you enjoy this craft?
Did you enjoy making this Spring Has Sprung Card? Let me know in the comments below! If you made this card, let me know how it turned out! Don’t forget you can get a copy of this card SVG file at my shop here.
If you enjoy this craft, check out my other: