We are in full swing of Halloween preparations over here. There are a bunch of projects on the go. Probably more projects than are good for me. And I will probably still be writing up Halloween posts well past Halloween, but that’s ok. But for now, I’m just trying to get this simple project finished. And as an added bonus, it’s great fun for kids to help with. We will learn to make window barricades to add to our Halloween decor.
As an Amazon Associate, I earn from qualifying purchases. This post contains affiliate links. I may receive a commission if you purchase an item from one of my links. This will not change the price you pay.
Supplies Need to Make window Barricades
This project doesn’t need many supplies. But to keep it consistent with everything, let’s review what we need:
- Old cardboard box – Ideally, you want the box to be wide or long enough to span the width of your window.
- Paint – I like darks and reds to resemble blood, but any colors will work.
- Paint Brushes – I recommend using paintbrushes to paint the barricades, but fingers will also work. That will give it a more creepy effect.
- Adhesive to stick the barricades to the window frame/house. I like to use 3D command strips for this, but duct tape will also work.
- Box cutter or scissors – I like to use a utility knife/box cutter.
Now that we have all our supplies, it is time to make our window barricades.
How to Make Window Barricades
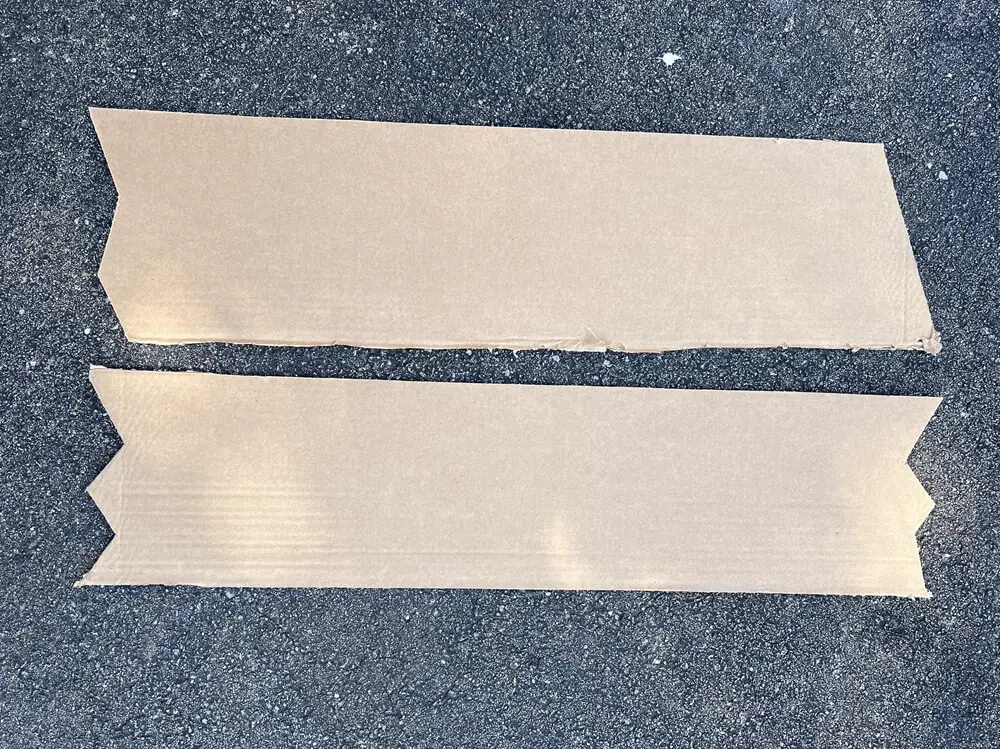
Cutting up your cardboard box to make a window barricade
The first thing to do is figure out how big of a box you need. This seems simple enough. You want your barricades to reach over both sides of the window. So, if your window is 24” inches wide, you will want at least 30” of cardboard to span the window.
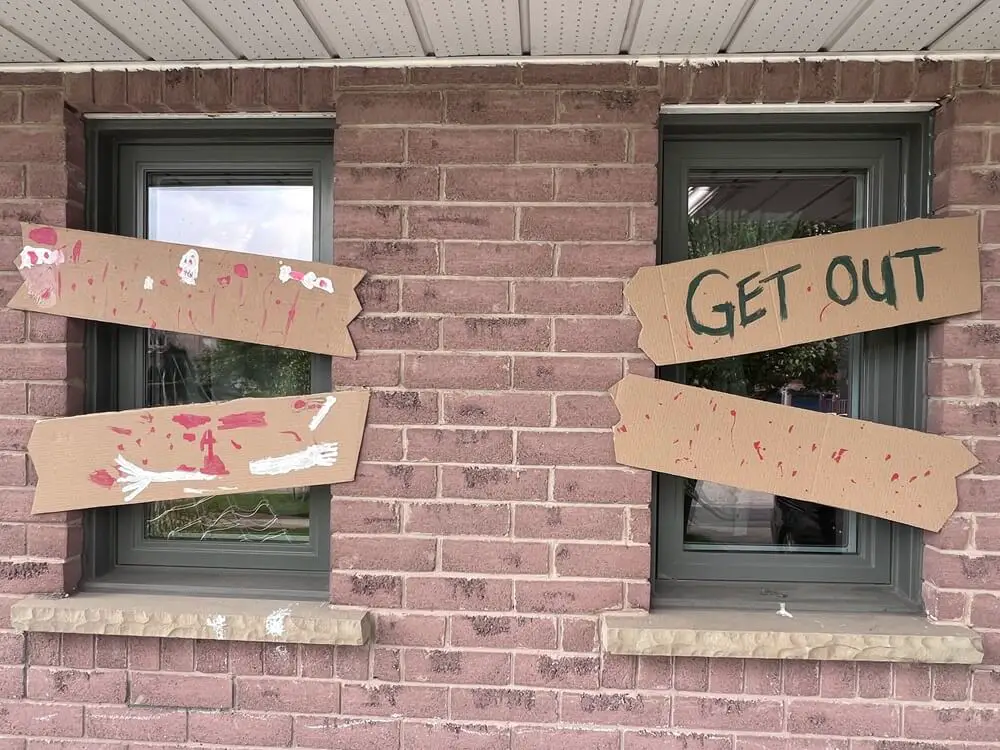
Once you have a box that you like, it is time to cut it up. You want to cut strips out of the box, about 8”-12” wide. You can also add some jagged edges to the sides to make it look more ominous.
Depending on how many windows you want to cover will depend on how many you need. I like the look of 2 barricades per window.
In my case, I needed 6 barricades because we were also going to apply barricades to the door.
Add Paint to your Window barricades
Now, it is time for the fun work. Add paint! You can add warnings onto the barricades, or signs for help. The options are endless. Here are some phrases you can paint onto your window barricades:
- GET OUT
- GO AWAY
- DANGER
- BEWARE
- HAUNTED
- HELP
- PLEASE HELP
- GHOSTS INSIDE
- ENTER IF YOU DARE
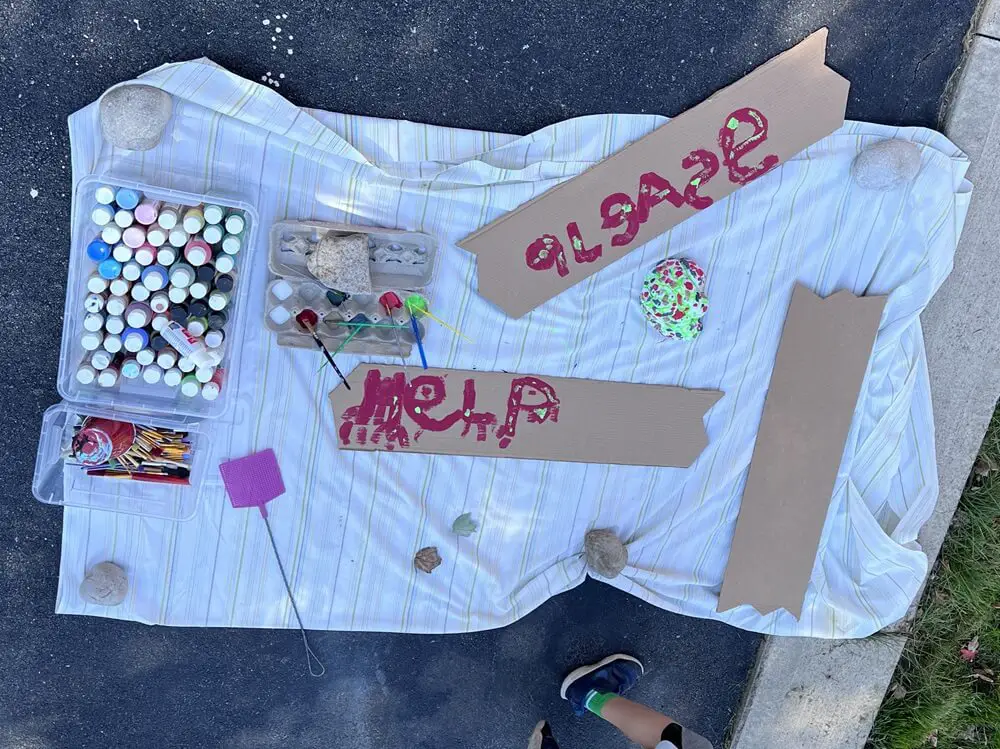
As an added touch, I like to spray blobs of paint onto the barricades to make it look like blood. You can also use fluorescent paint to make the signs glow in the dark.
To learn more about fluorescent painting for Halloween decorations, check out this post here.
Attach the barricades to the windows
I like to use 3M Command Strips as I find it sticks well to cardboard and brick. It also holds nicely onto siding.
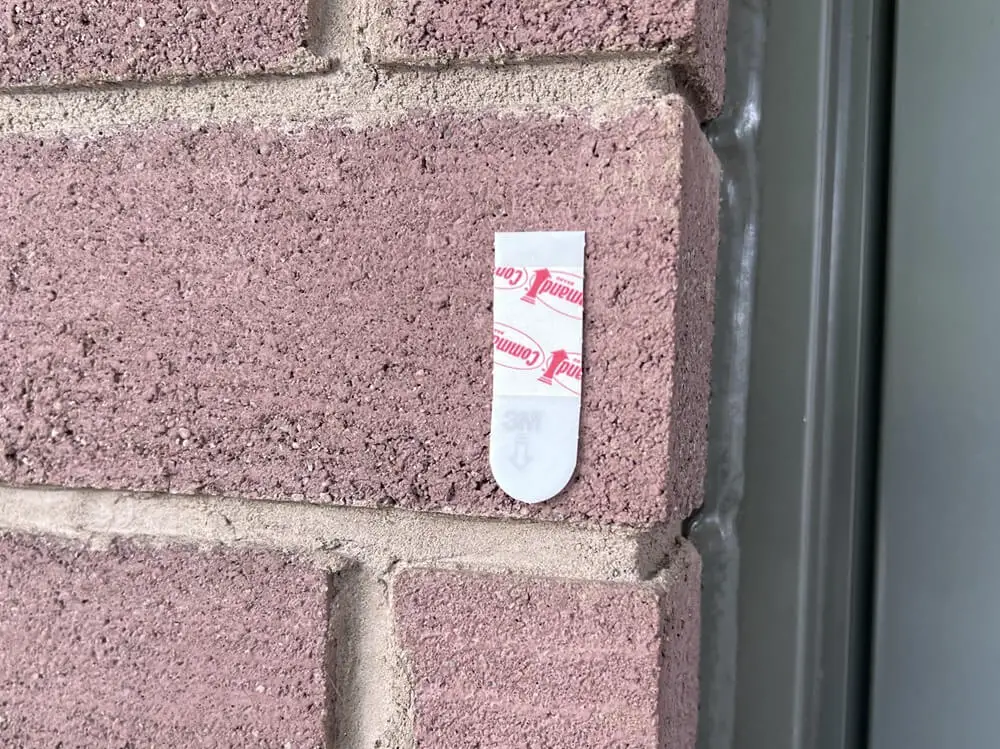
If you are not a fan of 3M command strips, you can use duct tape. Fold the duct tape into a loop with the sticky side out, and apply it to the back of the cardboard. My only warning about duct tape is that if adhering it to siding, the residue from the tape may stay on your siding after Halloween is over, and you will need to scrub it off.
When placing the barricades over the window, I have them slanted instead of perfectly straight. I find that this gives a scarier creepier look.
And that’s it! Your Window Barricades are Complete!
Things I learned along the way:
- When painting on cardboard, you want to remember that cardboard will have a natural bow in it. This can affect how the tape or 3M command strips hold the cardboard. If the bow is too large, the barricades will pop off the window/house.
- Adding barricades onto the door is also fun. Since your door (is most likely) wider than your windows, you can adhere the barricades directly onto the door, instead of onto the door frame or house.
- Adding window barricades is a fun addition to Halloween decor, but this will impede your ability to open windows. So, if you want to open your windows with the barricades on you may need to allow for more space between the barricades and the house/window.
- A great way to get your kids involved with this Halloween decoration is to have them help with the painting. My kids love to paint, and I ran out of barricades, so I needed to make more to keep them busy. And as we have an abundance of cardboard boxes this year, it was no issue to cut more.
Did you enjoy learning how to make window barricades?
Did you enjoy this post on how to make window barricades to add to your Halloween decor? Let me know in the comments below!
If you enjoyed this Halloween post, be sure to check out my other Halloween Posts HERE.
Don’t forget to sign up for my newsletters! You’ll get inside tips on upcoming posts and additional behind the scenes details about what’s happening on the site!