I am a huge fan of stickers. I would put stickers on anything that has a plain surface. But sometimes, plain stickers are just not enough. And I like them to sparkle and shine. And I find the best way to make stickers sparkle and shine is to make them holographic! I found making holographic stickers can be a bit of a challenge sometimes, so I decided to write about how to make holographic stickers.
As an Amazon Associate, I earn from qualifying purchases. This post contains affiliate links. I may receive a commission if you purchase an item from one of my links. This will not change the price you pay.
Supplies needed to Make Holographic Stickers
The supplies we need for this craft are our standard sticker supplies:
- Sticker paper – I use Koala Sticker paper, but I have used Cricut Paper in the past. You can read my review here on which one I like better and why.
- Printer – you need to print your stickers – I use my Eco-Tank 2850 to print all my stickers.
- Cutting machine – I used my Explore Air 2, but a Maker Series Machine will also work.
- Cutting mat – You will need cutting mats for this Cricut craft.
- Holographic sticker paper – I use this type of paper. It is nice since it comes with 4 different holographic designs.
- Scissors/Paper cutter – this is to help cut the holographic paper to size.
- Green Painters Tape – to hold things together while working. Any tape will work so long as it can be removed without ripping the sticker paper.
- Burnishing tool – optional.
How to Make Stickers
In this post, I will not review how to make stickers. You can read about making stickers in this list of posts below.
- Inspirational Quote Stickers with Cricut
- How to Make Drawings into Stickers
- Make Flower Stickers With Your iPhone and Cricut
- How to make FREE Valentine’s Day Stickers
There are many different types of stickers to make, and hopefully, this list will help you.
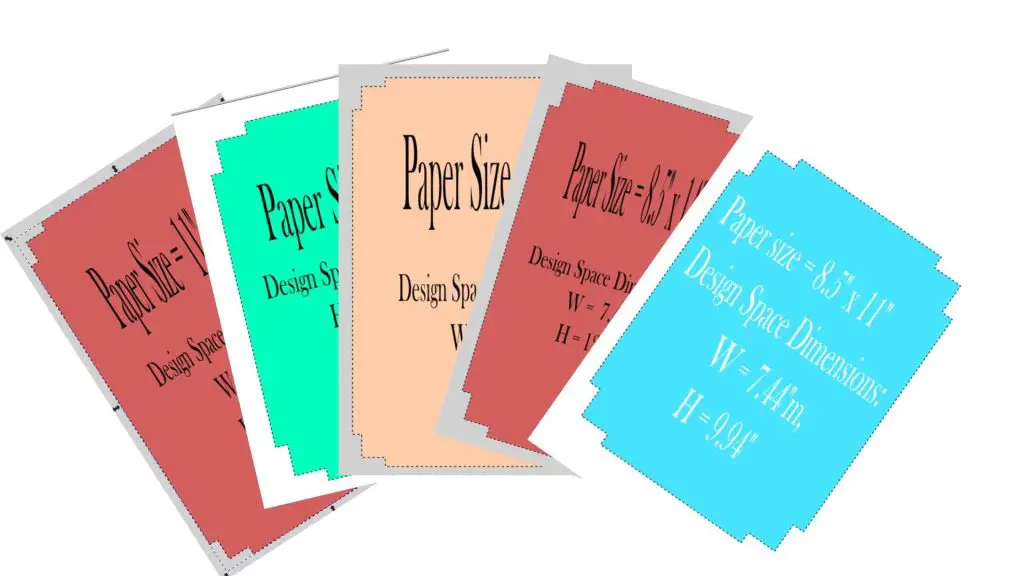
Once you have your stickers ready to Make, I recommend you read this blog post on how to maximize your Print Then Cut paper space. I have created a template in this blog post that helps you maximize your sticker paper usage.
Once you have your sticker paper set up, send it to Make. But do not cut it out yet.
How to Make Holographic Stickers
Now that you have a sheet of sticker paper printed out, we have some work to do. So be sure not to send the sticker sheet into your Cricut to cut it just yet.
You will need to pull out your holographic sticker paper. I have a variety pack with 4 different designs on them. But any holographic sticker paper will work.
Cutting the Holographic Sticker Paper to size
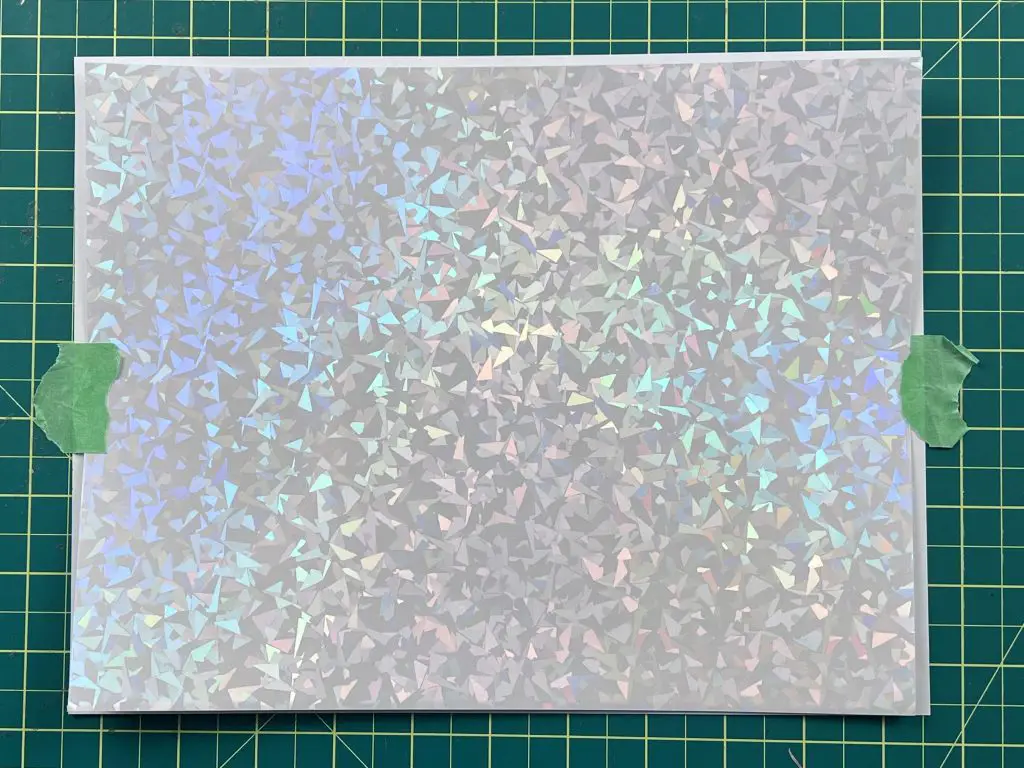
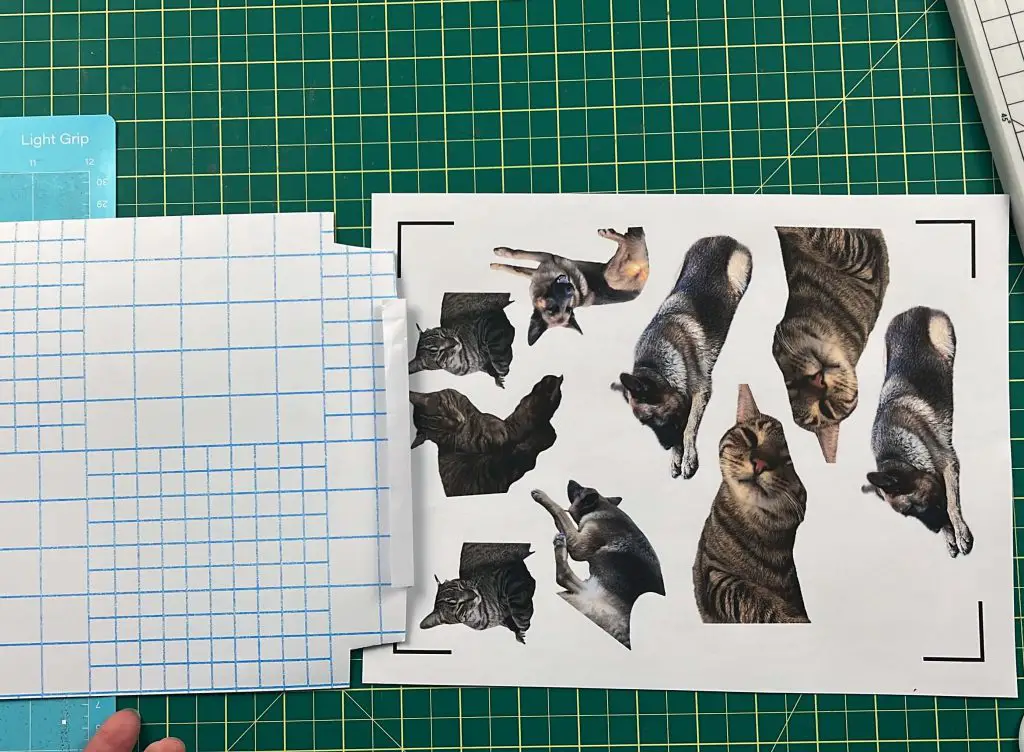
Place your Sticker Sheet down on your workstation. Then, place the holographic sticker paper over it. You are not removing any backing yet. You want to see how big/small the holographic paper is, compared to your sticker paper.
The holographic paper needs to be slightly smaller than your full sticker paper but larger than the area between the registration marks. Trim the holographic paper either with scissors or a paper cutter. The length and width should be just smaller than the paper. If you are using 8.5″ x 11″ sticker paper (which is what I use), you want the holographic paper to be about 0.25-0.5″ smaller in both width and height. My holographic paper is already less wide than the sticker paper, so I only needed to cut some of the length.
Once the holographic sticker paper is cut, place it over the printed sticker paper. It should be centered over the sticker paper. Then, using green painter’s tape, tape the holographic paper to the sticker paper. There should be a small amount of sticker paper on top and bottom to attach to.
I initially taped everything to my workstation. Once both the top and bottom were taped, I slowly pulled the top of the sticker paper off the workstation and applied the tape to the back of the sticker paper to hold it in place. Then, I repeated this for the bottom.
When applying tape to the sticker and holographic paper, you want to use a small piece in the center of the width for the top and bottom. You need to be able to pull the holographic paper away from the sticker paper to see the registration marks at the side of the sticker paper.
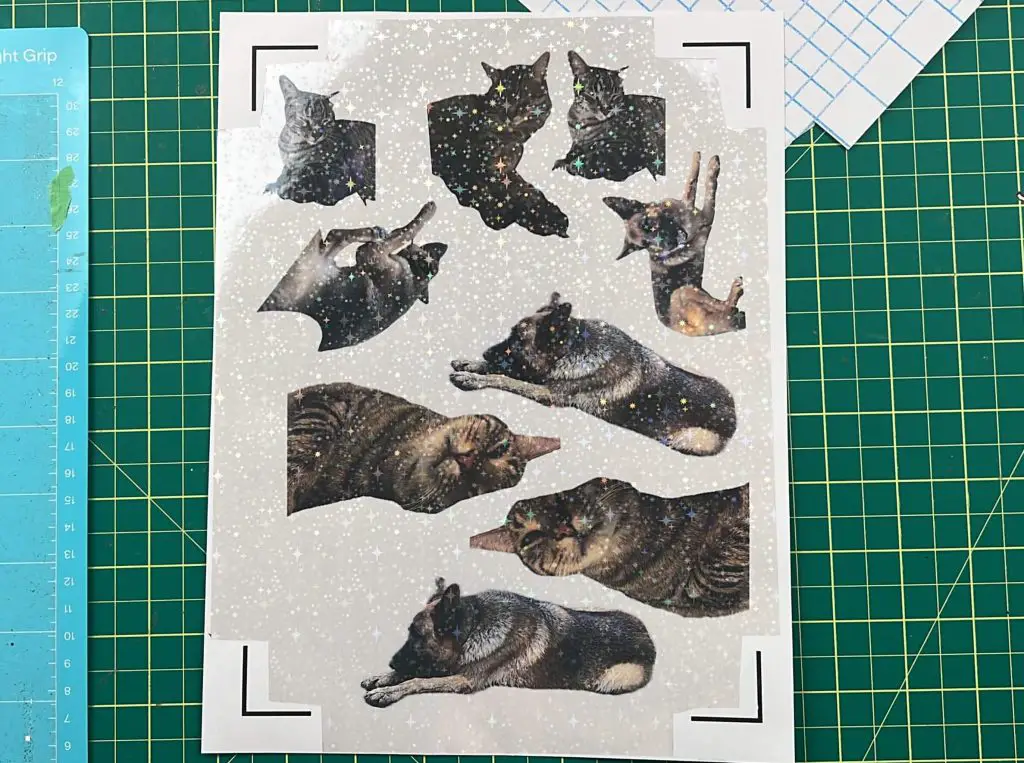
Cutting out the registration Marks from holographic Sticker paper
Your Cricut needs to see the registration marks on the sticker paper. The registration marks need to be unobstructed. So you cannot have the holographic paper on top of or too close to the registration marks.
For this, flip up one corner at a time and mark off with a pencil just a little past the end of the registration marks. Each corner will have 2 marks. Then, using scissors, cut a notch about 0.5″ into the holographic sticker paper. Next, fold this section to see part of the registration mark, and cut the holographic paper away. Repeat this on the other side of the registration mark to have the full registration mark visible. Then, repeat this on each corner.

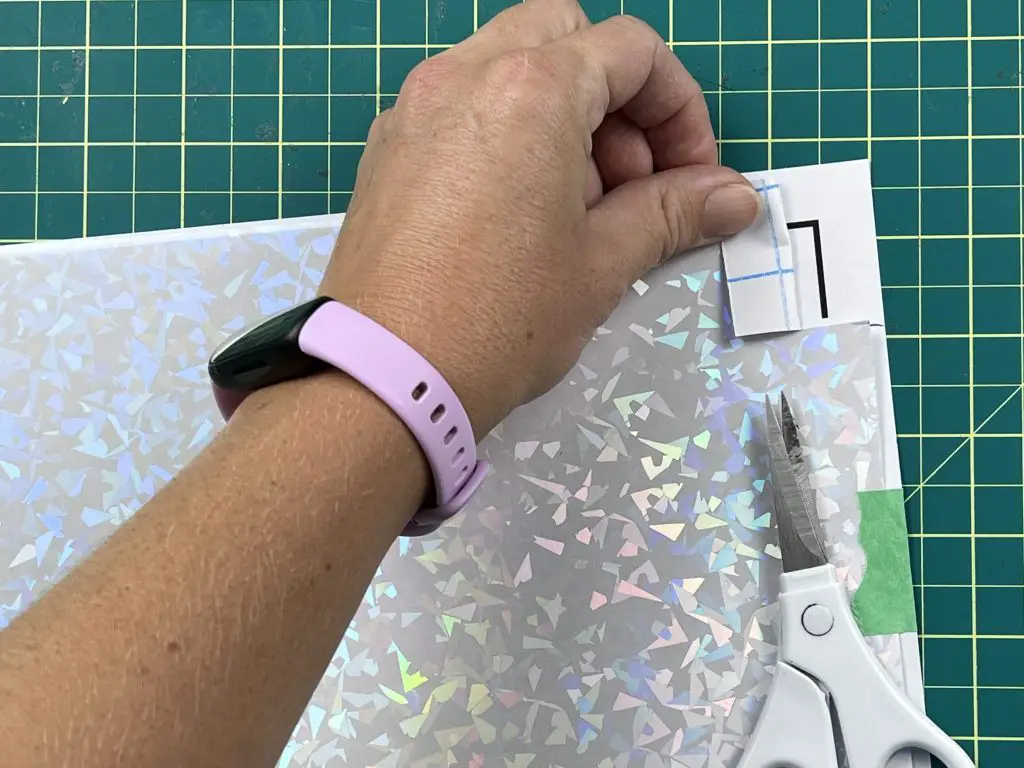
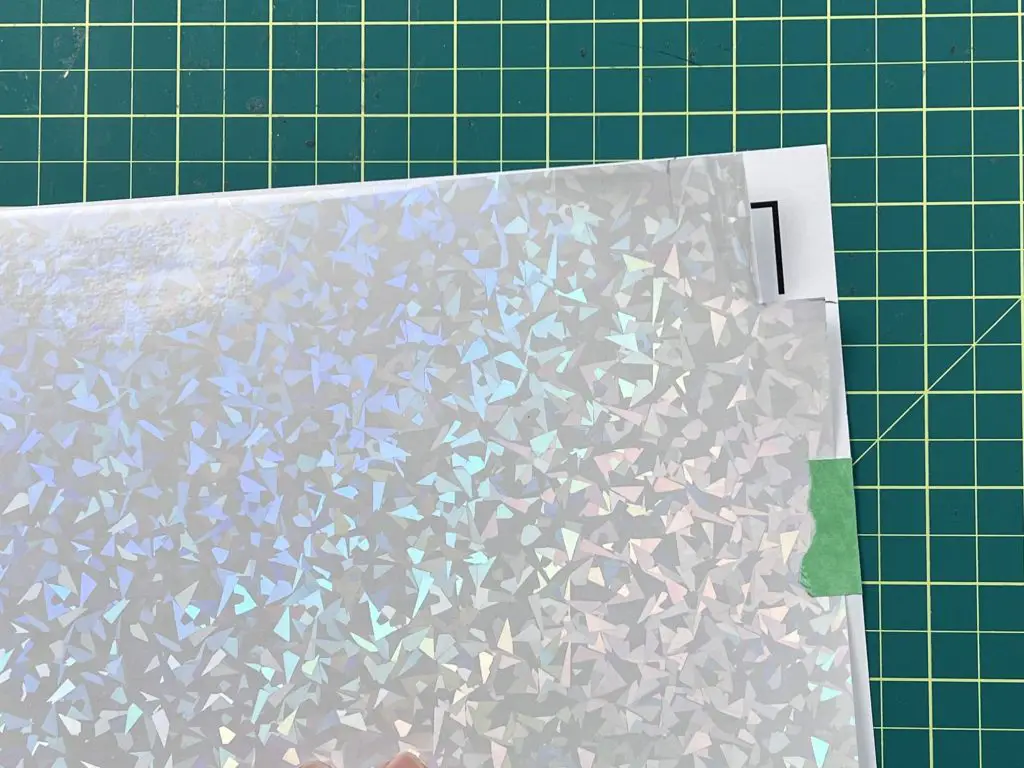
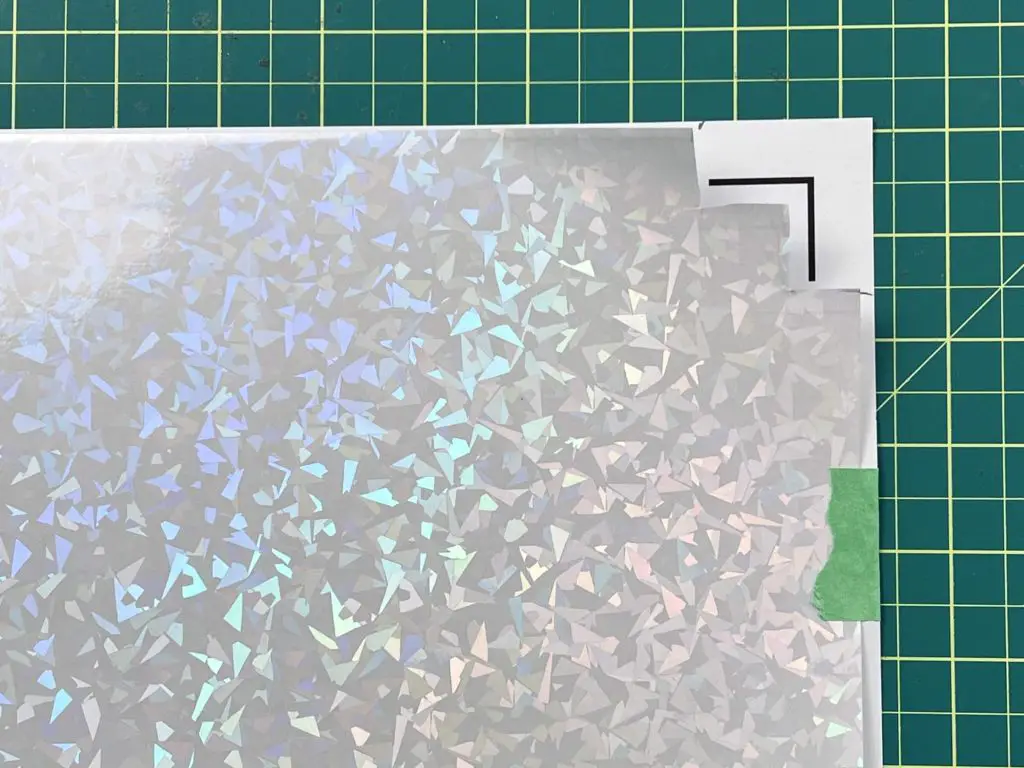
Before you proceed to the next step, do a quick review to make sure that the holographic paper is not overtop the registration marks. If you need to, do a little trim to keep them away. I like to have the paper about 0.25″ away from the registration marks so that my Cricut does not get confused by the shine.
Appling the Holographic Sticker Paper
Now for the fun part. Remove one piece of green tape from either the top or bottom. And leave the other one attached.
Once the one piece of tape is removed, flip the holographic paper over so that it is lying flat next to the sticker sheet but still attached.
Starting at the side that is still taped, pull away about 0.5″ of the holographic paper backing sheet. Then press and fold it.
Now, slowly flip the holographic paper over, but not allowing the exposed area to touch the sticker paper just yet. Alight the bottom of the holographic paper with the bottom registration marks to make sure they are still exposed. Then, slowly flatten the holographic paper over the sticker sheet until the top is aligned. Now, can press down on the exposed holographic paper to adhere it to the sticker paper.
Next, slowly pull away the backing paper from the holographic paper. I like to use a burnishing tool to slowly press the holographic sticker paper onto the printed sticker paper. This helps elimainte bubbles. This is not a rush activity. Take your time, and apply gentle pressure. If you notice an air bubble, you can slowly pull up that area and repress it.
Continue this the full way down the sticker sheet.
Once you have the holographic paper attached, remove the tape from the top.
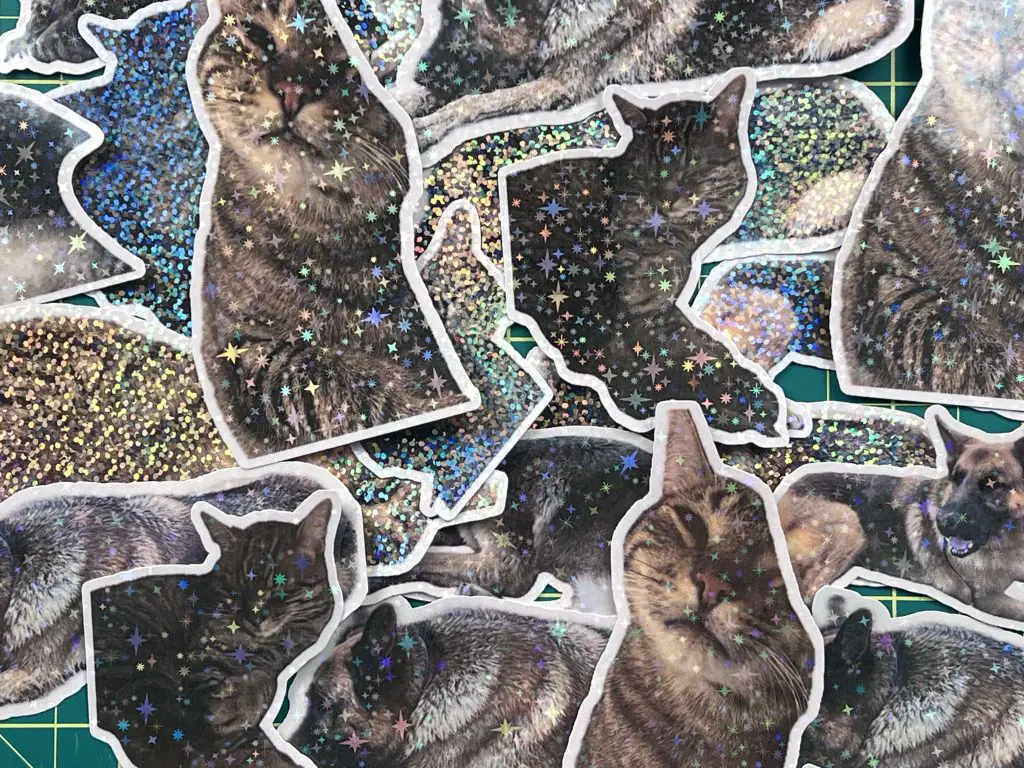
Cut out your Holographic Stickers
Now, all that is left to do is to cut your stickers!
Place the sticker sheet on your cutting mat. Make sure the design is the same way as it is on your screen, and feed it into your Cricut to cut.
Now, you simply need to wait for it to cut out!
Cut Settings for Holographic Stickers
I like to have my holographic stickers made as individual stickers. I find that using the Cardstock setting on my materials dial is best for this.
However, every machine is a bit different, so you may need to experiment with the cut settings on your machine to see which is best for you.
And there you have it! Your Holographic Stickers are Complete!
Things I learned along the way while making holographic stickers
I like stickers… I probably have too many in my house as it is… but that’s ok. But I did learn some things while making these holographic stickers:
- The sensors on my Cricut Explore Air 2 are very sensitive. If I do not cut the holographic paper back far enough, the shine from the paper will interfere with the sensors and stop the cut from happening. On the bright side, I have found that the holographic paper is not that difficult to pull back and cut more off if needed.
- Getting a kiss-cut on holographic stickers can be tricky. I have managed to get some of my holographic stickers to successfully get a kiss-cut, but not every time. I have found that the light cardstock setting works, but this is something you need to play with. What is kiss-cut? That is when your stickers are still attached to the sticker paper, and you peel the stickers off the paper/sheet. You do not have individual stickers.
- Holographic stickers are nice and shiny, and kids love them, so they do not last long in my pile of stickers.
- I was going to make a template to cut the exact size needed for the holographic stickers, but not every sticker cut sheet is going to be the same size (unless you use my template, but even then it might not be), and you would be forced to use the same paper and holographic paper as me, and that might not be the case. But maybe one day I will make one.
- When I make stickers, I always try to use a full sheet of sticker paper so that I am not waste more paper. But if you are in a need for a certain sticker and not using a whole sheet with stickers, you don’t need to use the full holographic paper. Simply cut a piece large enough to cover the printed area while not covering the registration marks.
Frequently Asked Questions About Making Holographic Stickers
How to Make Holographic Stickers if I’m not Using the Whole Sticker Paper?
If you are not using the whole sticker paper, and only part of it, the process for making holographic stickers is the same. The only difference is that you can cut your holographic sticker paper smaller to only cover the portion of the sticker paper that has been used.
Are Holographic Sticker Waterproof?
I have found that the holographic stick paper seals the sticker paper underneath quite nicely. However, after several times in the dishwasher, the water has seeped into the paper below. We have put them on water bottles, so they get quite a bit of wear and tear. However, as we make lost of sticker, stickers get replaced frequently, so it is not a big deal if they are or are not waterproof.
But from the standpoint of just having them on random odds and ends that get wiped or wet sometimes, then yes, I would say they are waterproof.
Why is the holographic sticker paper larger than the area inside the registration marks?
The reason I have made the holographic sticker paper larger than the registration marks is simple. If you place your stickers at the very edge of the Print Then Cut area, you will want to have some extra holographic at the edges so that the whole sticker is covered. If you use only the exact amount within the registration marks, you will have the edges of stickers without holographic stickers paper on them.
Did you find this tutorial on making holographic stickers helpful?
Did you find this tutorial on how to make holographic stickers helpful? Let me know in the comments below. If you tried this method, let me know how it worked. Also, let me know if you have any other suggestions on how to make this craft better!
If you enjoyed this craft on making stickers, be sure to check out my other sticker posts listed below:
- Inspirational Quote Stickers with Cricut
- How to Make Drawings into Stickers
- Cricut Sticker Paper vs Koala Sticker
- Make Flower Stickers With Your iPhone and Cricut
- Maximize Print then Cut size with Cricut