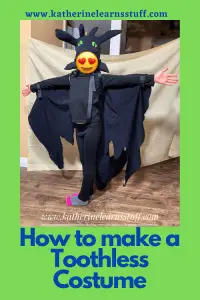
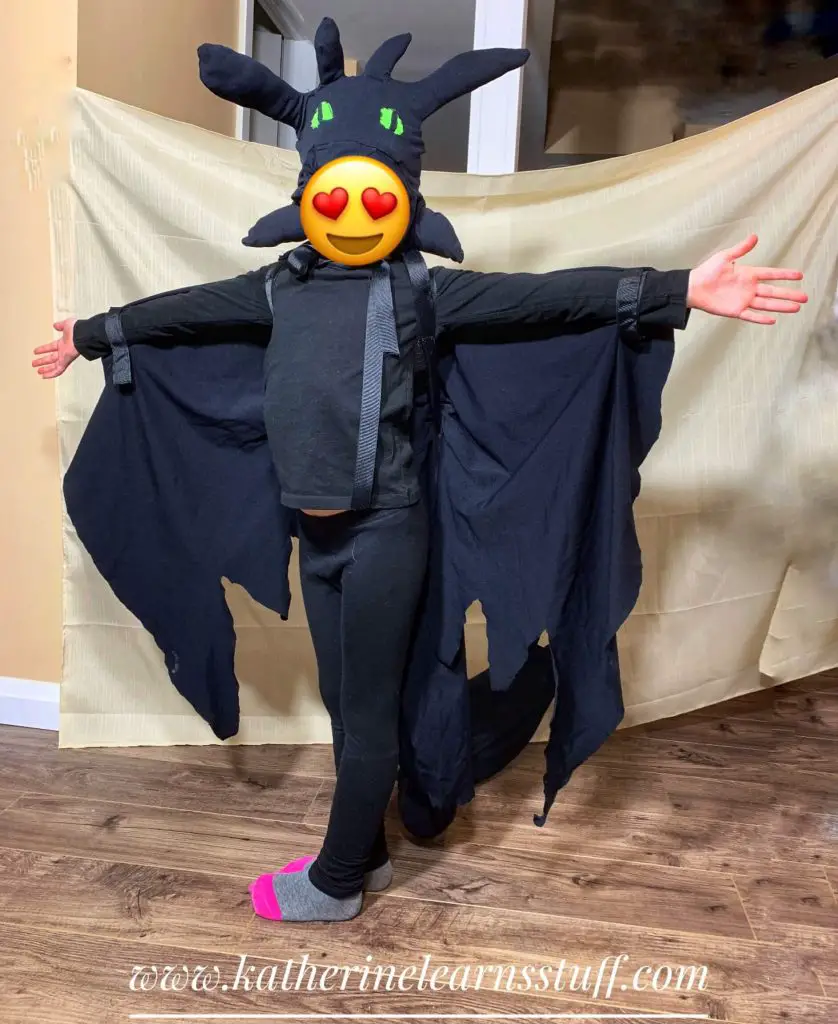
In most recent times, my kids have become obsessed with dragons, everything from playing with dragons, being a dragon, and watching dragon movies. Currently, the favorite dragon in our house is Toothless from How to Train Your Dragon: Homecoming, so we needed a DIY Toothless Costume for Halloween.
This costume consists of 3 distinct parts – the wings, the tail and the headpiece. We are going to start with the dragon tail.
As an Amazon Associate, I earn from qualifying purchases. This post contains affiliate links. I may receive a commission if you purchase an item from one of my links. This will not change the price you pay.
Supplies needed to make a Toothless Costume
The tail took a bit of work as we wanted it to have some dimension, so some of these supplies may seem a bit weird, but bear with me.
- Fabric – lots of black fabric and little bits of green fabric.
- Polyester stuffing
- A sewing machine, needle and thread
- Wire hangers – several
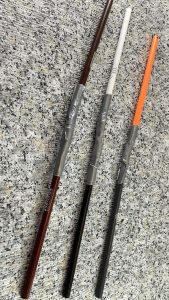
- Pencil Crayons or wood doweling – I used pencil crayons as we lots of them lying around.
- Black Ribbon – 3/4″ or 1″ thickness
- Blank hook and loop Velcro – 3/4″ or 1″ thickness, but needs to match the ribbon thickness above, or be smaller, but not larger.
- Duct Tape
- Headband
- Toilet paper roll
DIY Toothless Costume – Tail
Designing the Tail
There are some items you want to consider before you start designing and cutting your toothless tail.
- How tall is the wearer of the costume? – You do not want the tail to be so long that it drags on the ground. The crucial measurement is the distance from the middle of their calves to about their shoulder blades. This will give you an approximate height for the tail.
- What shape do you want the tail to be? – Do you want the tail to be straight or have a bend in it? We wanted a bent tail, so we needed to remember to keep that in mind when drawing our design.
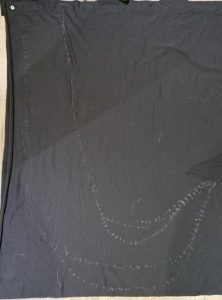
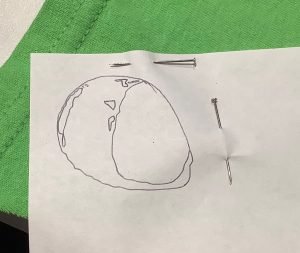
Laying a sheet of fabric on the floor and fold it in half. Sketch a J-shape with the height of the J, being the distance we measured above – length from claves to shoulder blades. I used a thin piece of used soap to draw the shape, but a fabric marker also works. As you can see from my image, it took several tires to get the design I wanted. Once happy with the shape, cut it out. Remember you have 2-pieces of fabric folded together, cut both pieces out together.
Designing the Tail Fins
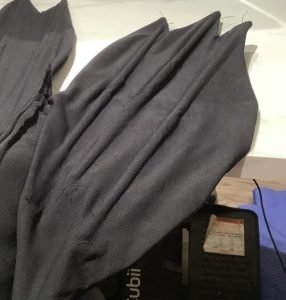
Next, we need to move onto the tail fins. Similar to above, we need 4-pieces, so fold the material twice so that 4 -layers of fabric are together. Draw one tail fin, about 1.5feet in length.
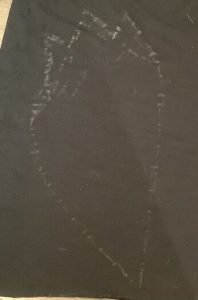
We wanted to have our Toothless costume be representative of the final How To Train Your Dragon Movie, where Toothless’ tail fins were black. If you want Toothless from the previous and original movies, you will need to make 2-pieces of fabric for the tail fin in red.
Once the sketch is complete, cut out the 4-pieces.
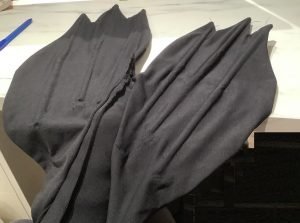
Using pins, pin two of the tail fins together. Following the pins, sew the fin around the edges. Leave an opening at the location where the tail fin attaches to the tail.
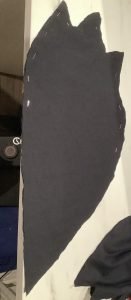
The tail fin will not stand up by itself, so I used pencil crayons to give some rigidity. As my tail fin had three spines, I needed three sets of pencil crayons. I used duct tape to tape 2 pencil crayons together to provide the required length. Insert the pencil crayons into the tail fin through the opening, and move them into the desired positions. Once positioned correctly, use pins to mark their locations. Remove the pencil crayons and sew straight lines where the pins are. This will keep the pencil crayon in the spots we want them. Once done sewing, insert the pencil crayons, and either by hand or with the sewing machine, add a little stitch at the open edge to keep the pencil crayons from sliding out.

Designing Tail Spikes
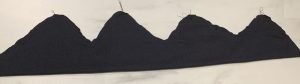
The last piece of the tail that we need to design and cut out is the tail spikes or spines. These are the ridges and bumps at the top of the tail.
Draw some ridges on the black fabric. These should be about 1/2 – 3/4 of the tail length.
You will need 2 of these pieces. Sew the ridge portion of the tail spikes together.
Sewing All the Tail Pieces together
Now it is time to assemble the tail, the spikes and the tail fin.
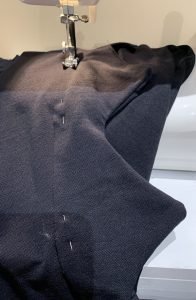
The first part of sewing is attaching the tail-fins to the tail. The body of the tail should still be in 2-pieces at this point. Line up one tail fin to the bottom of one tailpiece, and pin them together. Repeat for the other tail and tail fin pieces. You will want both the tail fins in the same spot on each tail. Align the pins and fabric to hide the surplus fabric and the seam underneath the fin. Sew the tail fin onto the tail.
Next, sew the two tail pieces together. The outward-facing side, where the spines will sit, should be sewn first. Where possible, you can flip the tail inside out to hide the seams, but with the tail fins attached, there will be parts where the seams will have to show. If you sew the tail together before you install the tail-fins, you will have to sew the fins on by hand.
Do not sew the top of the tail closed. This needs to remain open for some of the next steps.
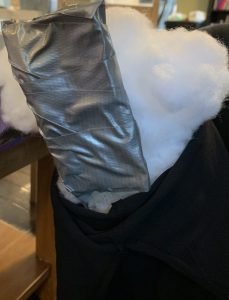
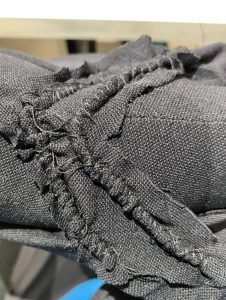
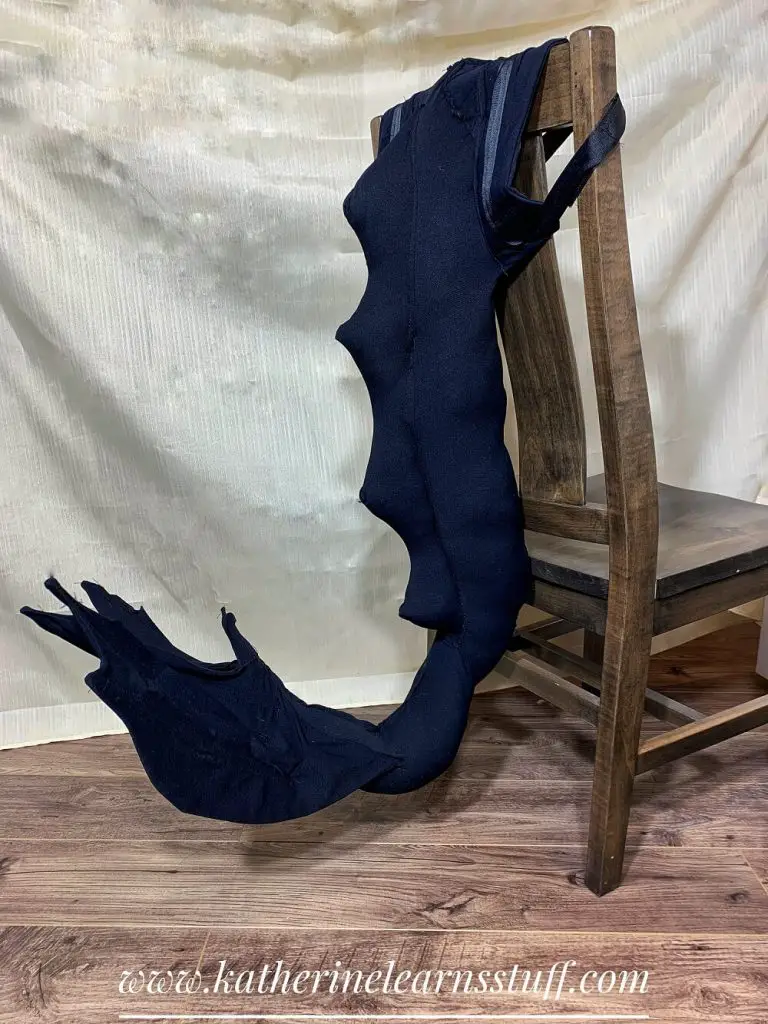
Now you can sew the spines onto the back. This will be over the seam of the main portion of the tail. Make sure to leave a little gap at either the top or bottom so that you can fill it with stuffing.
Stuff and Shape the Tail
Now that most of the tail is assembled, it is time to start filling it with stuffing. Fill the tail and spines with polyester stuffing. Once the spines are filled, the open gap can be sewn shut by hand.
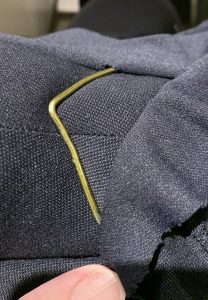
Depending on what type of fabric you are using, you may need to use some wire coat hangers to help maintain the shape. I used a fabric similar to Lycra, with lots of stretch. It did not retain the shape I wanted, so this was required.
Using two wire coat hangers and some duct tape, I shaped the hangers into a J. Apply duct tape to the ends to cover the sharp ends.
Insert these into the stuffed tail and use a needle and thread to keep them in place. This will keep the tail in a J-shape.
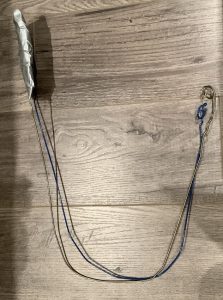
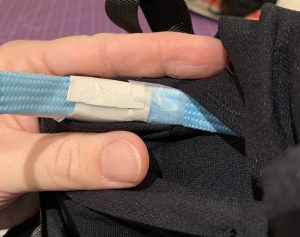
Using 1-2 wire coat hangers, cut and shaped into a V. Cutting a small notch into the tail, pushing the wire hangers in through the tail, and up to be in line with the pencil crayons. Using some fabric, sew over the hangers to hide them, and help keep them in place.
How Do you wear the tail?
Now that the tail is complete, we need to make a backpack piece to wear that tail.
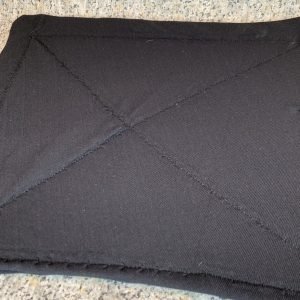
Cutting two squares of black fabric and some rigid liner (I used cabinet liner), sew the liner inside the two pieces of fabric. I sewed the fabric first and then flipped them inside out to hide the seams, leaving a gap to insert the liner.
Once the liner was in, I sewed several cross stitches on the backing piece to keep everything in place.
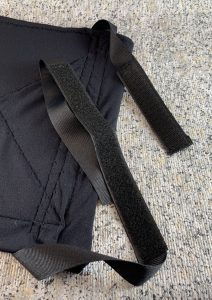
I sewed on two black ribbons, one over each shoulder for the straps. I allowed for extra slack on the straps to allow the costume to be worn over a winter coat.
Each strap needs a hoop and a loop portion to hold it together. I found that Velcro is more user-friendly for kids than buttons or snaps. Also, I found that having the hook portion on top/over the shoulder strap worked best to reduce damage to clothes.
Once the back piece is complete, it is time to sew on the tail.
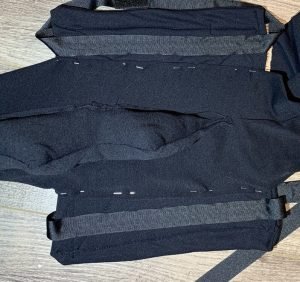
Strategically placing the tip of the tail at the top of the back piece, pin it into place. If your stuffing is not overpowering, you should be able to sew the tail to the backing piece on your sewing machine. You can also remove some of the stuffing if needed. I sewed the top into a V-shape and made sure to add additional seams onto the side of the back pieces to increase holding capacity. I also left a hole at the side to add more stuffing.
Now the tail is complete!
Dragon Wings are Also needed
As dragons have been a big theme in our house, we created dragon wings before this tail. Jump to this post on how to make them
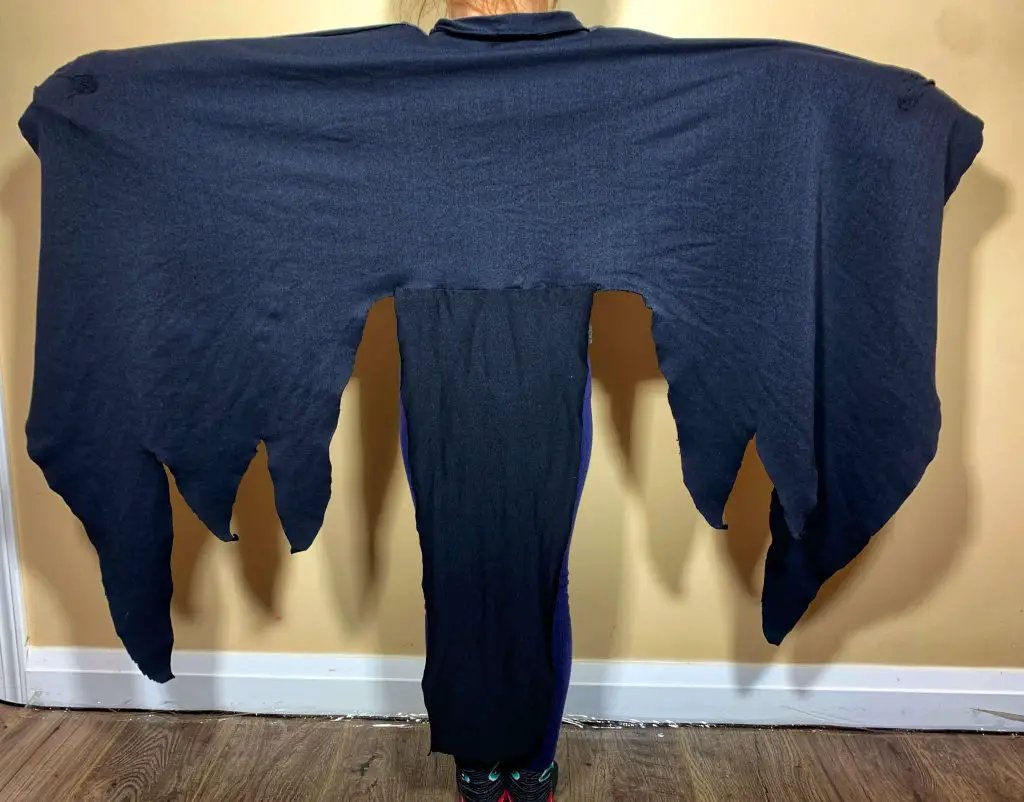
Designing the Head for the DIY Toothless Costume
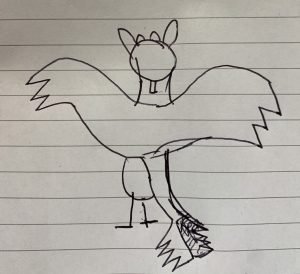
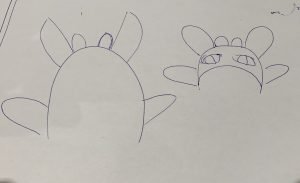
The headpiece for the DIY Toothless costume was probably the toughest part to figure out. The first thing I needed to do was sketch the design from my head. With the sketch complete, I could start measuring, drawing and cutting.
Designing a Toothless Mask
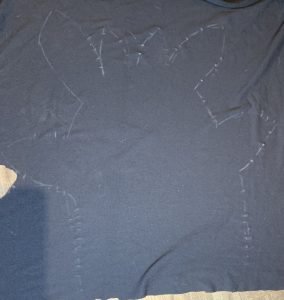
Once the design is drawn up, it is time to do the same on the fabric. I probably overcomplicated it, but I wanted an inner and outer layer of the mask and headpiece. So, I needed an underside that would sit flat on the head and an outer part providing the shape.
I used a hoodie to trace the required size for the inner sections – 3 pieces were needed, 2-semi-circle-like pieces, and one rectangular piece. The rectangular piece is sewn between the two hoodie pieces to give it more space for your head. These 3 pieces need to be sewn together.
The outer layer of the headpiece is made of 2 pieces, one for the front and one for the back. This allows the ears and bumps on Toothless’s head to stand up. These two pieces are sewn together.
Once the inner and outer layers are two separate pieces, they need to be combined to make one headpiece. It is important to only sew around the edges where the face will be visible, as you need to leave the bottom open to help shape the ears and fill it with stuffing.
The best way to sew any of these pieces is to make sure they are inside out so that the seams are hidden when you flip and wear the Toothless headpiece.
Toothless has Green Eyes
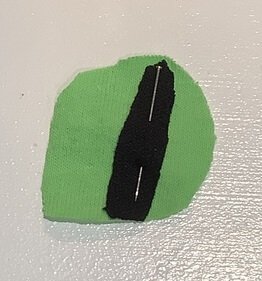
Toothless has a specific shape and color of eyes. I copied a version of Tootless’s eyes using my coloring pages tutorial on my Cricut, as I do not have a printer. Once they were drawn and cut, I pinned the paper onto some green fabric I had from an old t-shirt. I then cut out small black slits of fabric for the center of the eyes. My kids wanted the Toothless angry eyes, so they were thin sections. Sewing the eyepieces together, and then centering them on the mask, and sewing them on as well.
You can sew the eyes onto the mask after joining the two top pieces, but I found it was better to wait to center the eyes.
Spines on the Back of the Mask
As with the spines we made on the tail, we need to add a few to the headpiece.
Cut out two pieces of fabric with 2-3 spikes on them. Sew the ridge portion together.
Pin the spines onto the center of the headpiece, and sew them on. Again, leave a little open spot at the bottom or top to fill the spines with stuffing. Once the spines are filled to your liking, sew the hole closed.
Once done sewing, make sure you have trimmed any surplus material off around the edges.

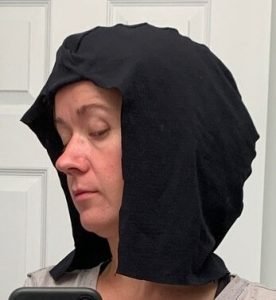
Making the ears pop on the Toothless mask
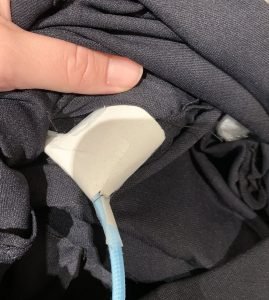
Before adding the stuffing into the headpiece, we need to make the ears and bumps on Toothless’s head stand up. I found that using some wire hangers, a headband and toilet paper rolls worked best.
The wire coat hanger was cut and bent into a U shape, with one side longer than the other. You need 2 of these. These are used for the 4 nodes/bumps on Toothless’s head. This will keep them standing at the same time. Stitch them at the edges/corners to keep the wire from dislodging.
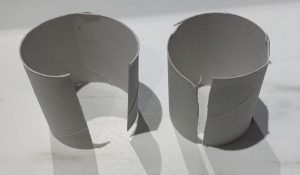
Cut the toilet paper roll in half, and cut a slit into it. At the larger (outer) nodes, tape the toilet paper rolls to the headband. Insert these sections into the nodes/bumps of the head. Again, you can add a few stitches to keep the headband in place.
This allows the headpiece to stay on the head in the correct spot.
Filling Toothless’s mask
Now it is time to fill the mask with stuffing.
You will need to play with the amount of stuffing to be used. If you add too much, it will make the headpiece deformed. If you add too little, the ears and bumps will droop.
Once you are happy with the stuffing, you can sew the bottom of the headpiece closed to keep everything inside. And your headpiece is done.
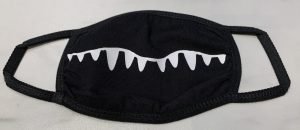
Optional Mask for the Toothless Teeth
When we made this costume, we were still in the thick of Covid, so we needed to wear face masks. I quickly cut some White HTV Vinyl Toothless teeth on my Cricut Explore Air 2 and ironed them onto a black cotton face mask to help enhance the costume.
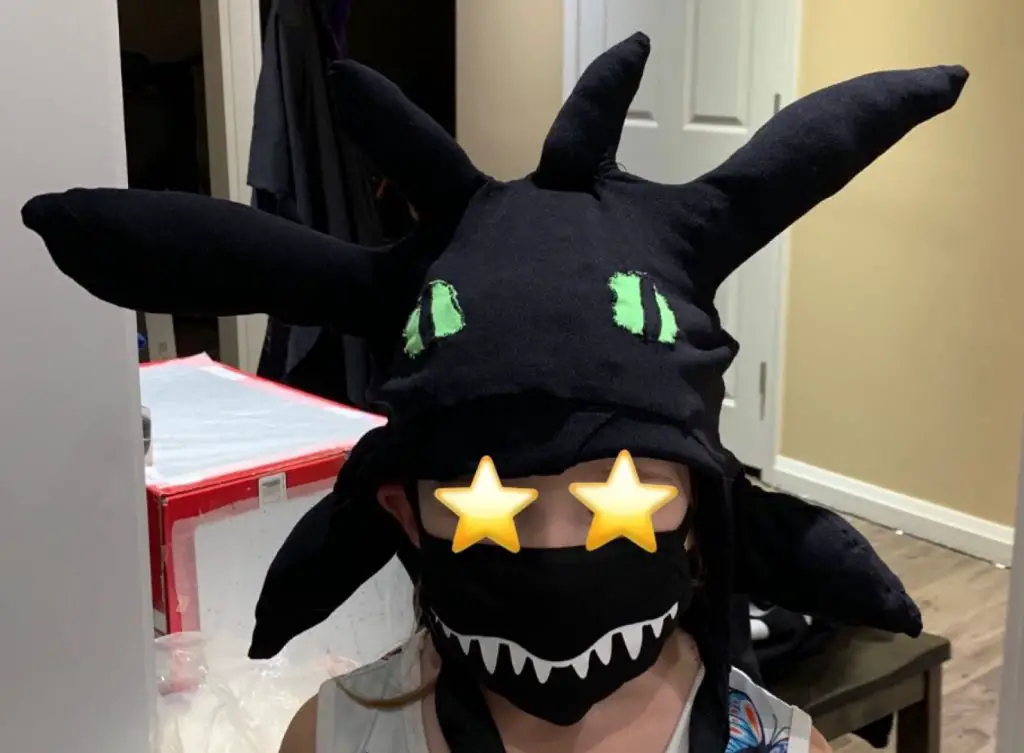
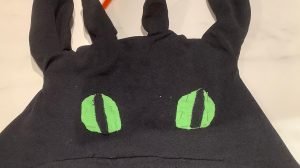
And that’s its! you’re DIY Toothless costume is complete!
Tips and Pointers when Making a DIY Toothless Costume
I started planning this DIY Toothless costume two months before Halloween to have it ready on time. And I’m glad I did, as there were some issues along the way. Here are some important takeaways that are important to share:
- Do not underestimate how much time this process will take. This project cannot be completed in one day. By the end of creating all three pieces, it probably took me about 3-weeks working evenings.
- The type of fabric you use is important. Especially when it comes to the tail. The fabric I used was stretchy, almost like a Lycra. This made keeping the J-shape of the tail challenging. If I had used a more rigid fabric like Broadcloth or Muslin Cotton the tail might not have required the wire hangers to help support the shape.
- When filling any of the parts with stuffing, remember you can add too much stuffing and ruin the costume. I played around with different stuffing amounts to find the ideal amount for each part of the Toothless costume.
Did you find this DIY toothless Costume Tutorial Helpful?
Did you find this DIY Toothless Costume Tutorial helpful? Let me know in the comments below!
If you liked this tutorial check out some of my other Sewing Tutorials HERE.