I have recently been working on paper crafts, and one of my designs was a large paper gift box. If you have been following me, you will have seen how to design a large paper box here. Now, it is time to go over the assembly so you can have a wonderful large paper gift box for any occasion.
As an Amazon Associate, I earn from qualifying purchases. This post contains affiliate links. I may receive a commission if you purchase an item from one of my links. This will not change the price you pay.
What you need to make a large paper gift box
- You need a design! You can follow my tutorial here to make your own file – or you can sign up for my newsletter below to gain access to my design.
- Cardstock – 12″ x 12″ cardstock is preferred, but if you have larger cardstock available, that will also work. I use a combination of dollar store cardstock and Recollections Paper from Amazon.
- Glue – I use Barely Art Precision Craft Glue. It dries quickly and does not leave creases on the paper when dried.
- Cutting machine – I use my Cricut Explore Air 2, but any cutting machine will work.
- Approximately 30 minutes to assemble the box.

Note regarding my design file
With my design, you will need to do a few items to the file.
- Increase the dimensions as the file will import into Cricut Design Space very small. Ensure your vertical and horizontal dimensions are locked and expand the design. Modify the width to be 58.35 inches before you ungroup the image. This will give you the prefect 10.5 x 11.5 box. However, you can make it smaller if you want.
- Select all of the lines and change them to score lines. Otherwise, you will have lines cut through all your paper.
- Attach the score lines onto the box pieces they are on so that they score the design, not just a new page.
Let’s Start assembling our large paper gift box
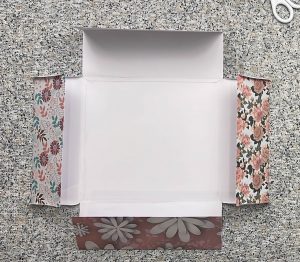
Once your design is cut, organize the pieces to have the top and bottom box pieces together. You do not want to mistakenly use top and bottom box pieces on the same box piece. Once you have the tops and bottoms together, it is time to fold all the score lines.
Assemble the Top of the box
The design allows the cardstock to be folded and shows the textured pattern on both the inside and outside of the box wall. You will need to arrange the pieces so that all textured sides are facing out, as shown here.

Flipping all the pieces over and applying glue onto the 4 tabs that attach to the face of the box.
I like to place a heavy book on top of the glued locations to help keep everything straights.

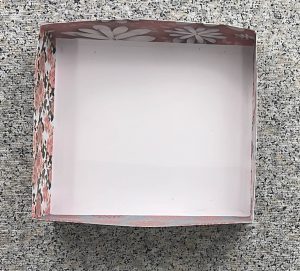
Once the glue has dried, it is time to glue the walls together. Only two walls have tabs on them to connect to the other walls. First, glue the tabs to the adjacent wall and then glue the wall closed to show the textured pattern on both sides.
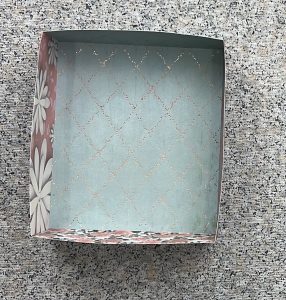
Assemble the Bottom of the box
Following the same steps as above, assemble the bottom of the box.
For my design, I have included an additional square as a liner on the inside of the bottom box. So that can now be glued in.
And that’s It! Your Large Paper Box is Complete!

Frequently Asked Questions
How long does it take to assemble a large paper box?
Assembly takes about 10 minutes, however, you need to wait for the glue to dry between steps, so this can add about 15 more minutes. I use Barely Art Precision Craft Glue, and I find that it dries very quick.
Can I make a bigger box?
Yes, you can! Making a larger box will require larger sheets of cardstock. I have not found a good source for cardstock larger than 12″ x 12″. However, if you want to be creative, you can cut posterboard into 12″ x 24″ pieces. Then simply stretch this design to fit your posterboard.
If you only have access to 12″ x 12″ cardstock, you can add joints into the faces and walls and make the box larger that way also.
Can I Make A Smaller Box?
Yes, you can! Reducing the sizes and using my file or creating your own file is no issue. If you have a smaller box, you can actually design it so that all of the pieces for the top and bottom of the box are on one 12″ x 12″ card stock.
What are large paper boxes used for?
I like to make these large paper boxes as gift boxes, but they can be used for any number of uses. You can use them to store items or to help organize your home.
Did you find this tutorial on how to make a large paper box helpful?
Did you find this tutorial on how to make a large paper box helpful? Let me know in the comments below! Did you try making this craft! Let me know how it turned out!
If you liked this tutorial, check out my other paper crafts here.