I’m always looking for ways to use up my paper supplies. A few years ago I went crazy and bought a whole bunch of cardstock on sale. And then I got a whole bunch for free from some people in town, and then I got more, and more and more… and now I have piles and piles of cardstock. And I need to use it. So, instead of buying gift bags, I have started to make my own. And that is how I came to make this simple paper gift bag.
As an Amazon Associate, I earn from qualifying purchases. This post contains affiliate links. I may receive a commission if you purchase an item from one of my links. This will not change the price you pay.
Supplies Needed to make a Simple Paper Gift Bag
Simple gift bags require simple supplies, so let’s review what we need:
- Cardstock – for this project I am using 12″ x 12″ cardstock. However, if you want to make the gift bag smaller, you can reduce the size to fit on an 8.5″ x 11″ instead. Each box only requires 1 sheet of cardstock.
- Cutting machine – I used my Cricut Explore Air 2 to make this project. But you can follow the design and cut it out with scissors.
- Cutting mat – Needed to cut with a cutting machine.
- Scoring Stylus or Scoring Wheel – If you have an Air Series Cricut Machine you will need a scoring stylus, if you have a Maker Series Machine you will need a scoring wheel.
- Simple Paper Gift Bag SVG File – I have created a free file that you can get to build this project. Sign up for my newsletter below, and I’ll send you a copy.
- Glue – I use my Bearly Art Craft Glue. If you prefer, you can use double-sided tape instead.
- This project takes about 5 minutes to complete.
Ok, now that we have all the supplies that we need to make this simple paper gift bag, let’s get this project started!
How to make a Simple Paper Gift Bag
Ok, let’s jump in and start making this Simple Paper Gift Bag!
Using the Simple Paper Gift Bag SVG File

Importing the Simple Paper Gift Bag SVG File
Once you have the file saved to your computer, you will need to perform the following steps:
- Unzip the file –
- Right-click on the file with your mouse and select Unzip
- Select a location where you want the file to be saved.
- Hit Enter and your file will be unzipped and saved.
- Upload the file to Cricut Design Space.
- Select the Upload Icon on the left side of your screen.
- Select the Upload Image button.
- Select the File from the location where the file was saved from above.
- Select the file from your DS Recently Uploaded documents. There should be a green rectangle around it.
- Hit the Add to Canvas button.
Once the simple paper gift bag SVG file is on your Design Space Canvas we can make some minor modifications so that the design cuts out perfectly on our Cricut.
Making the required modifications to the Simple Paper Gift Bag SVG File
Adjusting the File Size
Select the design that has been uploaded onto your Canvas. Before you do anything, we need to verify the size. Typically when I design files, Cricut likes to change the sizes.
As we are cutting this out on 12″ x 12″ cardstock, you want to extend the height to 11.5″. That is the maximum size you can cut.
If you prefer to cut this on 8.5″ x 11″, you can make the height 10.5″.
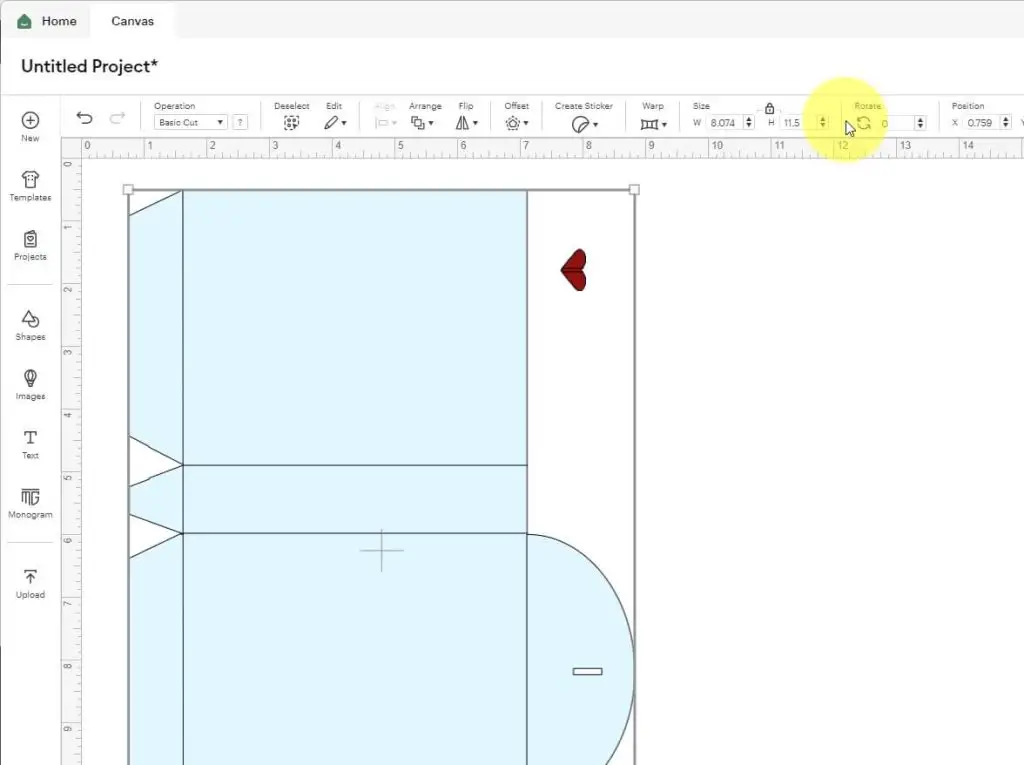
Once the size is adjusted, we can select the Ungroup button. This will allow us to work with individual items.
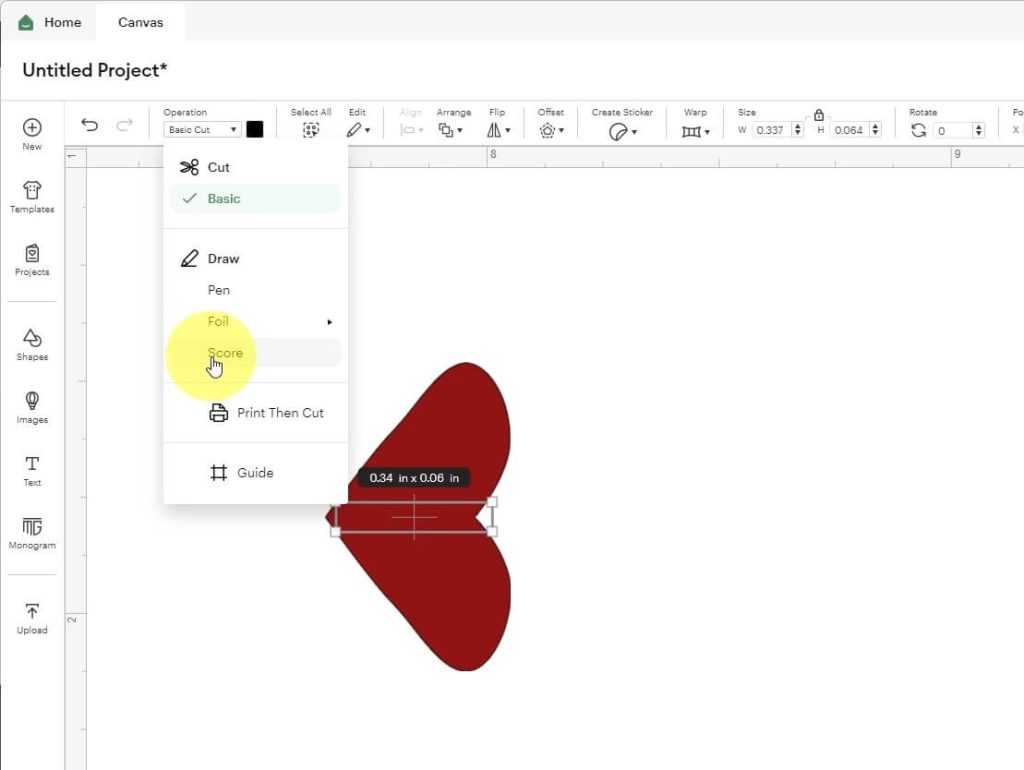
Attaching the Score Lines
In the Layers Panel on your right side, select the down arrow next to the gift box. This will open up all the elements that are part of the gift box. Select each of the cut lines (you can click and hold shift to select multiple at a time). Then, in your Operations menus, change the operation from Basic Cut to Score. Now, select all the score lines and the gift bag, and click the Attach button to attach all the items together. This will ensure that the lines are scored in the correct place on the gift bag.
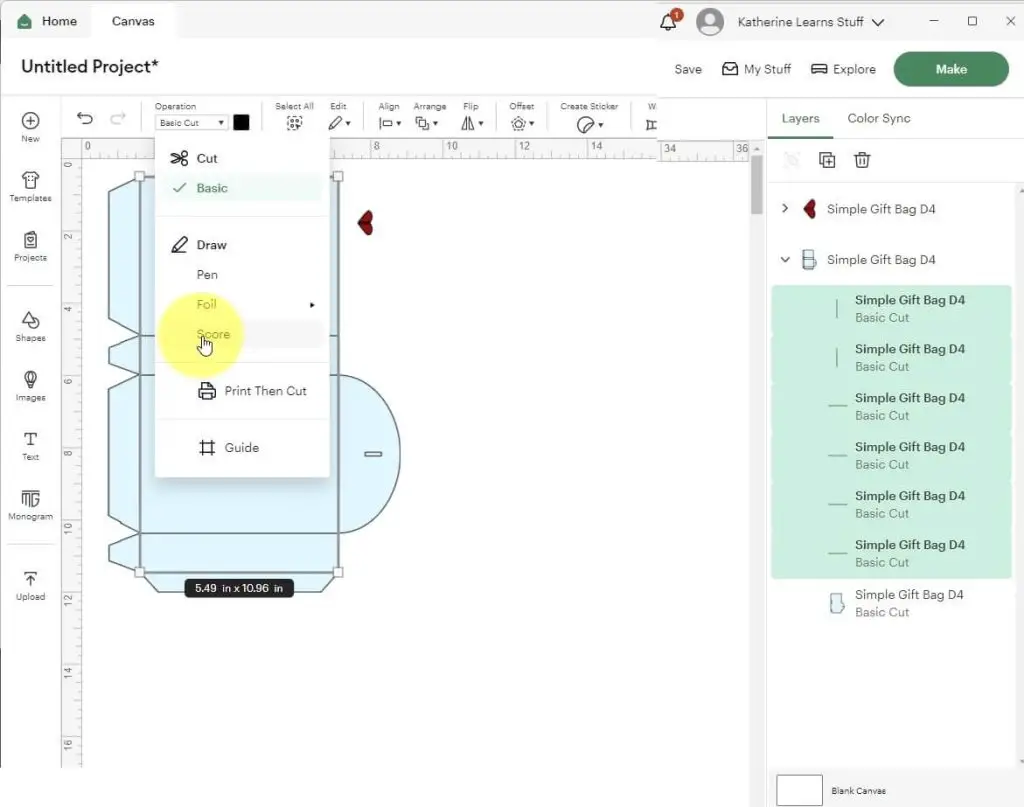
You will need to repeat the same process for the cut lines located on the heart. This little heart is used to hold the simple gift bag closed.
Now our simple gift bag is ready to be cut! All you need to do is click the Make button and cut this out with a cardstock setting.
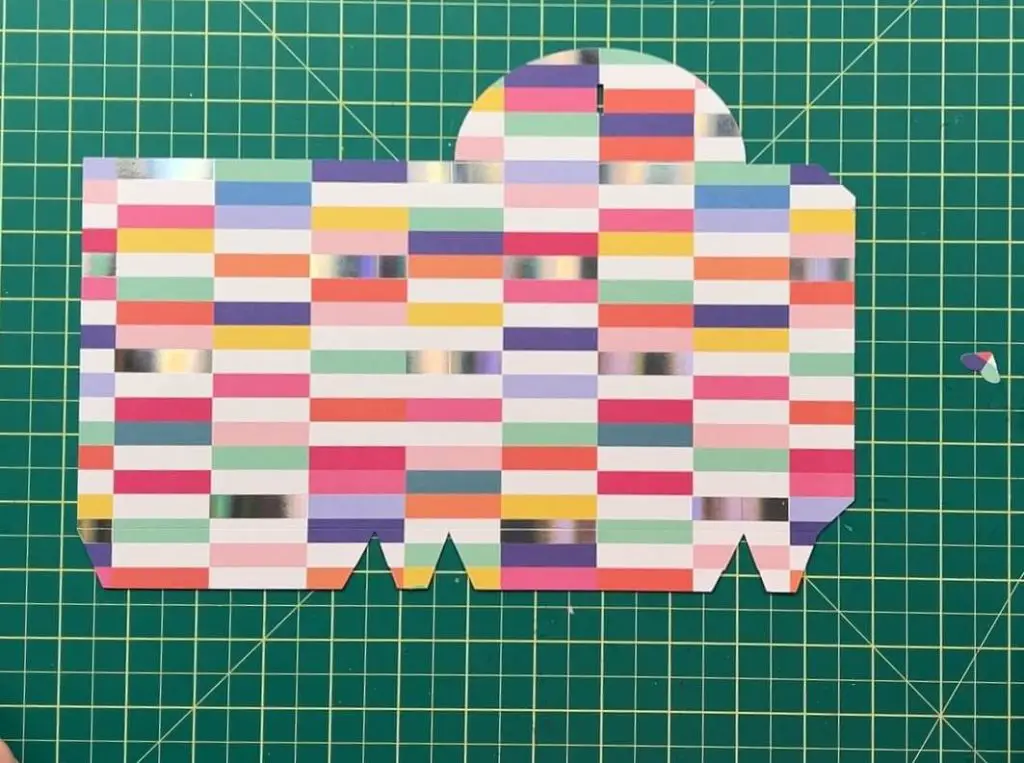
Review of the Simple Paper Gift Bag Cut Pieces
Now that we have adjusted our design and cut out the design, you should have the following:
- large cut out of the box with score lines
- 1 small heart with 2 score lines
Making the simple paper gift bag
Now it is time to get this simple paper gift bag assembled! This is a quick make, but let’s go over it anyway.
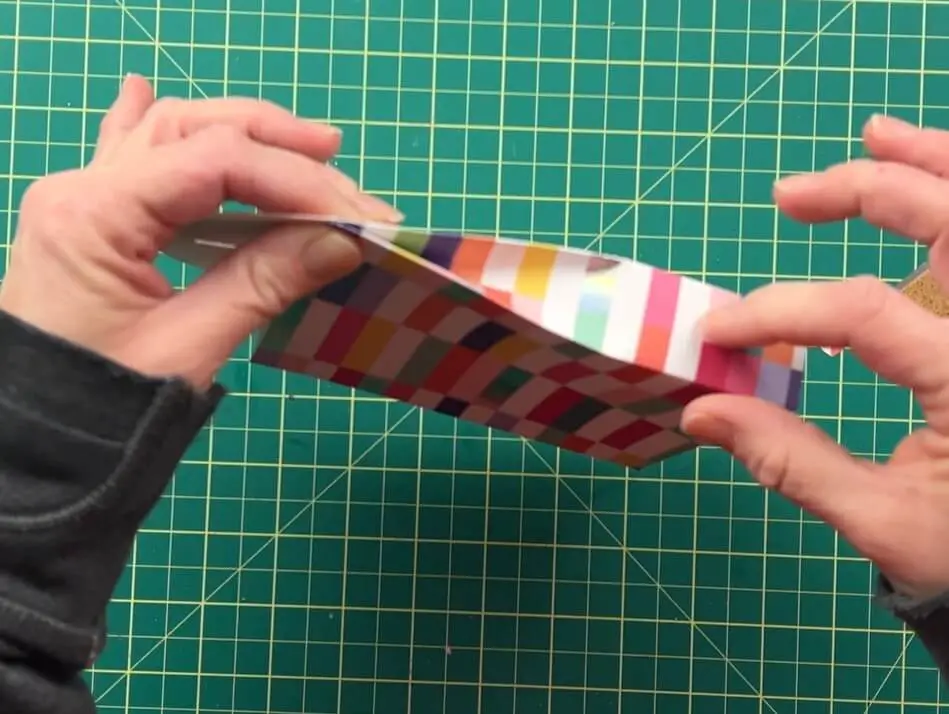
First, we want to fold all the score lines. Remember you are making a simple bag, so all the folds are in the same direction.
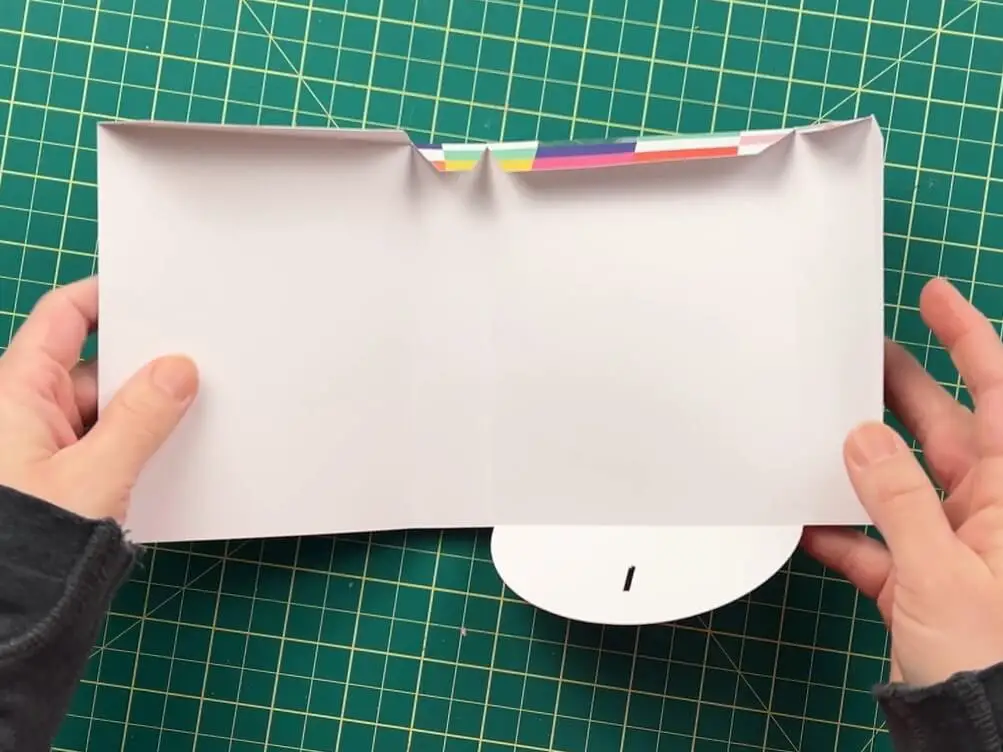
Next, we apply glue to the side tab and the bottom flaps for the bag and hold them together to glue the bag shut. I recommend starting with the side tab and then working to the bottom.
To hold the bottom tabs in place while the glue dries, I used a ruler to hold it all down.
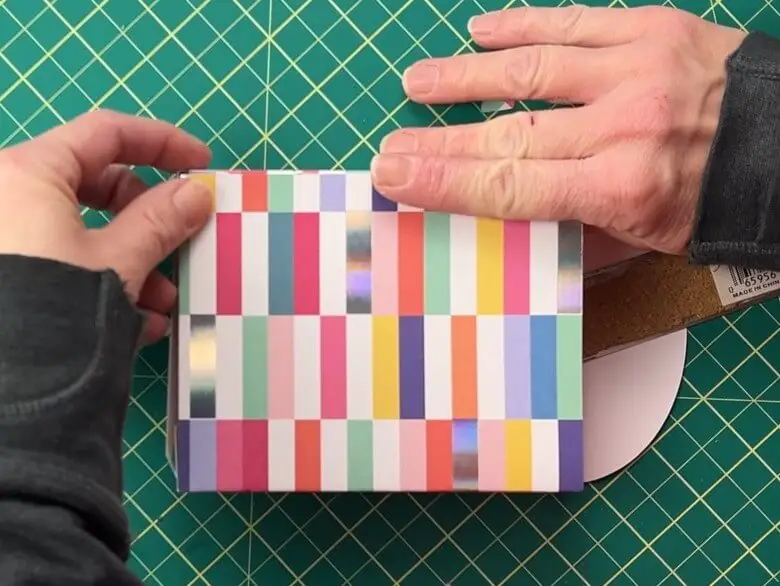
Adding Folds on the side panels
Once the gift bag is glue, we need to add a small fold or crease in the middle of the side panels. This will help the bag close.
Simply line up the outer edges of the side panels and squeeze them together. This will add a fold in the bag.
Attaching the Heart
Now for the fun part! You get to attach the heart to the bag! This heart is meant to hold the bag closed. Attaching it can be tricky, but we can make this work. First, close the top flap of the bag. Using a pencil, trace the hole onto the body of the bag. Next, fold the heart on the score lines. Apply a small amount of glue to the heart and stick it onto the pencil marking.
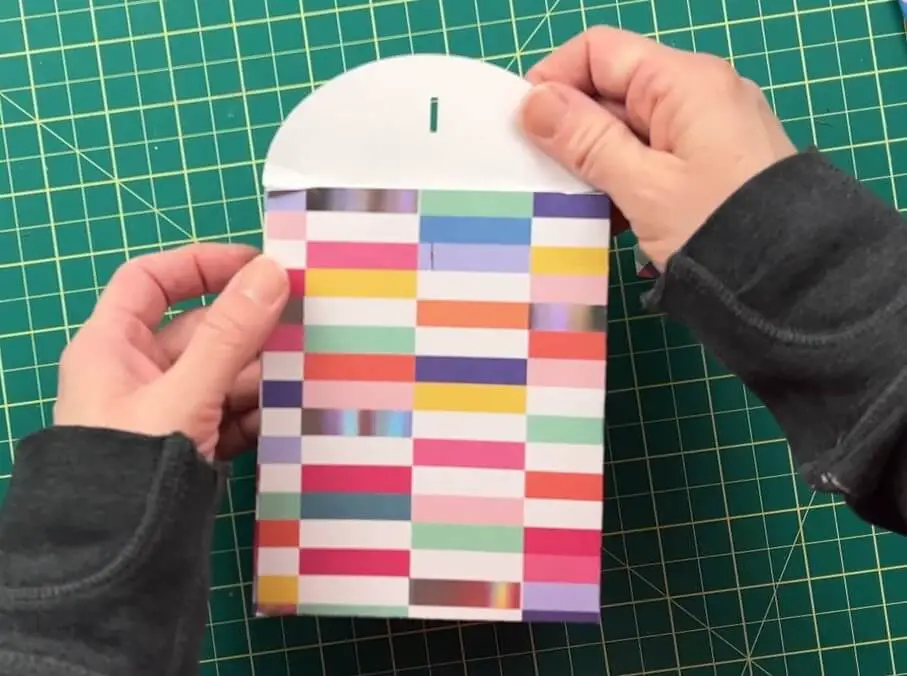
Once the glue is dried, you can close the bag and the heart will help keep it closed.
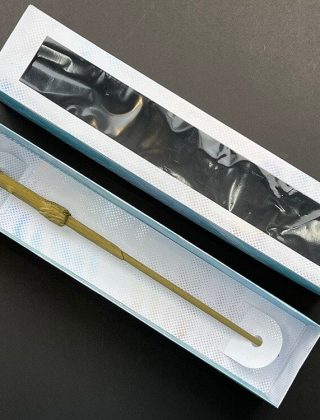
And there you have it! Your Simple Paper Gift Bag is Complete!
Things I learned while making this craft
The whole purpose of this craft was to help use up paper. And it did that, but there are a few things I learned along the way.
- Gluing this bag shut was a bit of a problem. Maybe because my head was off somewhere else when making it, but it shouldn’t have been so hard. The large and small rectangles on the box are all the same sizes, respectively, so I could have folded the box flat to glue the side flap. Then, glue the bottom flaps at one time. For some reason, I started backwards (I did this several times the hard way). So, it shouldn’t be hard to glue this bag.
- I added the heart to hold the bag close. It does that. However, it can be hard to get the heart into the slot. So you can use the heart to hold the bag closed, or you can glue it on the front flap and keep the bag closed with tape or glue.
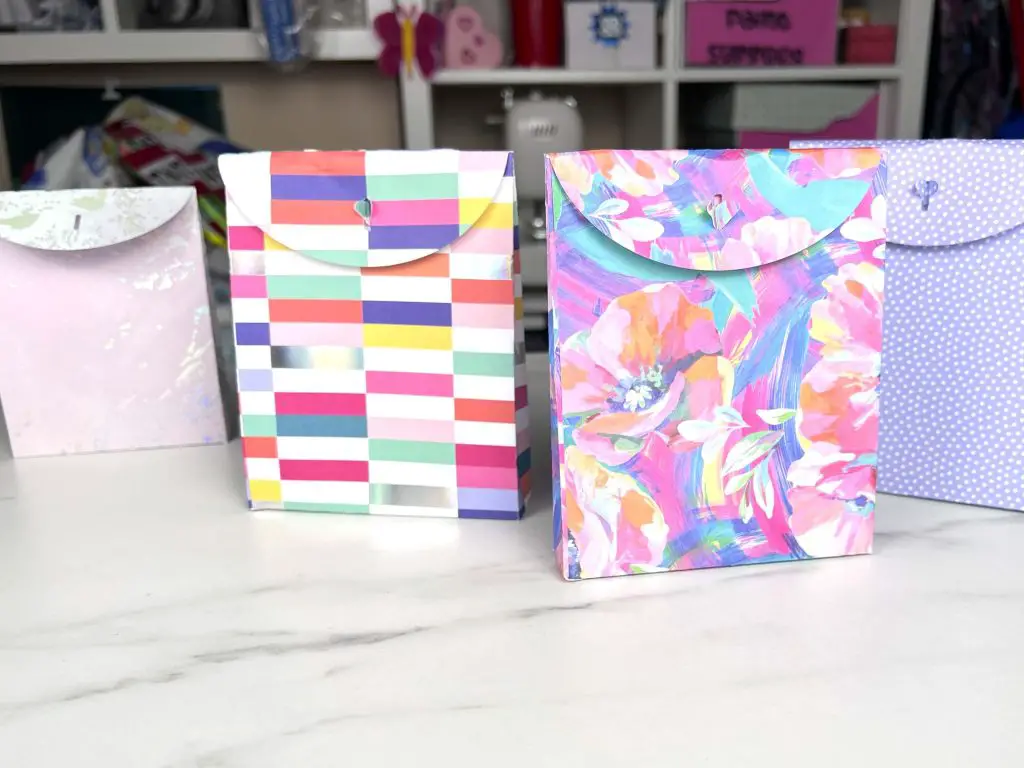
- The bag that I designed is narrow. The same concept can be used to make a thicker box by having wider rectangles on the side panels.
- I like how this bag turned out, but I think I will be making some other ones in the future that are larger and require 2 or 3 sheets of cardstock to achieve the results that I want.
Did you enjoy this paper craft?
Did you enjoy this paper craft? Let me know if you tried it out and how it turned out! If you have any suggestions on how to make this project better, please let me know!
If you enjoyed this craft, check out my other Paper Crafts Here.