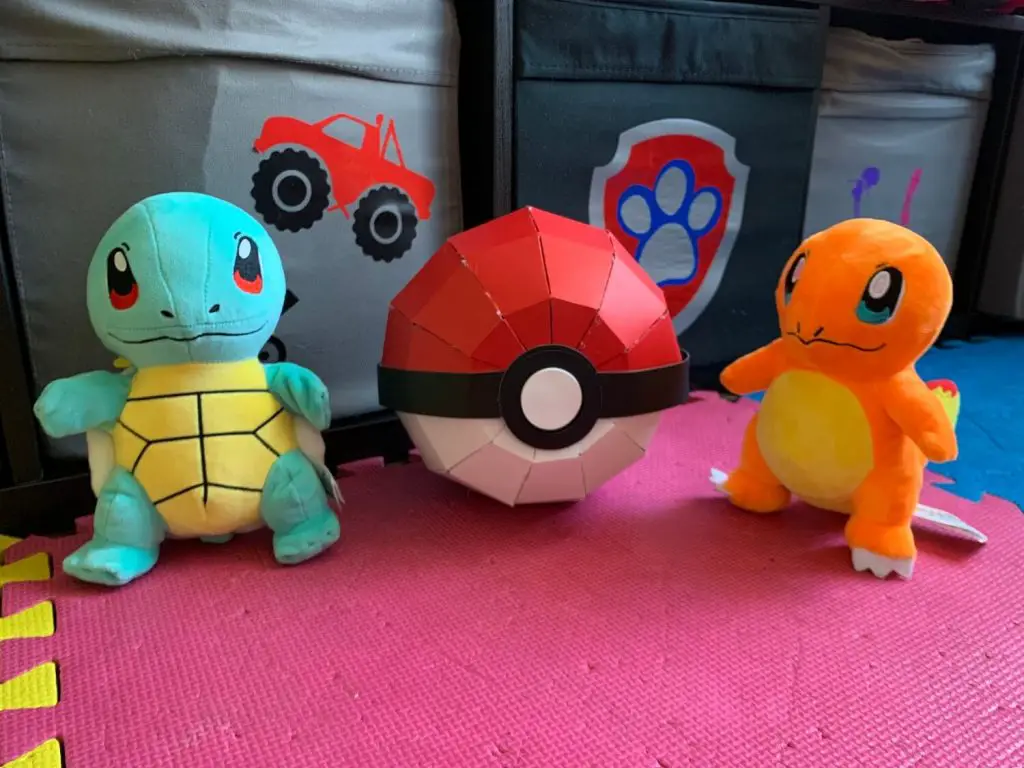
As with many of my projects, I get inspiration for my latest crafts from my children. My one daughter is currently in love with Pokeman. And since I made dragon eggs for my other daughter, it was time to make a Pokeball. I debated making paper mache but thought I would venture into new territory and make a Paper Pokeball.
As an Amazon Associate, I earn from qualifying purchases. This post contains affiliate links. I may receive a commission if you purchase an item from one of my links. This will not change the price you pay.
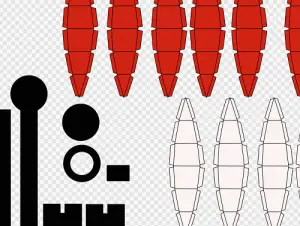
supplies needed to make a Paper Pokeball
- Red, White and Black Card Stock – depending on the size you want, you will need two 12”x12” card stock of each red and white, and one 12”x12” sheet. These are the sizes I used to make a large ball, but I could have gone as far as to use 12” x 24” to make the ball even bigger.
- Glue and Glue gun – Assembling the main body of the ball works best with a glue gun as the glue will dry faster and allow you to complete the paper Pokeball faster.
- Cutting Machine – I used my Cricut Explore Air 2, but you can use scissors instead.
- Cut file/Design – You can either create your own file or get a copy of my design in my Resources Library.

Let’s Get Started making our Paper Pokeball
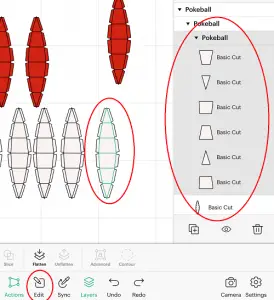
Modify the Paper Pokeball Cut File
If you are using my cut file, here are some important items to do and keep in mind.
- There are fewer white ball sections than red ball sections. This is how I designed it to help assemble the Pokeball. You do not need to make additional white sections.
- The white ball sections are also slightly smaller than the red sections. Again, this is to help with assembly.
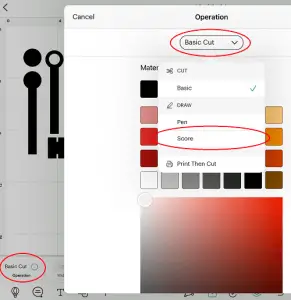
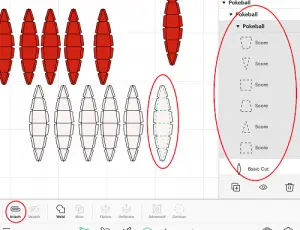
- You will need to grab all of the inner cut lines in Design Space and change them from cut to score. Otherwise, you will have a whole lot of loose pieces.
- You will need to size the Pokeball to your liking in Design Space. I recommend grabbing and expanding all of the pieces at once. This will ensure all of the pieces are sized proportionally to each other.
And now you are ready to cut the file.
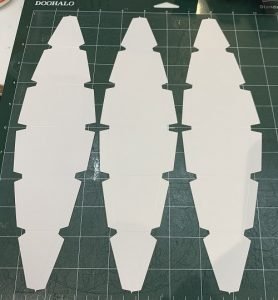
Cut all of the paper pokeball pieces
As mentioned above, I used my Cricut Explore Air 2 to cut the paper Pokeball pieces. But you can use any other cutting machine, scissors or a sharp crafting knife.
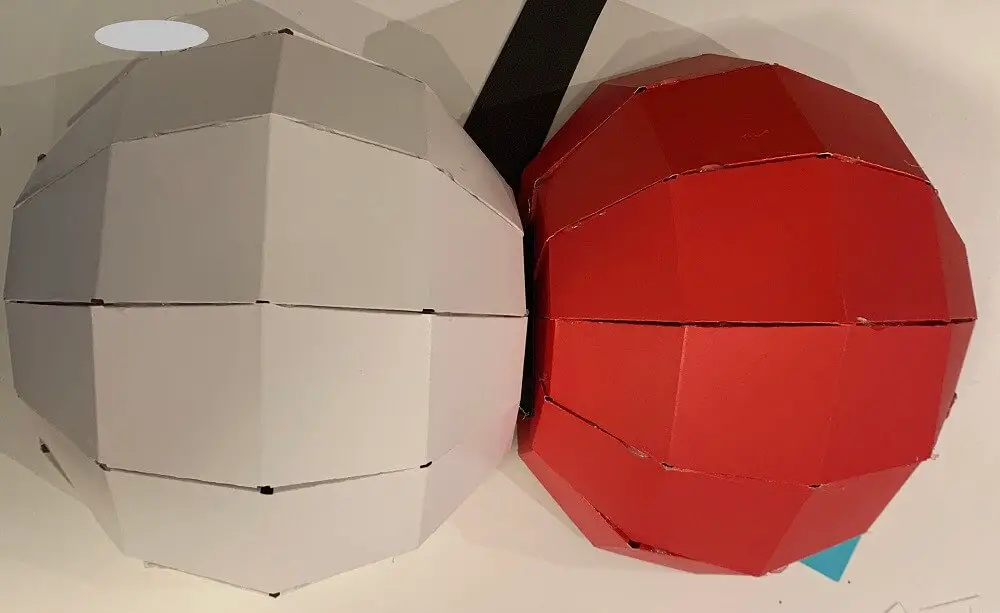
Assemble the Pokeball – Just the outer ball
Once all of the pieces are cut out, you can fold all of the score lines. This will cause all of the wedge pieces to start taking shape.
The white pieces will be glued together, and the red pieces will be glued together, but the white and red pieces are not glued together. You will have two distinct halves, one in white and one in red.

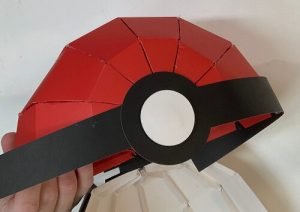
Assemble pokeball accent pieces
Once the outer ball is glued into 2 pieces, glue the black strips onto the exposed edge of the red ball. Make sure to align the circle on the front centre of the red ball and glue the strips all the way around the ball.
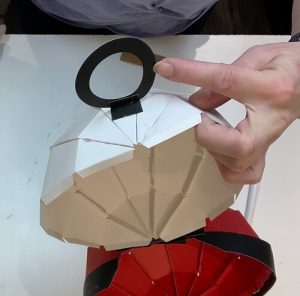
Once the black accent pieces are glued on, attach the white circle to the larger black circle. Use either foam tape or multiple white circles glued together to increase the height of the white circles. I glued 8 white circles together to give them more height, as I ran out of foam tape.
The white circles need to be elevated to hold the paper Pokeball closed.
Do not attach the black circle to the hole yet, the one that looks like a donut. This needs to wait for later.
Join the 2 pokeball halves
Once your red 1/2 Pokeball is dry with all the black accent pieces, it is time to attach the red and white halves together. Attach the red and white 1/2 Pokeballs using the black H-shaped piece. Apply glue to the outside of the red and white halves and align the inner edge of the H with the edge of the Pokeball halves. There will be a little bit of surplus material between the 2 halves, but that helps with opening/closing the ball.
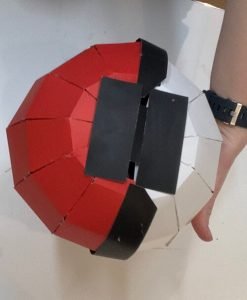
I have included 2 H sections. One for the inside and one for the outside. The inner one is optional. If you want to install the inner one, make sure to glue it while the ball is fully open. And let it dry open. If you close it and the hinge moves, it will wear faster and make it harder to open the ball.
Install the final Latch to the pokeball
Retrieve the black donut-shaped circle we set aside earlier and the little square that was cut. These pieces will be the latch to close the Pokeball. Now that the Pokeball opens and closes, we can accurately glue the black donut onto the white Pokeball. Take the little square and fold it in half. Glue one side of the folded square to the donut. You want the fold to be facing the outer edge of the circle. Once the glue is dry, you can glue the other portion of the black square onto the white Pokeball half. Make sure you glue it in the right spot and make sure you can close the ball.
You want this donut to fit over the white circle tab to fit under and hold the ball closed. You will need to be careful with this assembly so as not to glue the ball totally shut.
And that’s it! Your Paper Pokeball is Complete!

Don’t want to read about it? Want to watch a video of how to make a Pokeball instead?
Frequently Asked Questions
how long does it take to assemble a paper pokeball?
My first Pokeball took several hours, but that was trial and error based on the original design. After I had finalized the design it took about an hour to assemble, cut time not included.
How long does a paper pokeball last?
The paper Pokeballs that I have made have lasted about 6 months. The main area of issue is the hinge at the back, as it is just made out of paper. My kids are pretty good at keeping their Pokeballs safe. As an alternate option, you can use black fabric or ribbon to reinforce the paper to give the hinge more integrity.
Things I learned along the way of making a paper pokeball
- Designing a paper ball is very challenging. I was unable to find a free 3-D Sphere anywhere to use, so I had to troubleshoot this. And even though my design has a mostly 3-D Sphere, it is not 100% perfect. But as I am not using it as a ball, but as a Pokeball, it does the trick.
- Gluing a sphere together is harder than it seems. The bends and folds all need to be in the right direction when gluing otherwise, the ball will shift and not align.
- For this project, I used poster board instead of card stock. I have 80lb card stock at home, and I found it was not rigid enough, I needed something thicker as my kids were going to play with it. I just bought a large sheet of poster board at the local dollar store.
Did you find the tutorial helpful?
Did you find this tutorial on making a paper Pokeball helpful? Let me know in the comments below! Also, don’t forget to check out my other paper craft tutorials here.
cute and a great idea, what size did you put in your machine to make the Pokéball that you made? Im just wondering because you fit one of those stuffed animals in it and I was thinking about doing something like that, thanks for all the hard work that you do to make these cute files
Thanks so much! I used 12×12 cardstock to make it. Let me know if it works out for you!
Where do I find your resources for the cricut file?
You have to sign up for my newsletter to get access to my resource library. There is a sign up form at the bottom of each page, and also at the sidebar (on desktop)