I know this post may be very similar to another one I did the other day, but I purposely broke this blog post into two articles. The first one was how to calibrate your Cricut for Print Then Cut using a computer, and now this one is how to calibrate your Cricut for Print Then Cut using an iPad. Initially, I was going to make it one post. Once I started typing and editing all the images, the post was 7000 words long… and let’s be honest, no one is going to read that much. And if you are an iPad user, you may not want to, or even care about, calibrating your Cricut to your computer, and vice versa. So, this post is strictly dedicated to calibrating your Cricut to Print Then Cut using your iPad.
So, let’s get this started.
As an Amazon Associate, I earn from qualifying purchases. This post contains affiliate links. I may receive a commission if you purchase an item from one of my links. This will not change the price you pay.
Supplies needed to Calibrate your Cricut for Print Then Cut using an iPad
Not a crazy extensive list, but there are a few things needed to make this calibration work:
- An iPad – you will need a version/model that supports Cricut. The older models will no longer support it. But at the time of writing this, Cricut Design Space works on any i-product that has iOS 15+. But, you can check here to see what the current requirements are.
- A Cricut Machine – either an Explore Series or a Maker Series machine. ( I know there is a way to print and cut with a Cricut Joy, but I’m not going over that in this blog post).
- A Printer – I’m using my Epson Eco-tank 2850.
- Paper – for calibrating the Print Then Cut. I used printer paper as I have an abundance of it, and it is not expensive. I recommend you do the same. But this calibration can be done on any printer paper.
- Cutting mats
- The time needed for this can depend on how many calibrations you go through. I would put aside 30 minutes to get this done.
And that’s all we need, so let’s get calibrating!
How to Calibrate Print Then Cut
In this blog post, I am focusing on the calibration process for an iPad. You can read how to calibrate your desktop/laptop for Print Then Cut here. The process is mostly the same, but some of the screens are different, so we want to make sure we are all on the same page.
So, let’s jump in!
How to Calibrate Your Cricut for Print Then Cut using an iPad
If you have never done Print Then Cut, and you have images on your canvas set for Print Then Cut when you hit Make, Cricut Design Space should prompt you to calibrate. But this may not be the case, or you may have dismissed this in the past and never done it. So, we will review how to do it manually. If you have been prompted by DS, jump down to section Set up the printed calibration Sheet on your Cutting Mat, below.
Accessing Print Then Cut Calibration
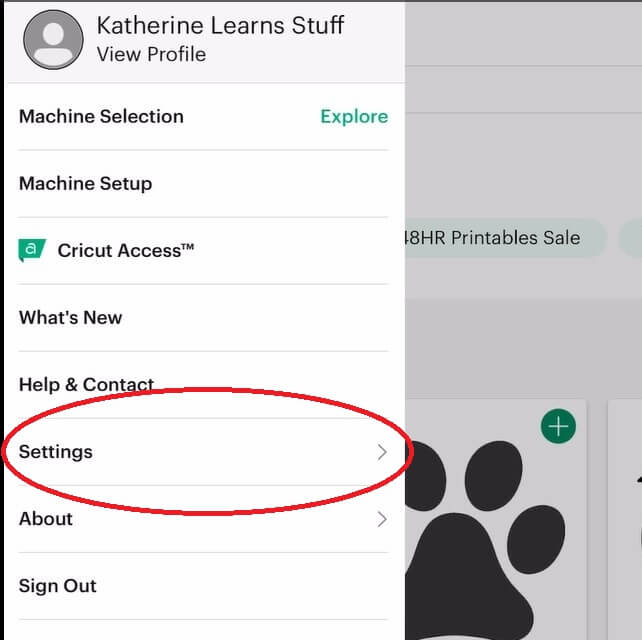
On your iPad, open up your Cricut Design Space. You will want to be on your Home Screen. At the top left corner, there are 3 horizontal lines. When you select these lines a menu will appear on the left side of your screen.
Then, select the Settings button.
Once you have selected Settings, a new menu will appear. On this menu, you will want to choose Print Then Cut Settings.
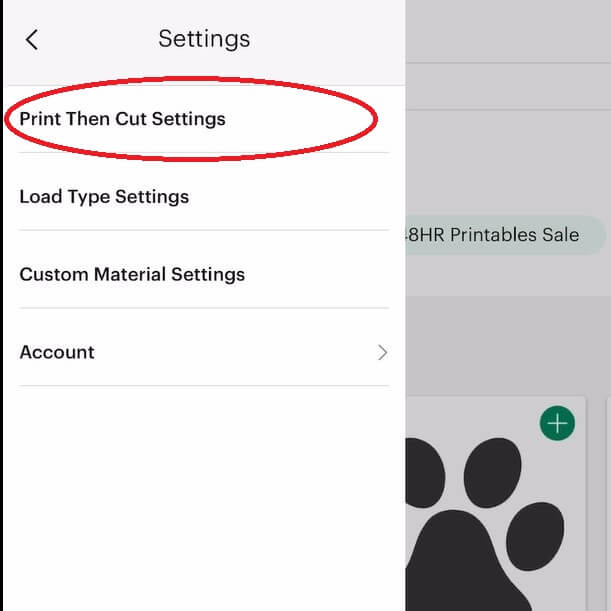
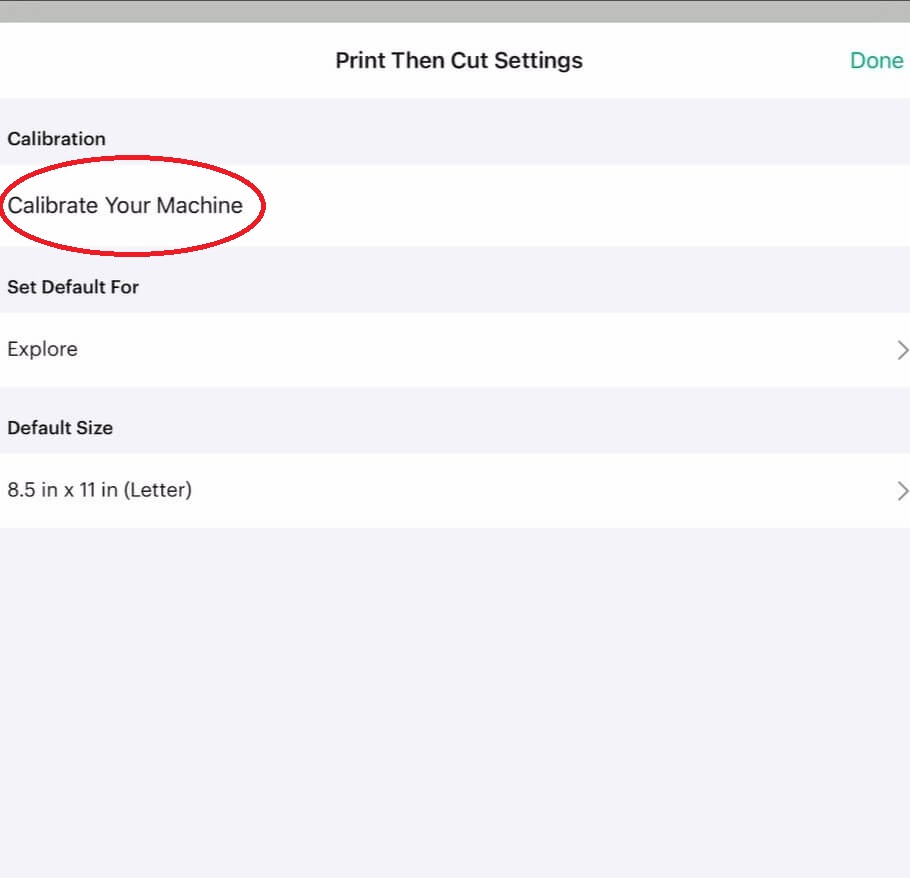
From here, a pop-up menu will appear. The first line on this menu will say – Calibration. You can now select the Calibrate your Machine line below. It is a bit deceiving as it does not look like a button, but the second line is, in fact, a button.
How to Print a Calibration Sheet
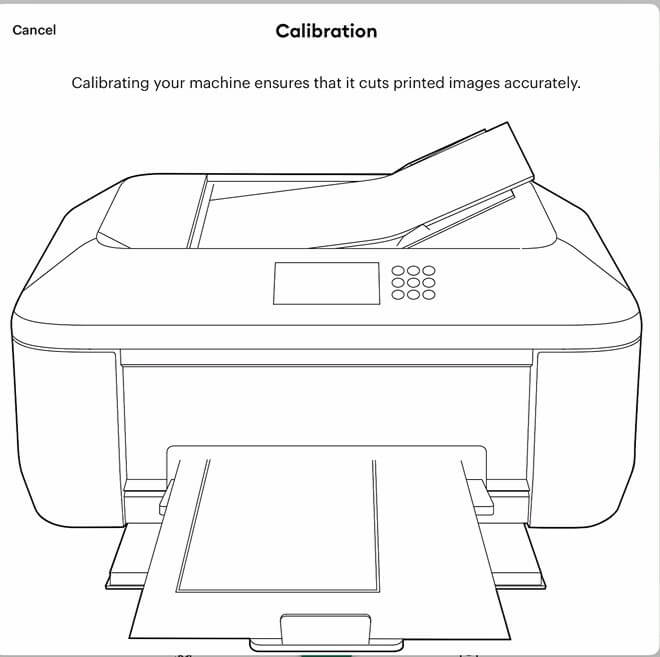
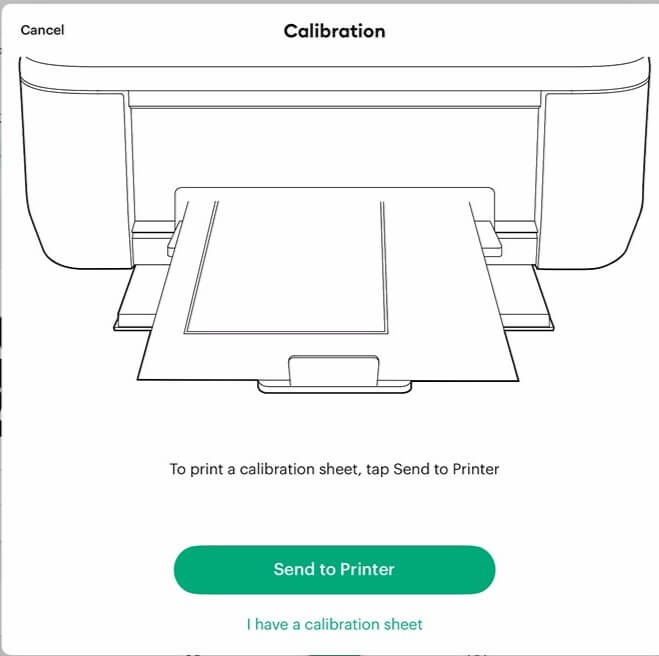
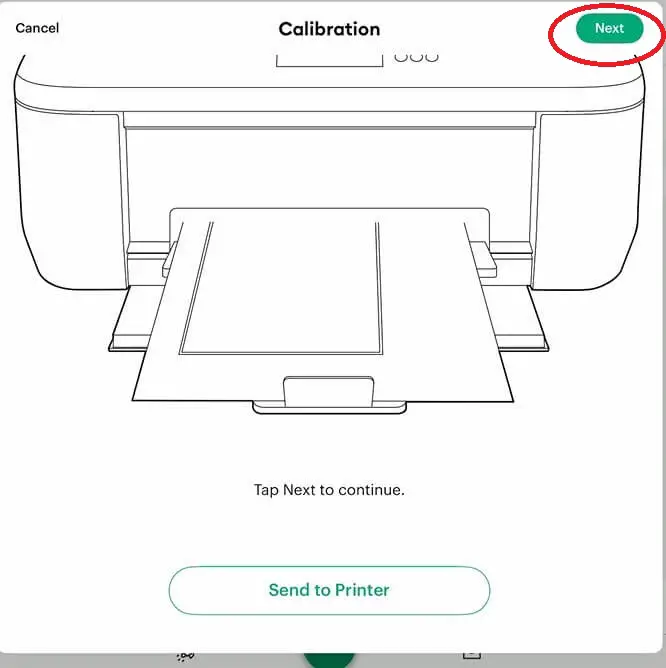
Again, a new pop-up box will appear for Calibration. Depending on how you are holding your iPad, you may need to scroll down on this menu to see the options available to you. Select the Green Send to Printer button.
You also have an option to skip printing a calibration sheet if you already have one printed.
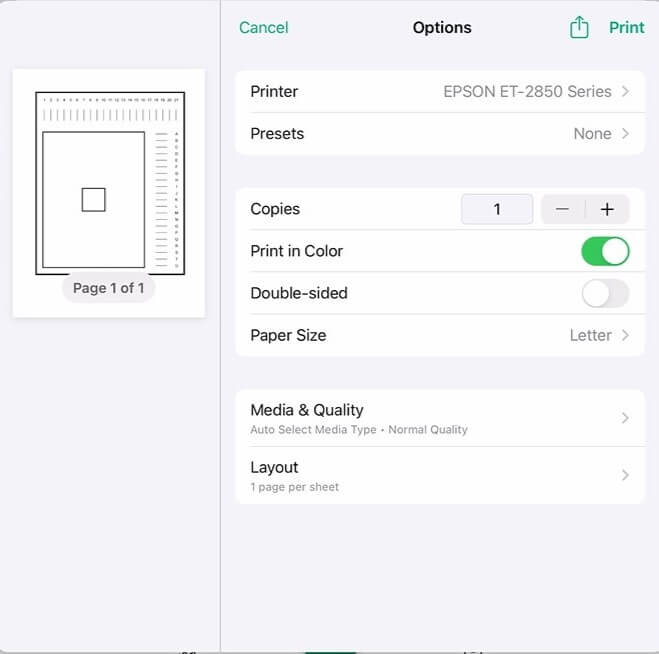
Now your printer setting pop-up menu will appear. On this menu, you can select your Printer, adjust and preset, the number of copies (I recommend printing off a few to save time later), quality and layout. Once happy with the printer selection, hit the Print Button.
This will print out a calibration sheet on your printer.
Once the sheet has been printed, click the Next button on your screen.
Set up the printed calibration Sheet on your Cutting Mat
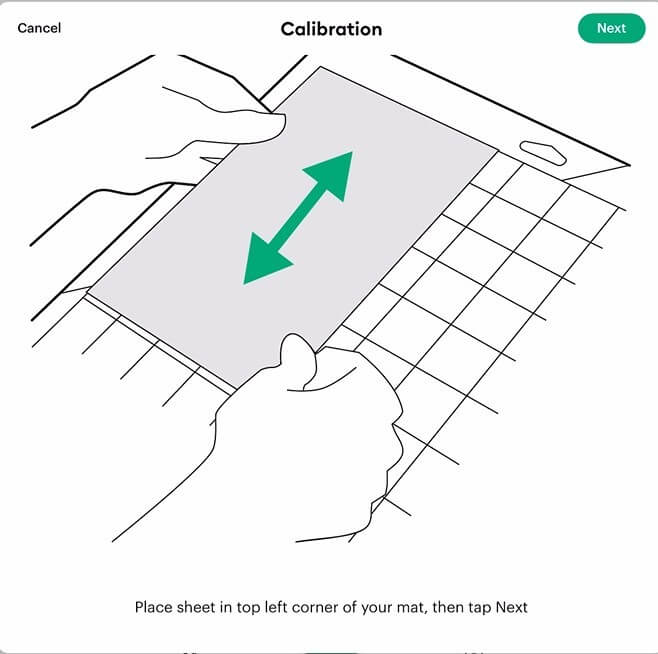
Next, take the printed sheet and place it onto your cutting mat. Once you have the paper on your cutting mat, click the Next button.
It is important to note, that when using your iPad to Print Then Cut, your Cricut Machine MUST be turned on.
Place the printed sheet onto your cutting mat. The top of the sheet needs to be located in the top left corner of your cutting mat.
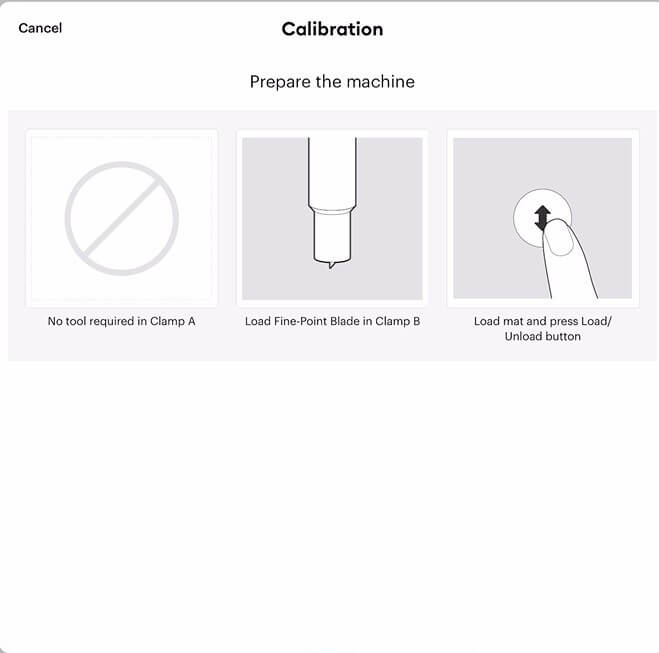
Next, the screen will change and let you know what you need in your machine – clamp A is empty, clamp B with a fine point blade, and you are ready to load the mat into your machine.
Starting the Calibration Process
To start the calibration process, load the mat into your machine by pushing the flashing up-down arrow button. Once you have done this, DS will prompt you to hit the flashing C Cricut GO button on your machine. This will start the calibration, with your Cricut looking for the registration marks.
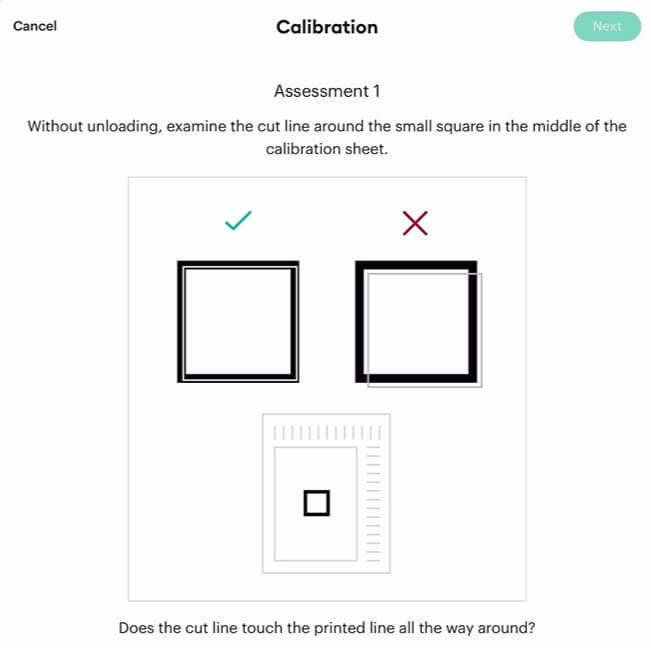
The first cut will cut out the small box in the center of the calibration sheet.
Make sure you do not pull your mat out of the machine. It needs to stay in for this to work.
When the cut is complete, DS will prompt you to tell it how the cut turned out. You have the option to select:
- Yes Proceed with Fine Calibrations, or
- No On to a Basic Calibration.
Depending on how you are holding your iPad, these buttons may be below your viewing screen. So, you may need to scroll down on the screen to see these options.
Depending on your answer, you will proceed to either a fine calibration or a basic calibration. And then select the Green Next button at the top right corner of your pop-up menu.
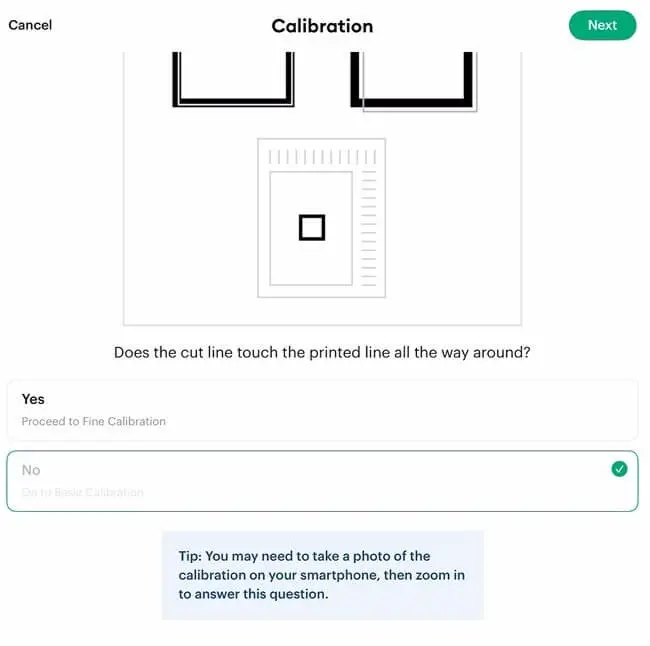
In my case, I was not happy with the lines, so I selected No, On to Basic Calibration.
Performing a Basic Calibration
Once you select the Next button after selecting No, the machine will pull your mat in again and start cutting.
Now, your Cricut will start to cut along the lines at the top and the lines at the side of the paper.
Once the cut is complete, make sure not to remove your cut mat from the machine.
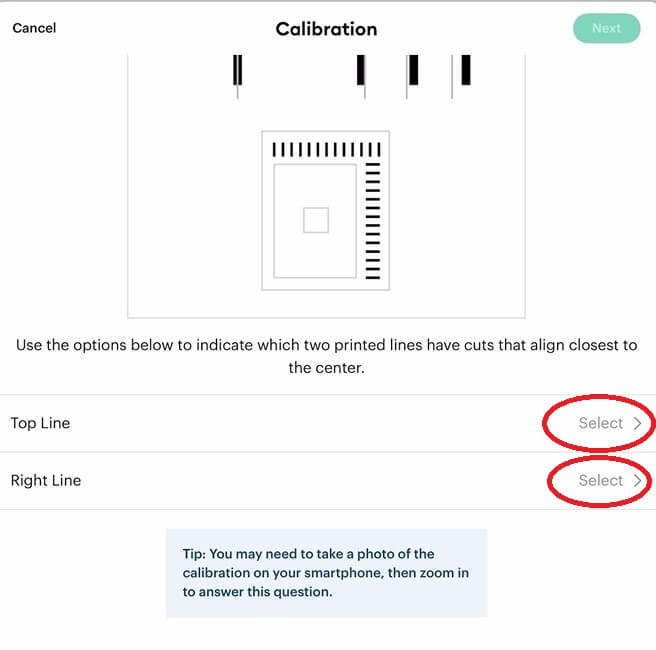
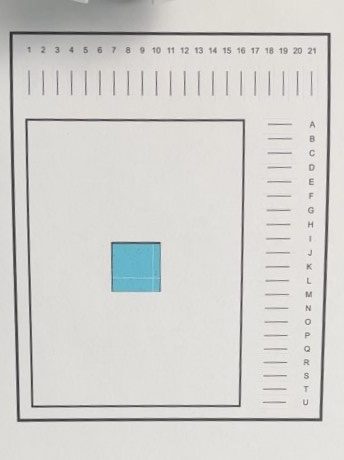
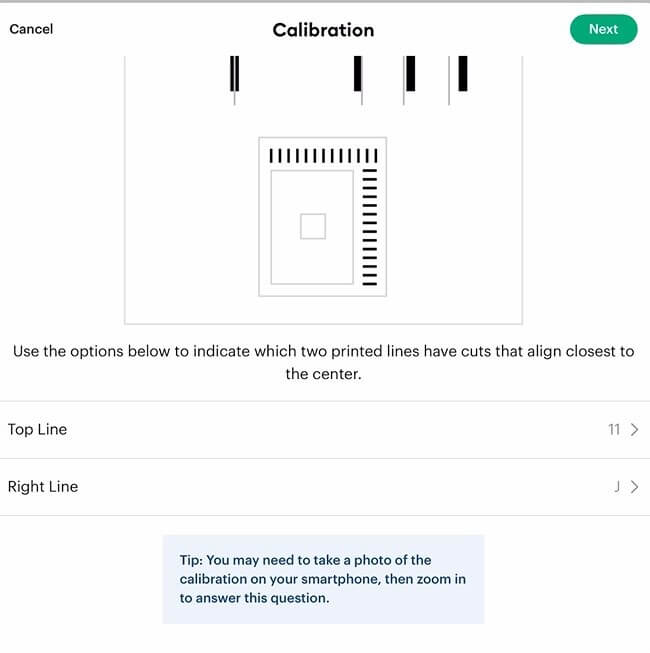
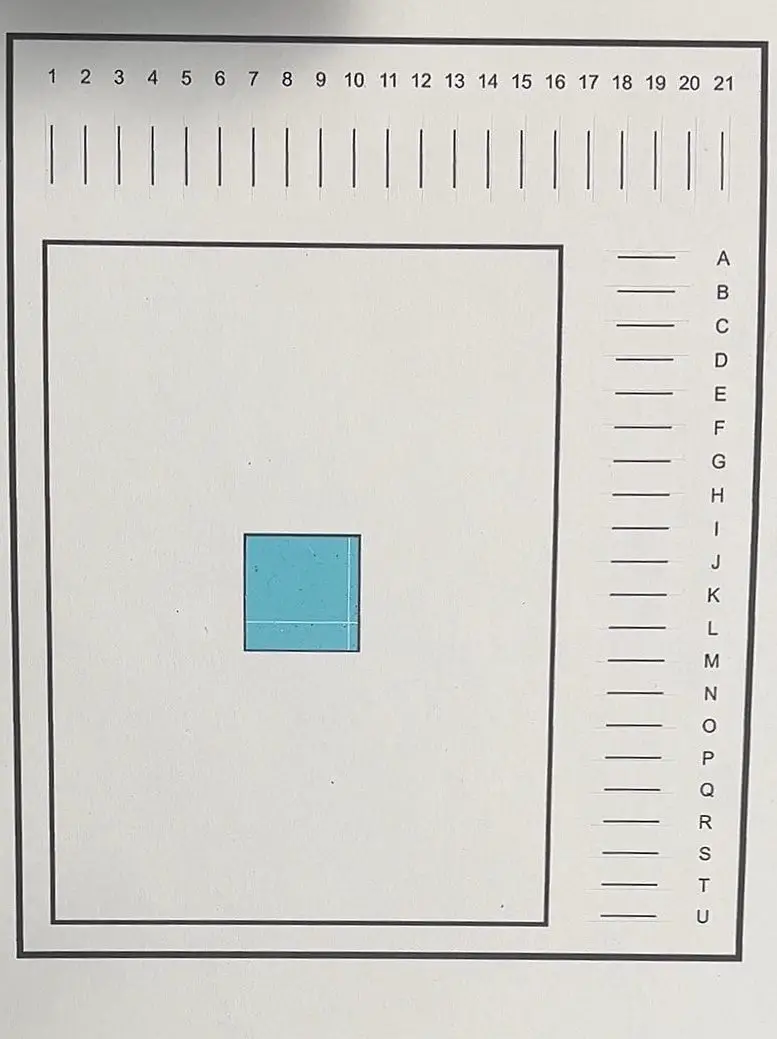
Each cut line will be in a different spot relative to the printed line. You will need to inspect the lines and tell Design Space, which line, from 1- 21 across the top, and lines A-U along the right side of the page, is closest to the printed lines. On my cut, the lines that lined up best were 11 and J.
Again you will need to scroll down on this menu, to find the drop-down menus to select your closest matches. Select the ones that closest match your cuts and select the Next button.
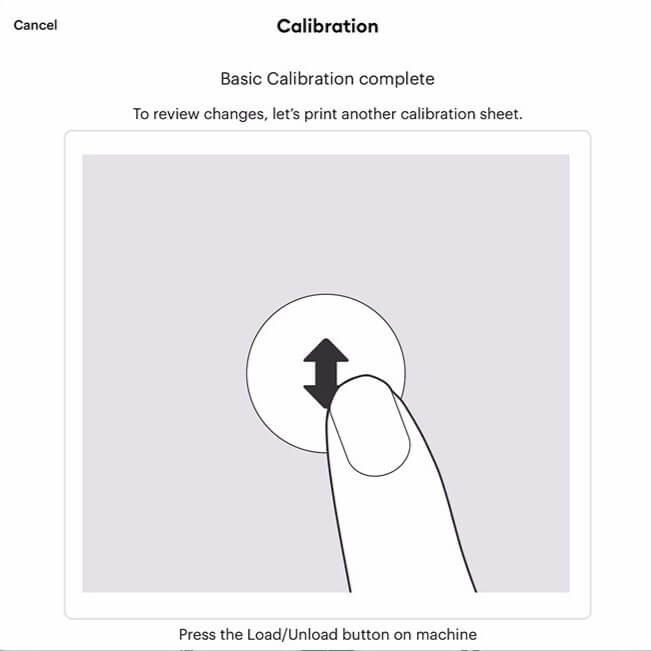
Now your basic calibration is complete. You will need to reprint a calibration sheet to continue. This process is the same as we mentioned above.
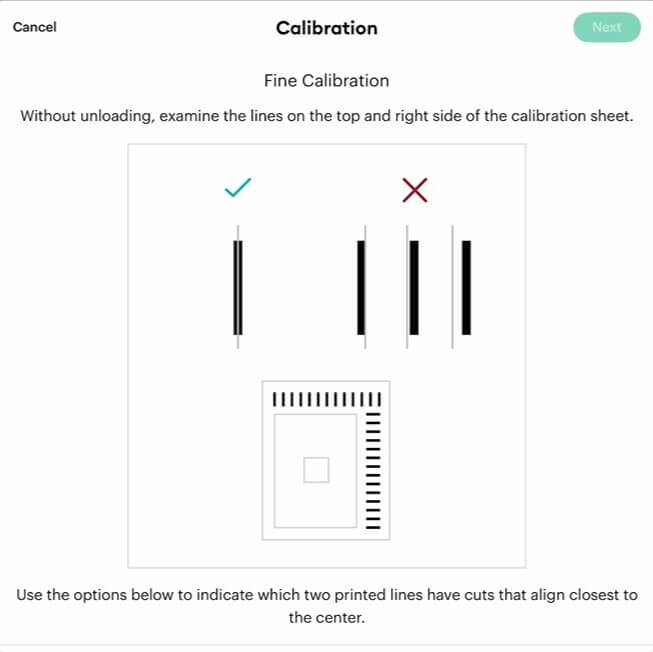
Performing a Fine Calibration
Once you have your next calibration sheet printed and put onto your mat, your machine will start the fine calibration process.
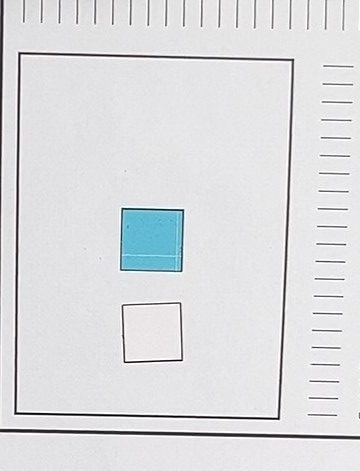
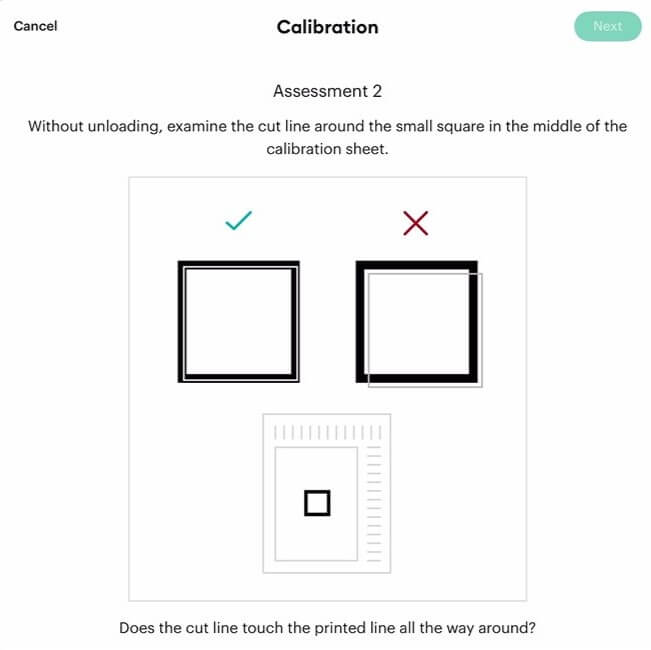
The machine will cut the small box again. Inspect the box that was cut out. If you are happy with the location of the cut mark, select Yes, Proceed with Fine Calibration. If you are unhappy with the cut, select No, and repeat the above steps.
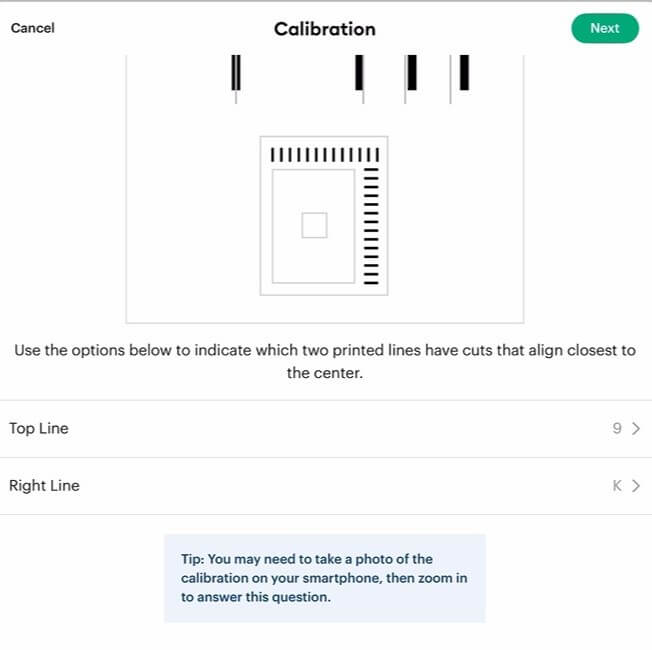
Your machine will again start to cut the vertical and horizontal lines on the printed calibration sheet. You will need to inspect the lines and tell Design Space, which line, from 1- 21 across the top, and lines A-U along the right side of the page, is closest to the printed lines. On my cut, the lines that lined up best were 9 and K. Select the lines that closest match your cuts and select the Next button.
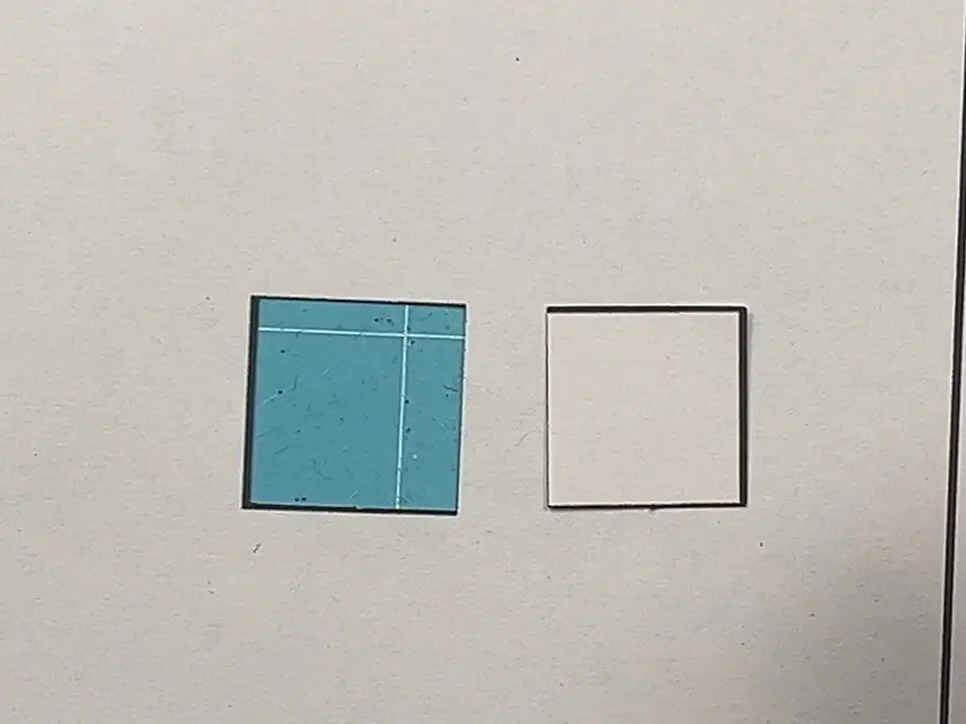
Now the machine will cut the large box on your sheet. Compare the cut box with the prompts on the screen. Are you satisfied with the cut? Select either:
- Yes, Cut is close enough to center, or
- No, I’d like to do another calibration.
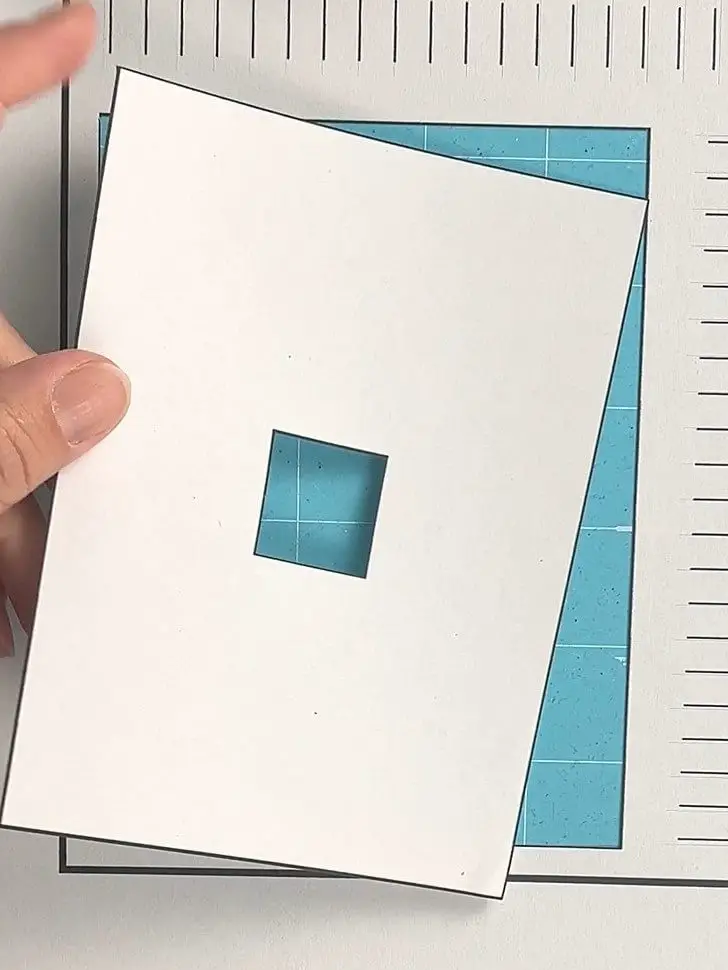
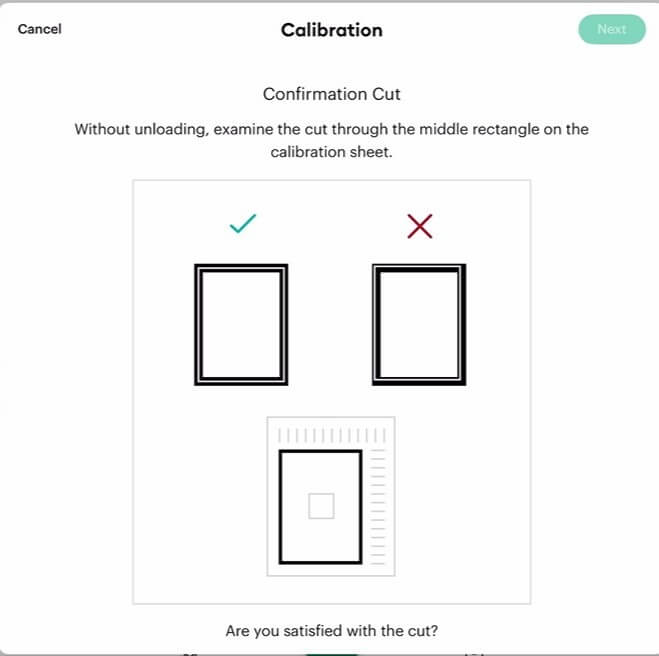
If you select Yes, your calibration will be complete. If you choose No, you will be prompted to print another calibration sheet and continue the calibration process.
For my cuts, I was happy with the outcome and selected Yes.
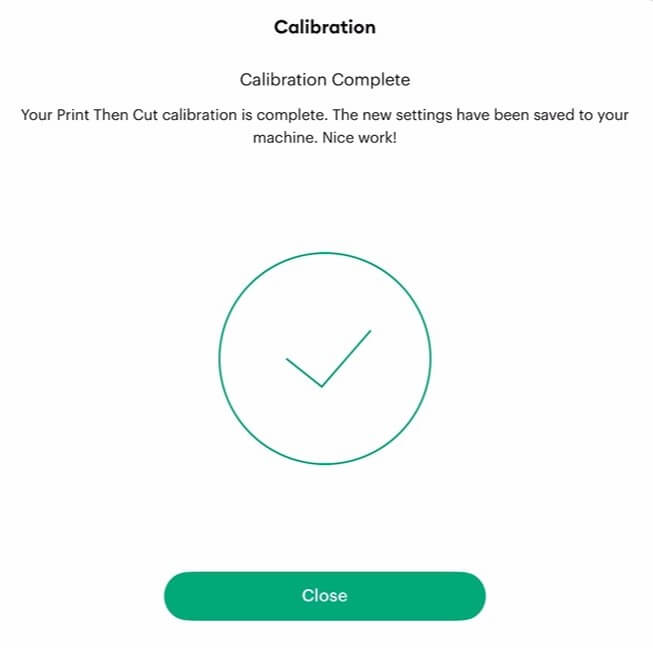
And there you have it! You have successfully Calibrated your iPad for Print then Cut!.
Things I learned about calibrating for Print then Cut
It has only been a while since I started doing Print Then Cut. I didn’t have a printer, so I never needed to learn. But I saw all the cool things that could be done, and finally splurged and bought a printer. And, as with all new things, there were things to learn, so here is what I learned.
- I mainly use my iPad when I’m using my Cricut. There are lots of reasons, but portability is a big one. I can do the design work on my iPad in the kitchen, and then when I have time I can pop into my workshop and Print Then Cut my projects. So having my iPad calibrated to my Cricut is key.
- There are some projects that I find harder to do on my iPad, especially when I’m trying to maximize my Print Then Cut. For those alignments, I’ll save the files in the cloud, then work on my computer and then switch back to my iPad to cut them out. I’ll do this to avoid wasting time recalibrating.
- If you use multiple things to connect to your Cricut, like different printers, tablets, phones, laptops and desktops, each one needs to have the Cricut recalibrated. Each item will have a slightly different output with your Cricut. Sometimes you may be lucky enough to have it work perfectly or almost perfectly while switching, but not always.
- When performing a calibration, when initially prompted to print the calibration sheet, I will normally print about 5 or 6 sheets so that I have them handy and ready for the next steps if the calibration process names multiple iterations.
- Calibration can take a long time. There were several times when I needed to go through the calibration processes 4 to 5 times before getting everything right. So be prepared to take the time you need for a proper calibration.
- Sometimes, even if you have calibrated your machines, the project you are working on does not Print Then Cut as it should. This happens… and sadly, I don’t have a solution. Sometimes turning everything on and off works to clean up the issue. Sometimes starting the project from scratch helps. And sadly, sometimes it just won’t work. In those cases, I suggest you step away from the machine, take a breath and try again later, or try another project instead. As an avid Cricut user, I know that sometimes DS just doesn’t work. And it doesn’t matter what you do.
Frequently Asked Questions about Print then Cut
What is a Basic Calibration with Cricut?
A basic calibration is the first part of the calibration process. This is when your Cricut machine is working to ensure that the lines are being cut and close to where they should be.
What is a fine calibration with Cricut?
A fine calibration is when you tune your machine so the cuts line up perfectly.
What if I select Fine Calibration instead of Basic Calibration? or Vise Versa?
If you are scared you selected the wrong calibration type, do not fear! While going through the process of the basic calibration or the fine calibration, the prompts within DS will keep working toward a full calibration. And as you follow the steps, your machine will get more tuned. But if you select fine instead of basic, or basic instead of fine, you will notice at the end of the process that your machine is either cutting perfectly or not. If it is not, you will simply keep following the prompts until your machine is tuned.
So, there is no “wrong” selection. The worst that will happen is that you print off a few more pages to finish the calibration process.
Did you enjoy this tutorial on How to Calibrate your Cricut for Print Then Cut using an IPad?
Did you enjoy this tutorial on how to calibrate your Cricut for Print Then Cut using an iPad?? Let me know if you found the information helpful. Also, let me know if you had any issues calibrating your Cricut for Print Then Cut.
If you enjoyed this blog post on calibrating your Cricut, check out:
- Tips and Tricks for Crafting and Cricut
- How to Calibrate Print Then Cut Using a Computer
- How to Maximize Print Then Cut Size with Cricut