I have wanted to make a wine glass cozy for the longest time. But like with most sewing projects, I have been putting it off. But now that I’m working on sewing projects, this one was a must-make. And I have to say, I love how they turned out! This is a quick sewing project, great for beginners and now my wine glasses are nice and cozy! And as an added bonus, since I made them all different colors, I no longer need to add charms to my wine glasses! So, let’s make some a DIY wine glass cozy!
As an Amazon Associate, I earn from qualifying purchases. This post contains affiliate links. I may receive a commission if you purchase an item from one of my links. This will not change the price you pay.
Supplies Needed to make a DIY wine glass cozy
Let’s start with a review of what supplies we need to make this DIY wine glass cozy:
- Sewing machine – Ideally you want a sewing machine. Currently, I can’t recommend one as I just broke mine and am hunting for a new one.
- Fabric – You can use new or scrap fabric. I will go over the sizing below.
- Thread – ideally you want thread that matches your fabric, buy any color will work.
- Interfacing – I have the old-school interfacing that you sew in, but you can use iron-on interfacing.
- 10 – 15 minutes to complete this project. If you’re good at sewing and cutting fabric, it can take less time.
How to Make DIY wine glass cozy
Measuring your Wine glass for Fabric size
Not all wine glasses are the same. Some have longer stems, some have larger bases, and some are a combination of who knows what. And that means, I can’t give you exact dimensions for your wine glass coater. So, instead, we will walk you through how to measure your wine glass to get the perfect fit.
Place your wing glass down on your work table. Using a ruler, or a cutting mat with dimension lines on it, measure the diameter of the base of the wine glass.
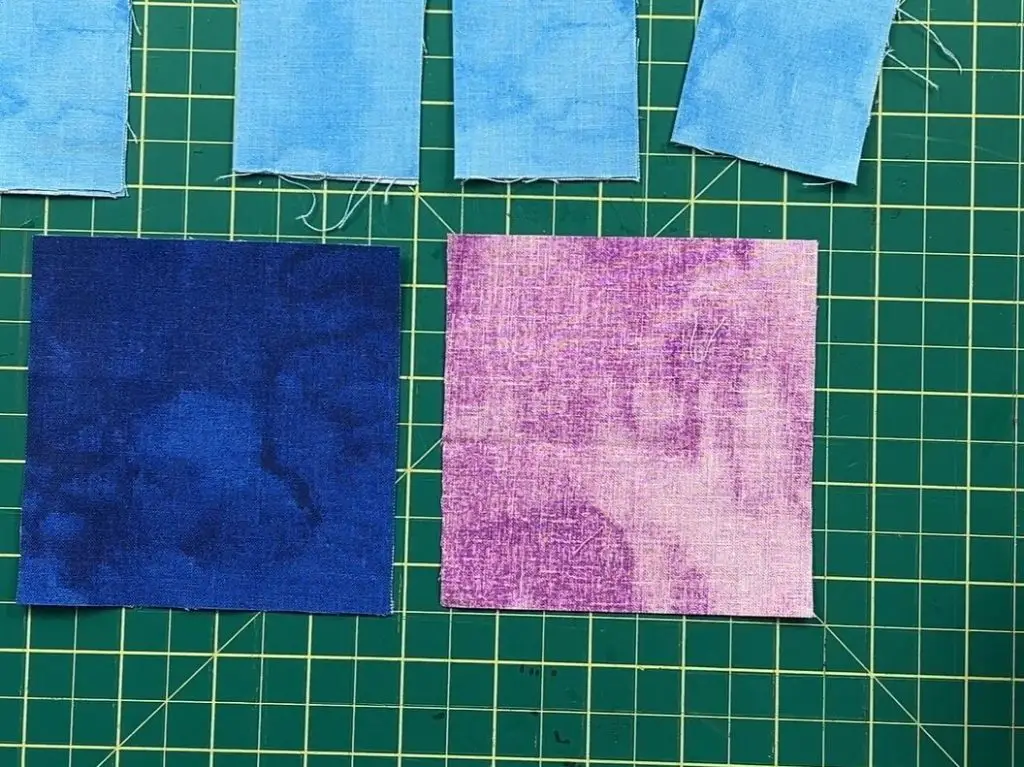
In my case, the base is 3″ wide.
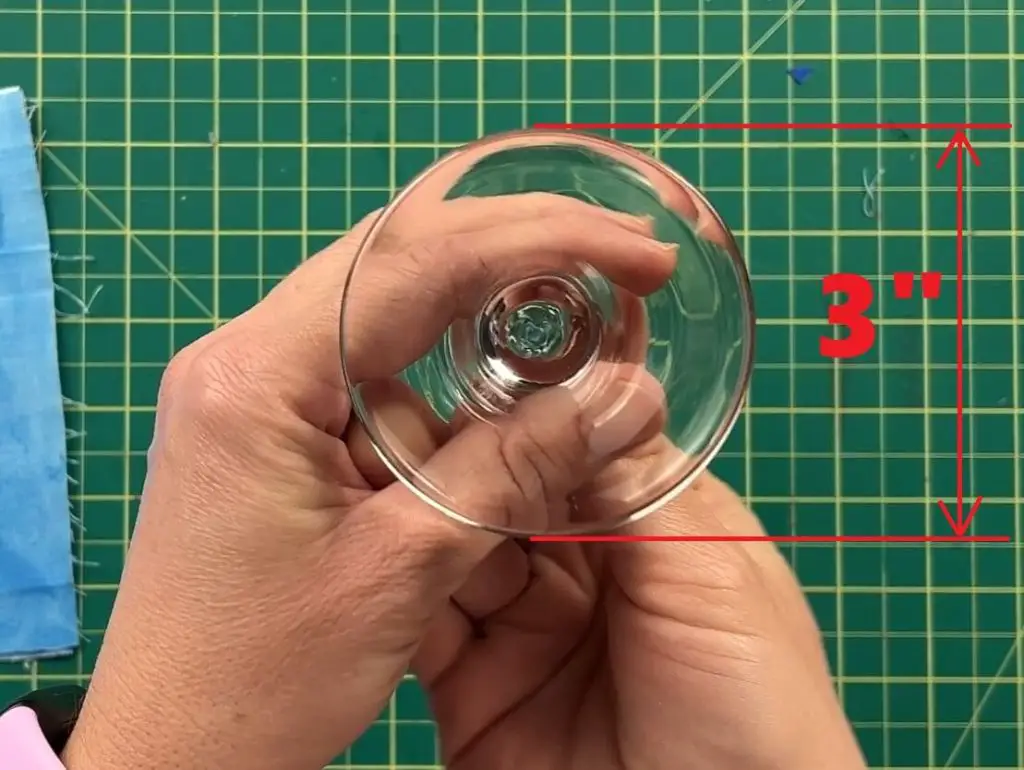
Add an extra inch for the fabric. This will provide enough fabric for sewing and flipping. So, in my case, I need a 4″x4″ of fabric for each square.
If you are not fantastic at sewing, you can go 1.5″ larger than the base or even 2″ larger. This will give you ample room to sew and still have the wine glass cozy fit your wine glass.
Fabric Require to Make Wine Glass Cozy
Now that we know what size fabric sheets we need, we get to cut our fabric.
For this, you will need:
- 6 squares of fabric – in my case they will be 4″ x 4″ each.
- 1 square for the bottom
- 1 square for the inside of the coaster
- 4 squares for the top folds of the coaster
- 1 square of interfacing – also 4″ x 4″
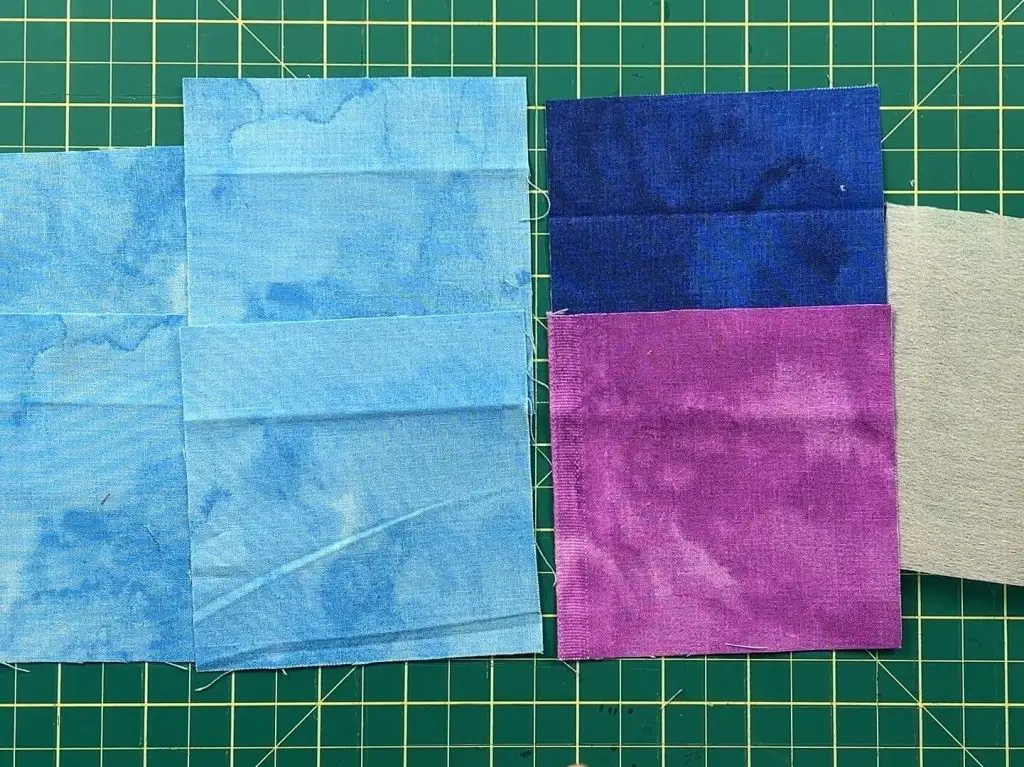
When selecting the color for your fabric, I suggest you use 4 squares of one color for the top and change the color of these 4 pieces of each cozy. This way everyone can have a different color on their wine glass.
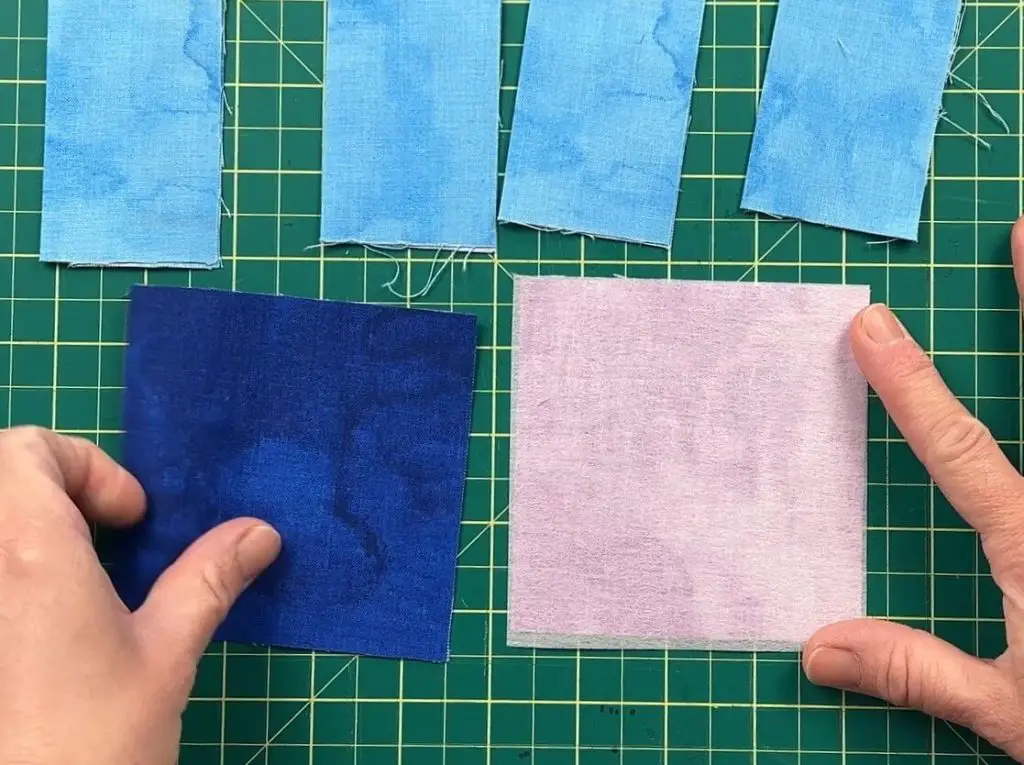
Iron and Fold your Wine Glass Cozy Squares
Now that we have our fabric cut and ready, it is time to prepare it to make this wine glass cozy.
The 2 squares used for the bottom and inside of the cozy need to be ironed flat.
The 4 squares that will be used for the top, each one is to be folded in half and ironed. This will make assembly and sewing easier.

Assembling the Wine Glass Coaster
The assembly of this coaster is a bit different than for normal sewing projects. Normally we sew inside out and flip everything at the end, but since this project requires us to flip anyway, we get to skip one flip. Bear with me, this will make sense in a moment.
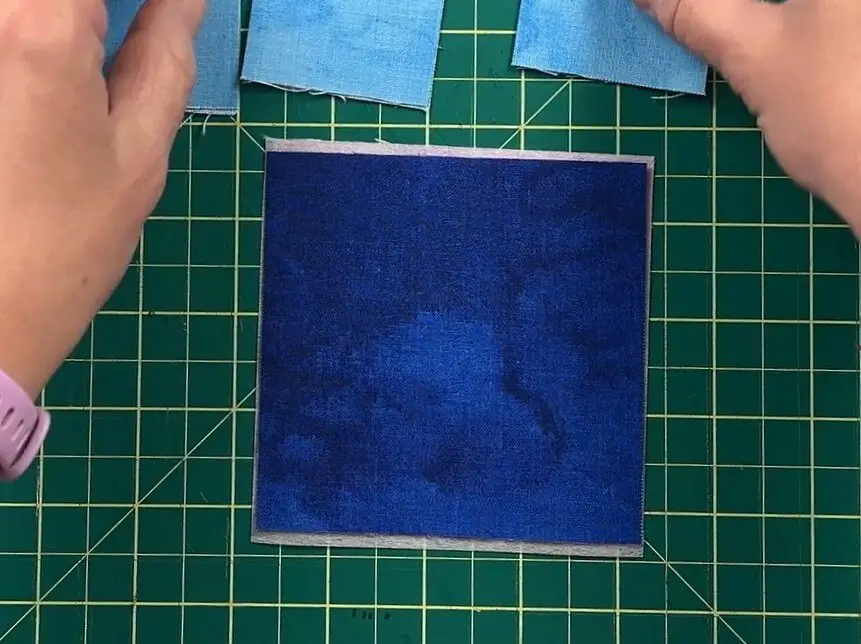
Place your first piece of fabric face down on your workstation. This fabric is the piece that will be inside the coaster.
Next, please the interfacing on top.
This is followed by the next piece of flat fabric, which will be the bottom of the coaster when the project is complete.
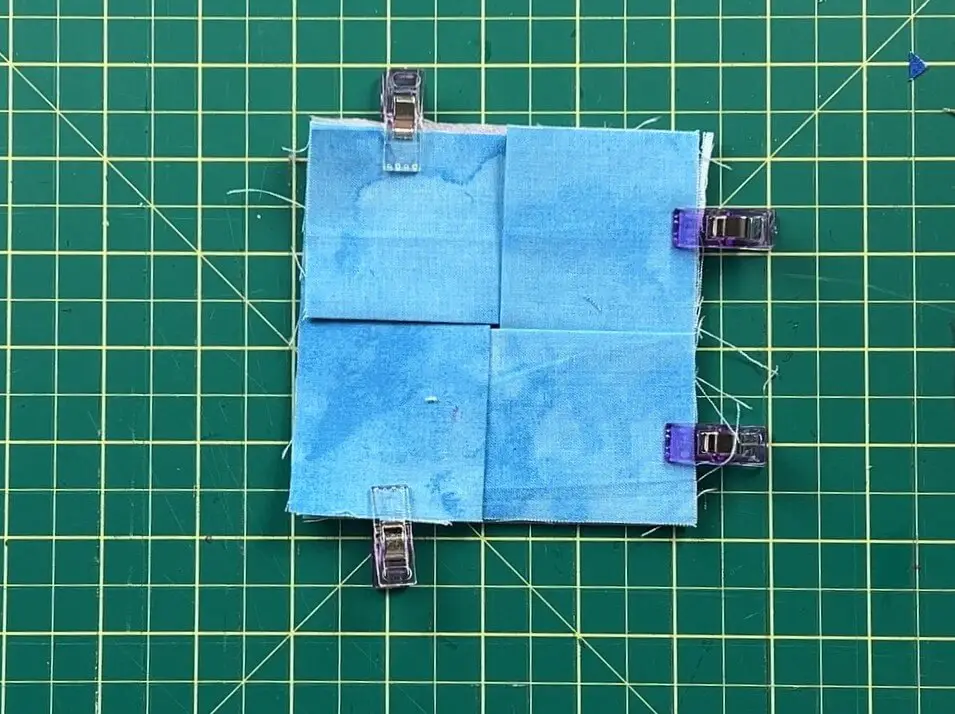
Finally, you want to place each of the 4 folded pieces of fabric on top of the bottom square. Align the open end with the edge of one side, rotating each piece to a different side. Continue placing each of the 4 pieces on top. Finally, you want to align these last 4 pieces so that one half of the piece is on top of the next, and under the previous. This will give you an over-under for each of the 4 pieces.
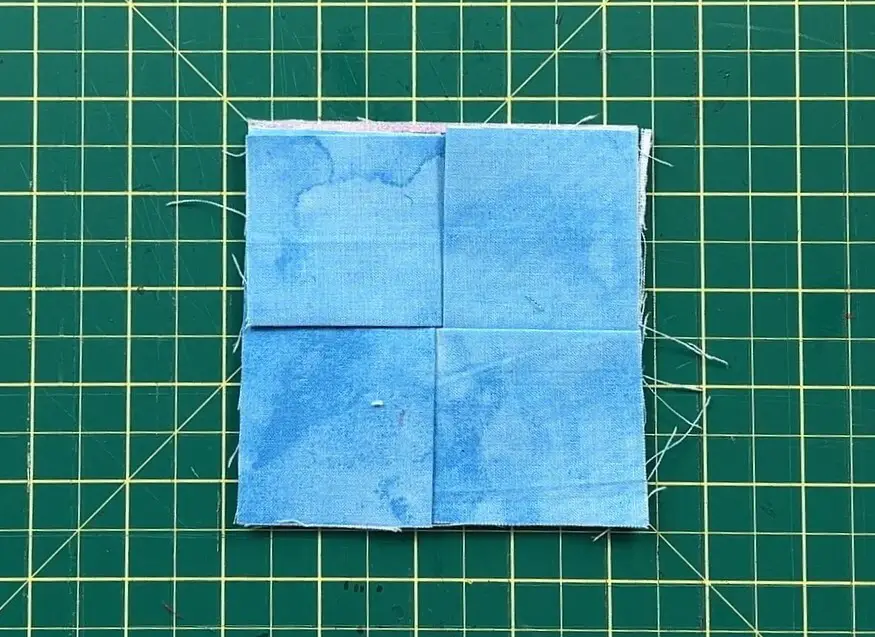
Finally, pin or add clips to hold everything in place.
Sewing the Coaster together
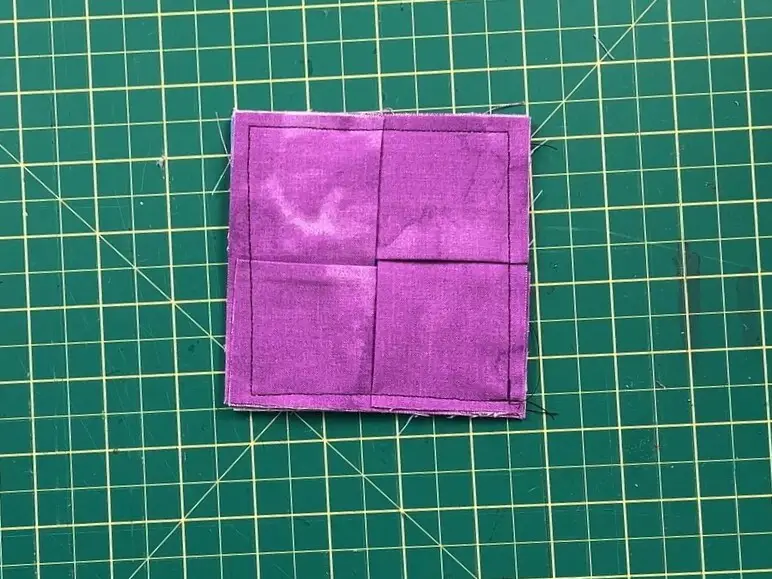
Now for the fun part! It’s time to sew!
You want to run a seam around the edge of the whole square. I sewed at 1/8″, but if you are not confident and have used a larger fabric, you can sew with a larger seam.
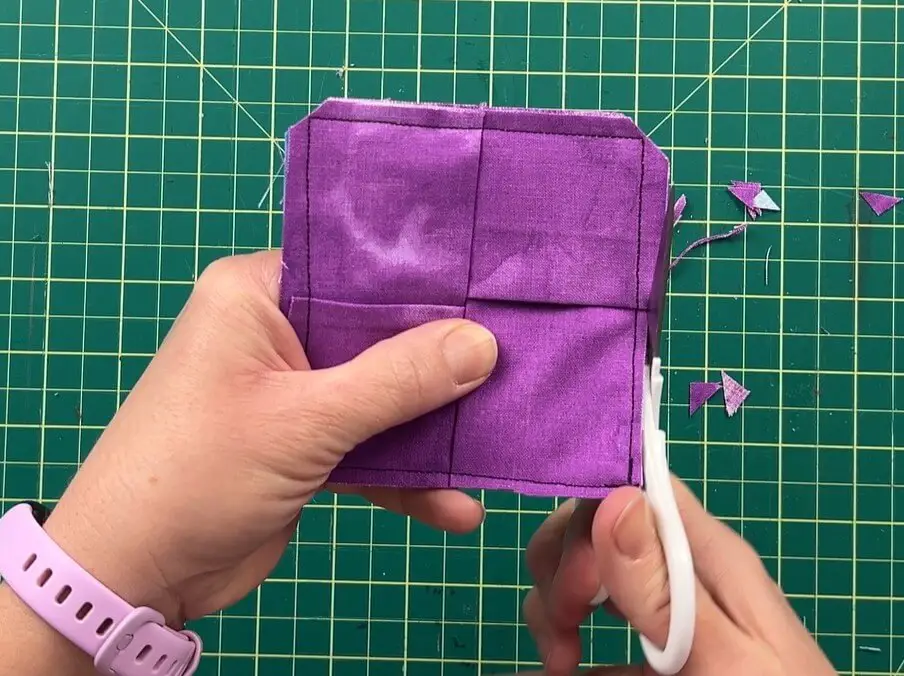
Once you have finished sewing, I recommend you cut the surplus fabric. If nothing else, cut the corners as there is a lot of fabric there and it will make flipping and pushing the corners out harder if there is too much left there.
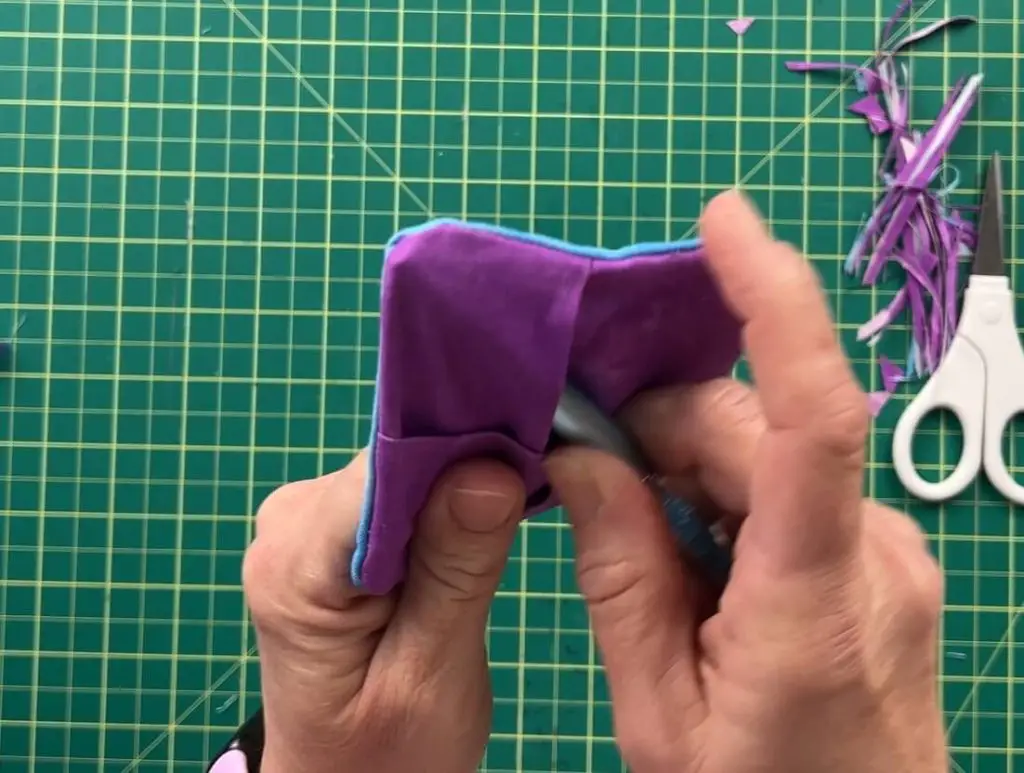
Flip the Wine Glass Cozy Right Side Out
Now all that is left to do is flip the cozy right side out. Use the hole located between the 4 top flaps for the cozy and pull and push the fabric through.
You will need to use a poking tool (a pen, sewing needle, whatever you have) to push the corners out all the way.
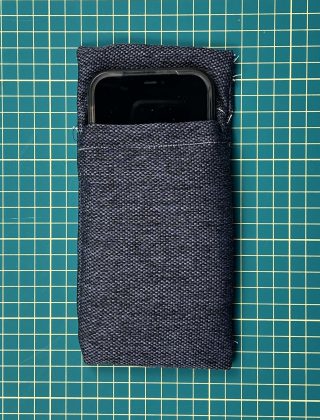
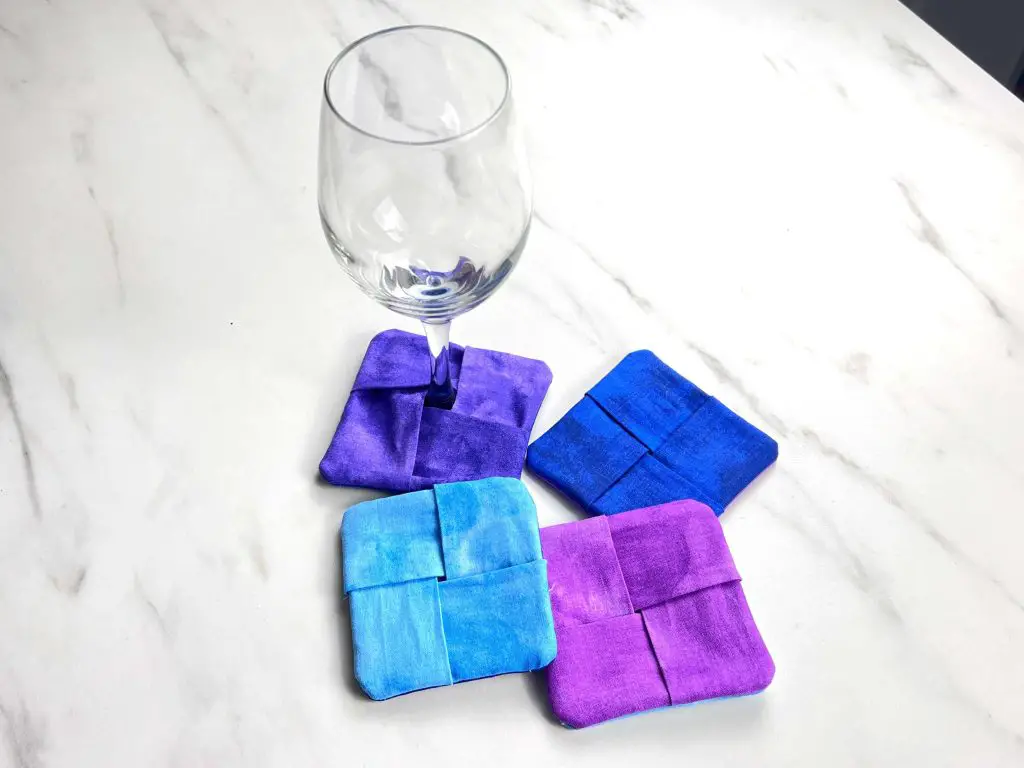
And now all that is left is to put your wine glass in and enjoy!
And that’s it! Your DIY wine glass cozy is Complete!
Things I learned while making the DIY wine glass cozy
This project was easy, yet challenging. I made several practice runs on this first as I couldn’t get my head around it. So, let’s talk about this.
- I’m used to sewing things inside out and then flipping them. For some reason, in my head, I needed to sew the base of the coaster inside out, leave a hole, flip it, attach the top, and flip it. This caused a lot of fabric to be sewn all at once, and a lot of chaotic flipping, that got me nowhere. After attempting this wrong, I realized my mistake and removed that extra step.
- When making these coasters, I used a 4″ square for each piece. This worked out great but left very little room for error. If you are not skilled at sewing, it may be challenging to keep all 6 pieces of fabric in place while sewing, even while using pins/clips. So having extra fabric can be useful.
- Inserting the wine glass into the cozy can be challenging the first few times using them. I say this, only because you have to find the right method. So, while you are learning, I recommend having an empty wine glass so that nothing spills.
- When sewing this cozy, I recommend orienting the fabric so that you are sewing with the over-under pieces on top. But also, so that your machine is pulling the fabric so that it goes onto a piece that is under the existing one. This will help avoid bunching and adjusting your needle during sewing.
Did you enjoy making this DIY wine glass cozy?
Did you enjoy making this DIY wine glass cozy? Let me know if you tried out this sewing project. If you have any suggestions on improving this project, leave me a comment below!
If you enjoyed this project, be sure to check out my other sewing projects here.