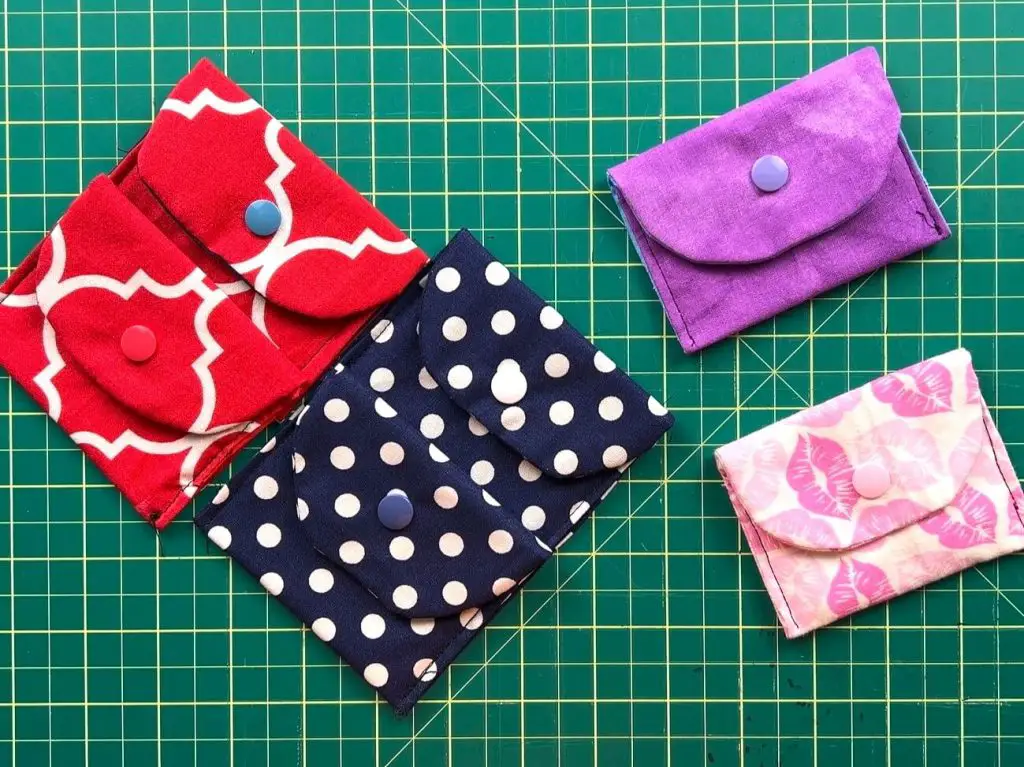
I have been putting off sewing for quite some time. I had good and bad reasons for it, but I was procrastinating, mainly. But I finally picked myself up and pulled out the sewing machine. And the first project we will make is a DIY Simple Mini Wallet. I love this little wallet, it is great for holding cards, bills or coins in small purses or pockets. And as usual, my kids have grabbed them all up and I have none left for me….
So, let’s jump in and get this project started.
As an Amazon Associate, I earn from qualifying purchases. This post contains affiliate links. I may receive a commission if you purchase an item from one of my links. This will not change the price you pay.
Supplies Needed to make a DIY Simple Mini Wallet
Let’s start with a review of what supplies we need to make this DIY Simple Mini Wallet
- Sewing machine – Ideally you want a sewing machine.
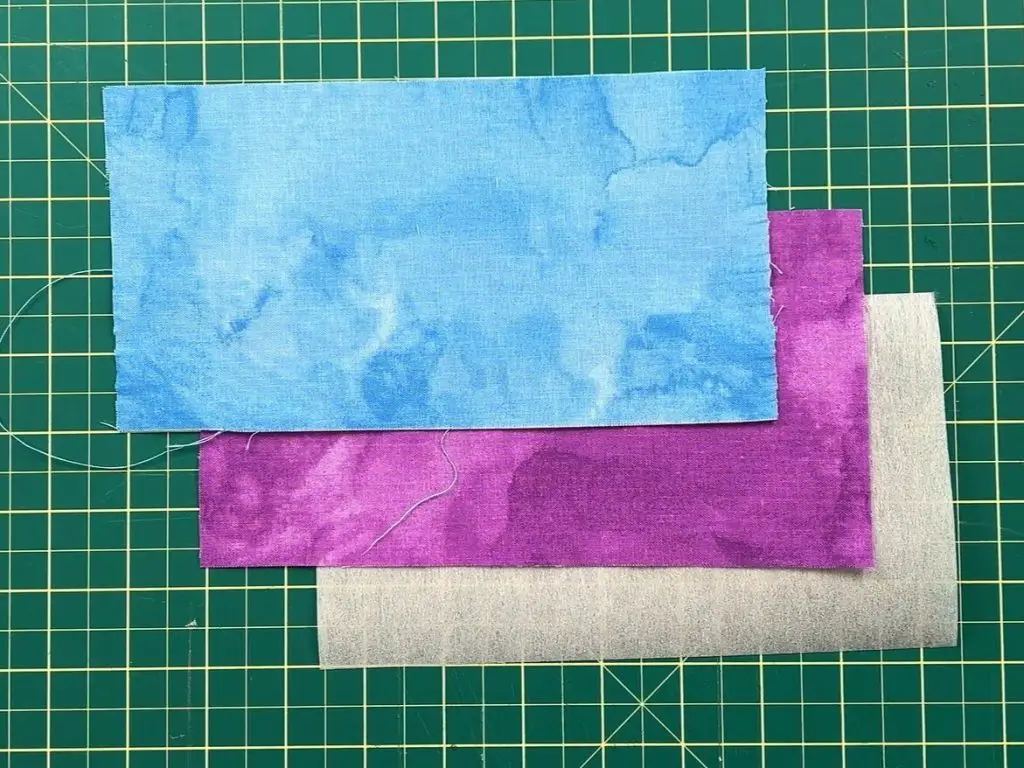
- Fabric – If you want to make the inside and outside the same color, you only need one fabric. But if you want to make them different you will need 2 colors. Each sheet will need to be 4.5″ x 8.5″.
- Interfacing – optional – I like to add interfacing between the fabric layers to add more rigidity. You can use iron-on interfacing. This makes the sewing faster. I do not have iron-on interfacing and am using up what I have before I buy more. This will need to be the same size as the fabric, so 4.5″ x 8.5″.
- Thread – ideally you want a thread that matches your fabric, buy any color will work.
- Snaps – I use these snaps for everything. They are quick to install and great for small projects.
- Pins or Clips to hold the project together.
- 10- 20 minutes to complete this project. If you’re an avid sewer it can take less time.
How to Make a DIY Mini Wallet
Preparing the Fabric
You will need 2 pieces of fabric. Each should be cut to 4.5″ x 8.5″. You can use either 1 color for the inside and outside, or 2 different colors for the inside and outside. I used 2 colors.
You will also need a piece of interfacing that is the same size.
Arranging the Fabric for Sewing
You want to place the fabric down on your workstation in the following order:
- Interfacing
- Fabric – design facing up
- Fabric – design facing down
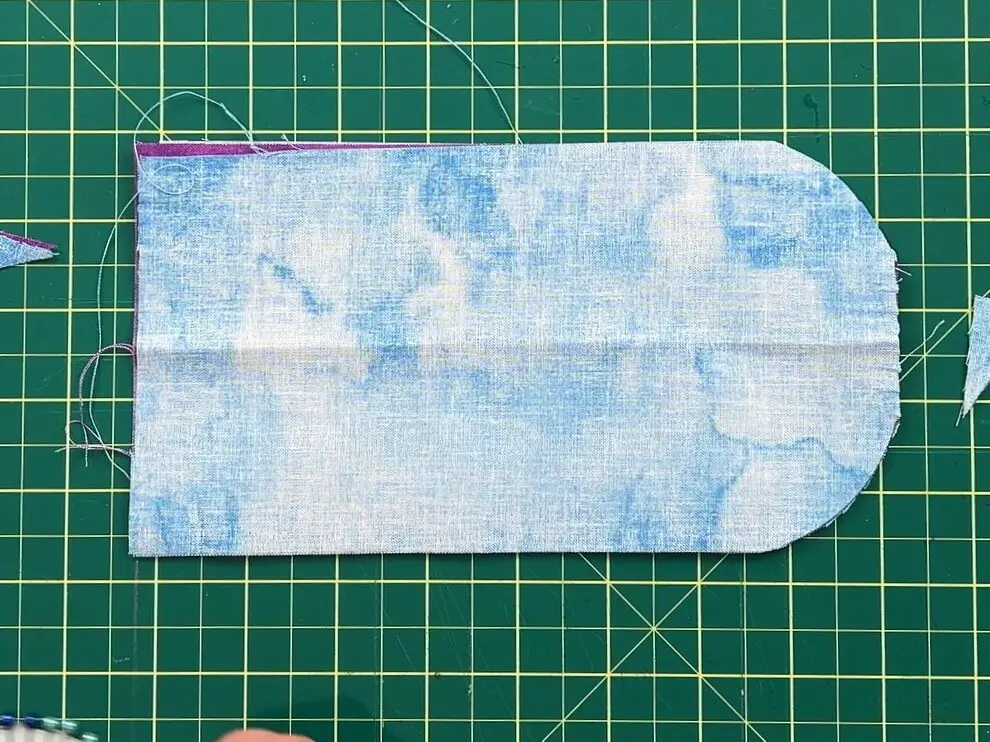
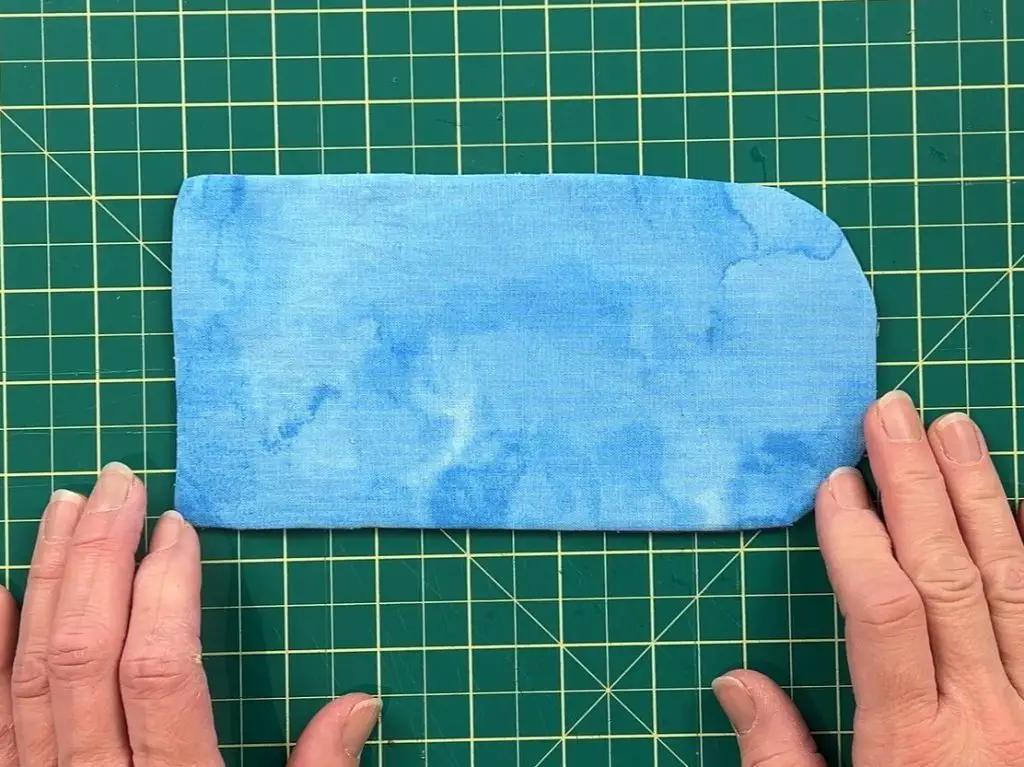
Cut a Round Edge for the Wallet Front Flap
This next step is optional. I say it’s optional because you don’t need to make a rounded edge for the front fold of the wallet, but I don’t like the look of sharp corners on the front.
Fold the fabric in half lengthwise. Using a jar lid, round coaster or freehand, draw a quarter circle, about 1 inch from the top edge.
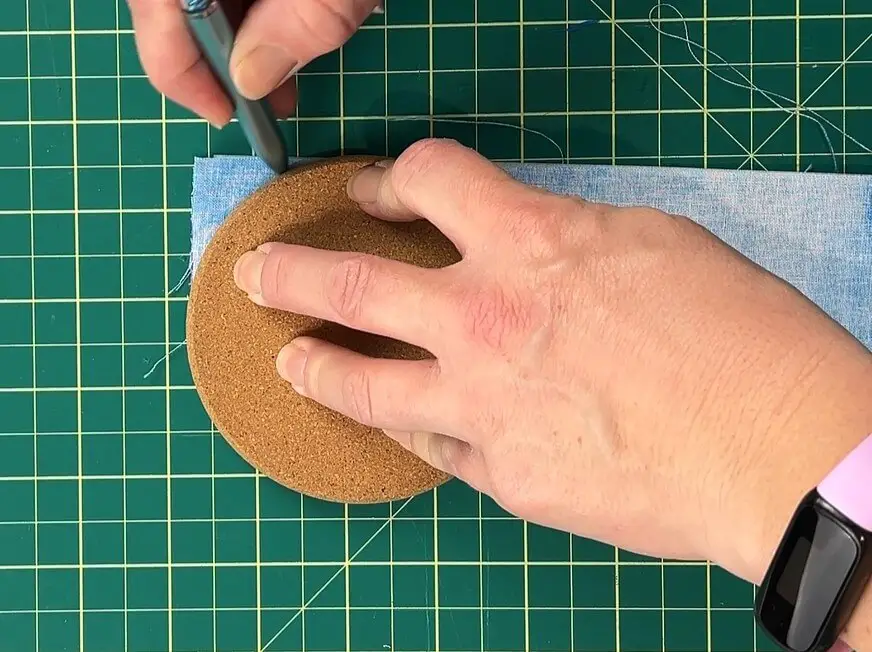
While holding it all together, cut the fabric along the drawn line.
Normally, I would say to pin the fabric together before doing this, but whenever I did that, it just went wonky, so I didn’t. But if your fabric stays put when pinned together pin it.
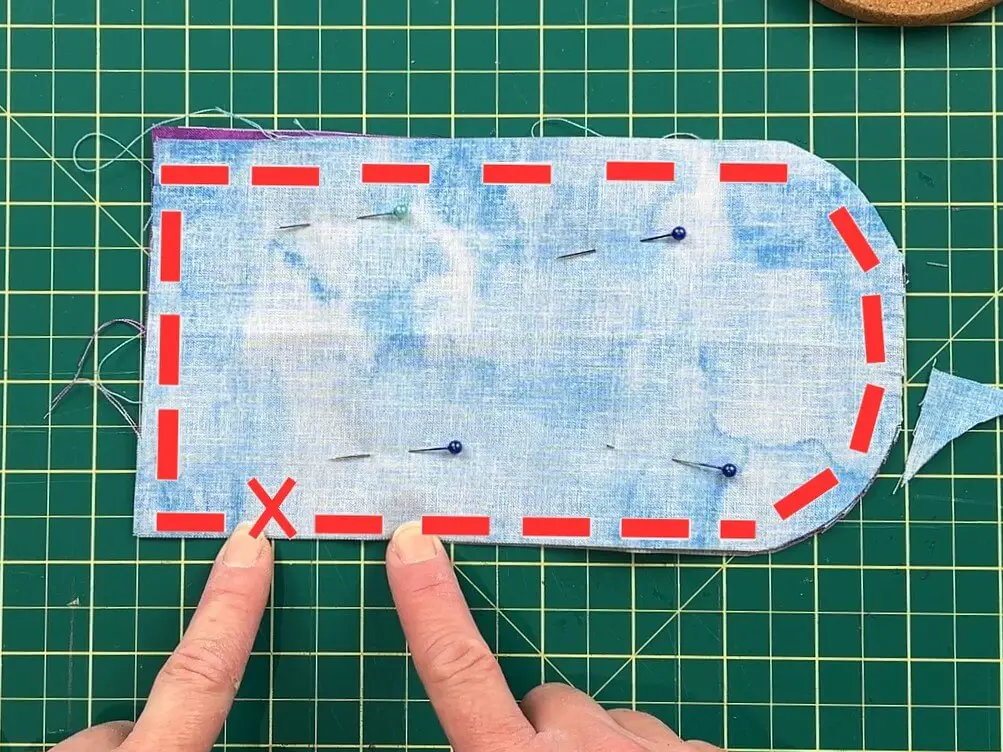
Sewing the outer edge of the mini wallet
You want to sew around the outer edge of the mini wallet. I sewed a 1/8″ seem all the way around. I did leave a small spot open to pull the fabric through afterwards.
Cut Surplus Fabric and Thread
Once you have sewed all the way around, it is time to cut the surplus thread and fabric.
When cutting, do not cut the fabric in the area of the opening. You want to leave surplus fabric there to close the hole.
When cutting around the corners, it is a good idea to trim it on an angle or even snip it towards the point to allow the fabric more movement after it is flipped.
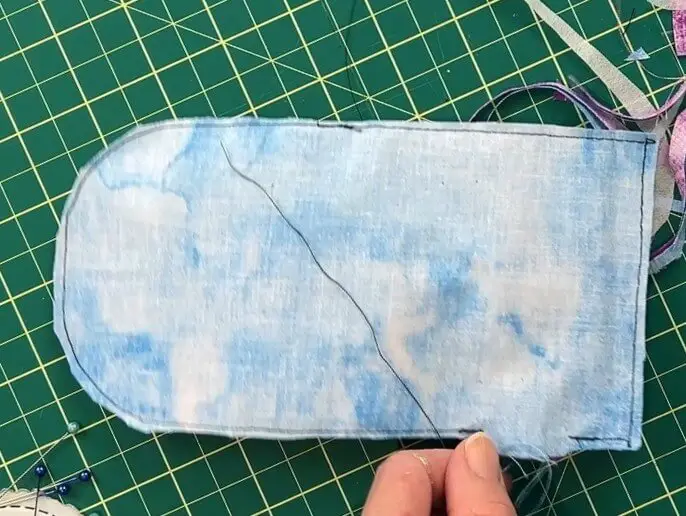
Flip the Mini wallet right side out
Now it is time to pull the fabric through the hole we left at the side of the wallet. Depending on how big or small you made the hole will determine how easy or hard it is to pull it through. I made my hole about 1/2″ wide, and this was a mistake. I should have made it larger.
Once the fabric is flipped, right side out, use a poking tool, pencil, crochet hook, wooden dowel, or whatever you have that is long and pointy to push all the edges out from inside the fabric. You want all the seams to be pushed out and all the corners to be pointy.
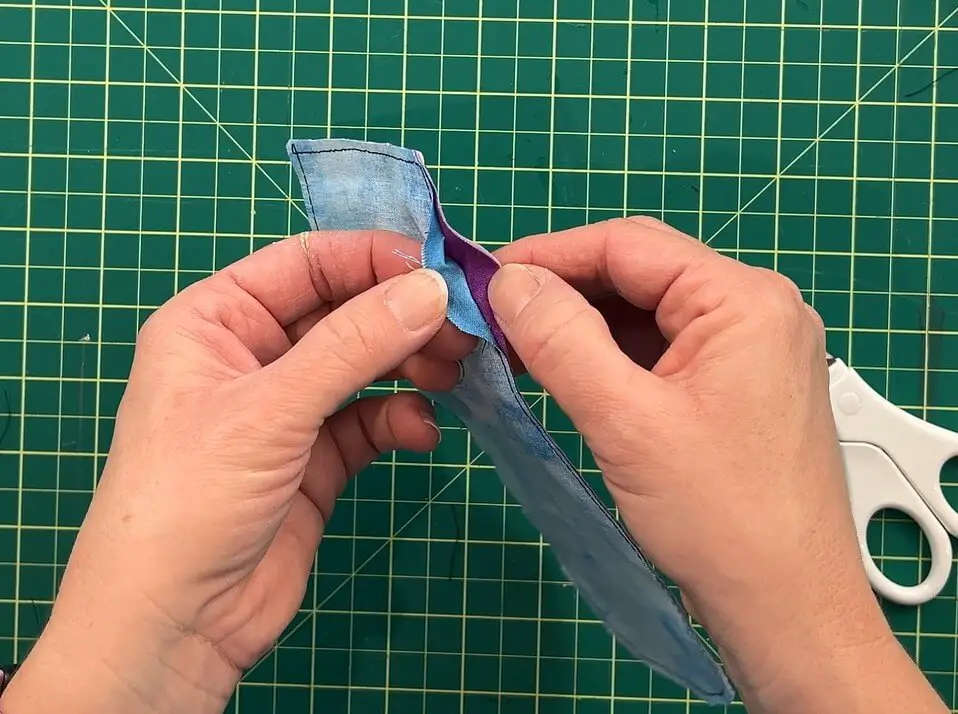
Next, you want to fold the surplus fabric at the hole inwards so that it is hidden inside the hole.
Once you are happy with the shape and edges, iron the fabric flat so everything stays in place.
Fold and Sew the Wallet
Once your fabric is ironed, it is time to turn it into a simple wallet.
You want the measure from the top (rounded side) down 2.5″. This will be the front flap. You can fold it down. Then, you will want to fold the bottom up to reach the fold of the front flat (about 2.75″). Be sure to align the bottom fold so that both edges are straight.
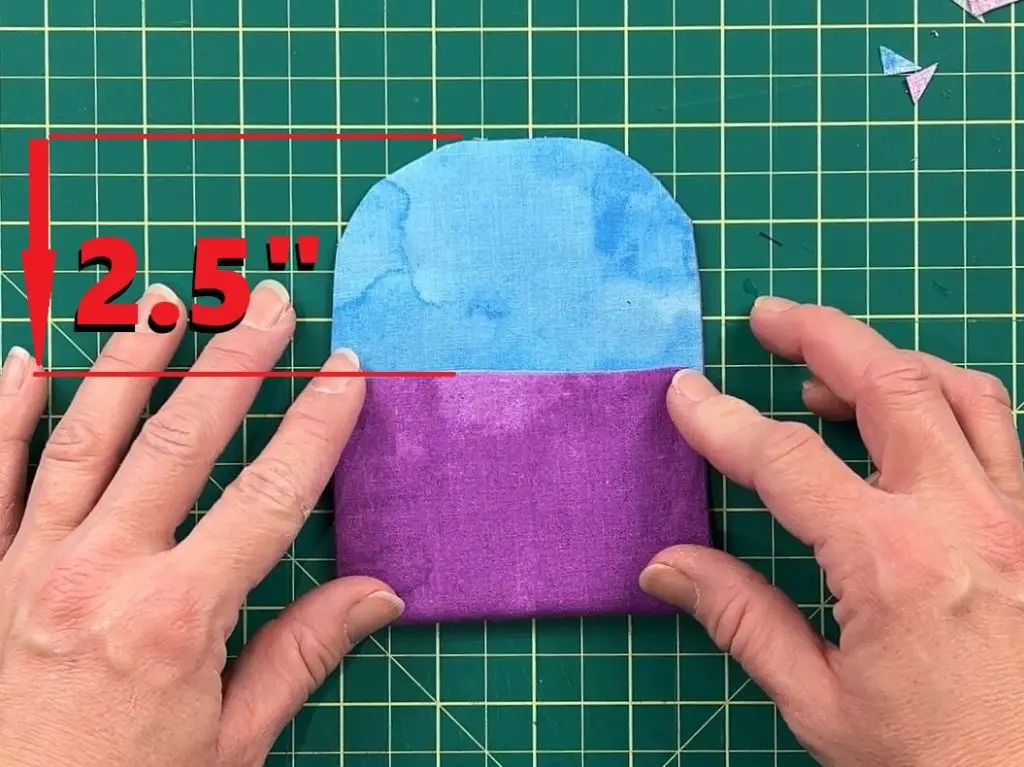
Pin the bottom to the back and iron it in place. You can also iron the top flap, but it is not needed.
Next, you want to sew the sides of the wallet. Make sure not to sew the wallet shut. This is also done at 1/8″ seam.
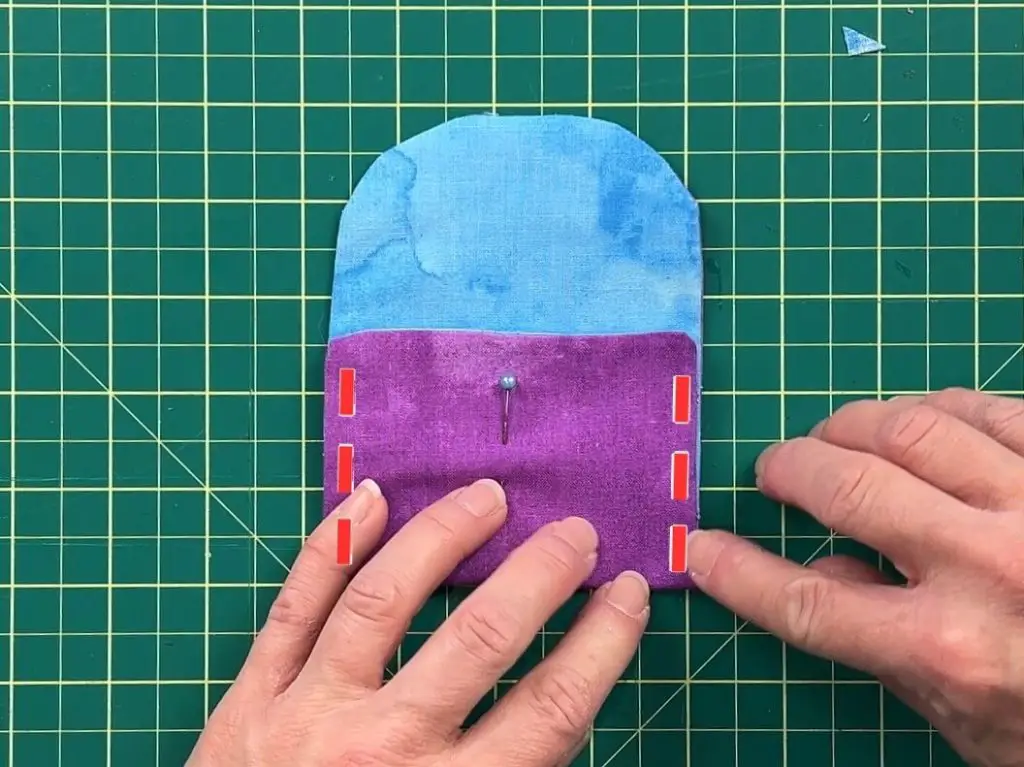
This is also when the hole we used to flip the fabric right side out gets sewn shut. So make sure the fabric is still flipped inside the hole.
Add Snaps to complete the DIY Simple Mini Wallet
The final step of this project is to install the snaps. You require 1 male, 1 female and 2 backing pieces. The set I have allows me to color coordinate different colors on the inside and out to match the colors of my mini wallet. But any color will work.
Fold the wallet in half, length-wise so that the sides of the wallet line up. About 1″ from the top of the top flap, you will want to poke a hole in the fabric. Before I poke the hole, I like to do a sanity check to verify this will fit in a good spot on the body of the wallet. Once happy, you can poke the hole, and push it through so that you get a second hole inside the body of the wallet.
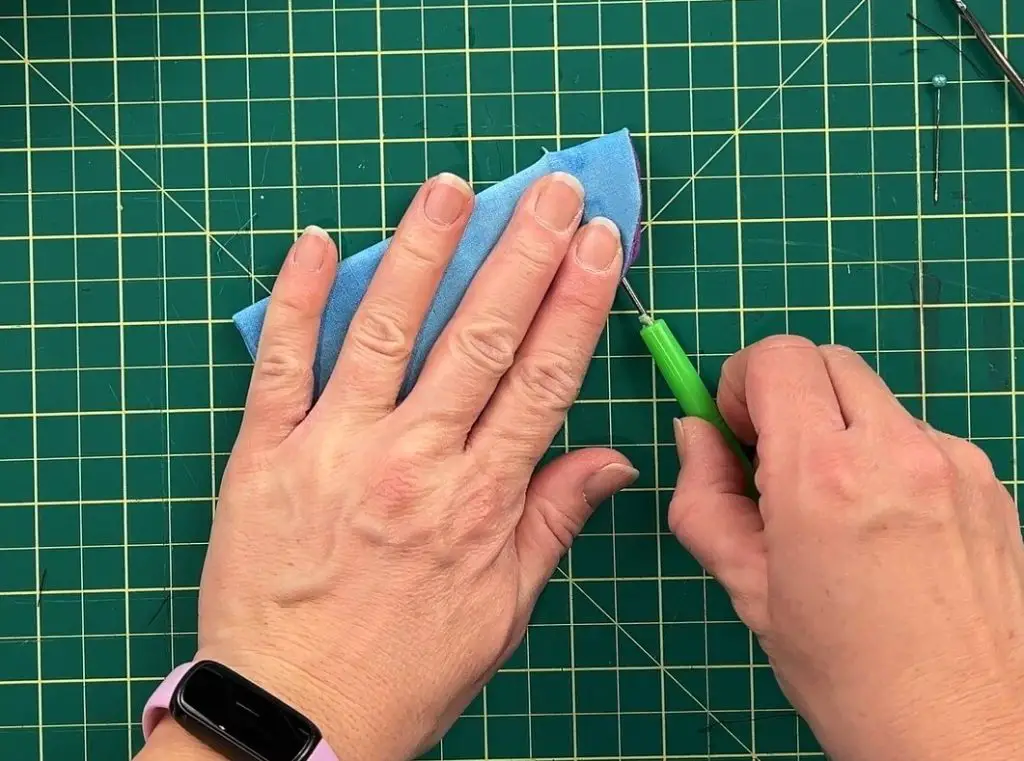
Poke the backing piece through the holes, and place the male piece on top. Using the riveting tool, squeeze the pieces together.
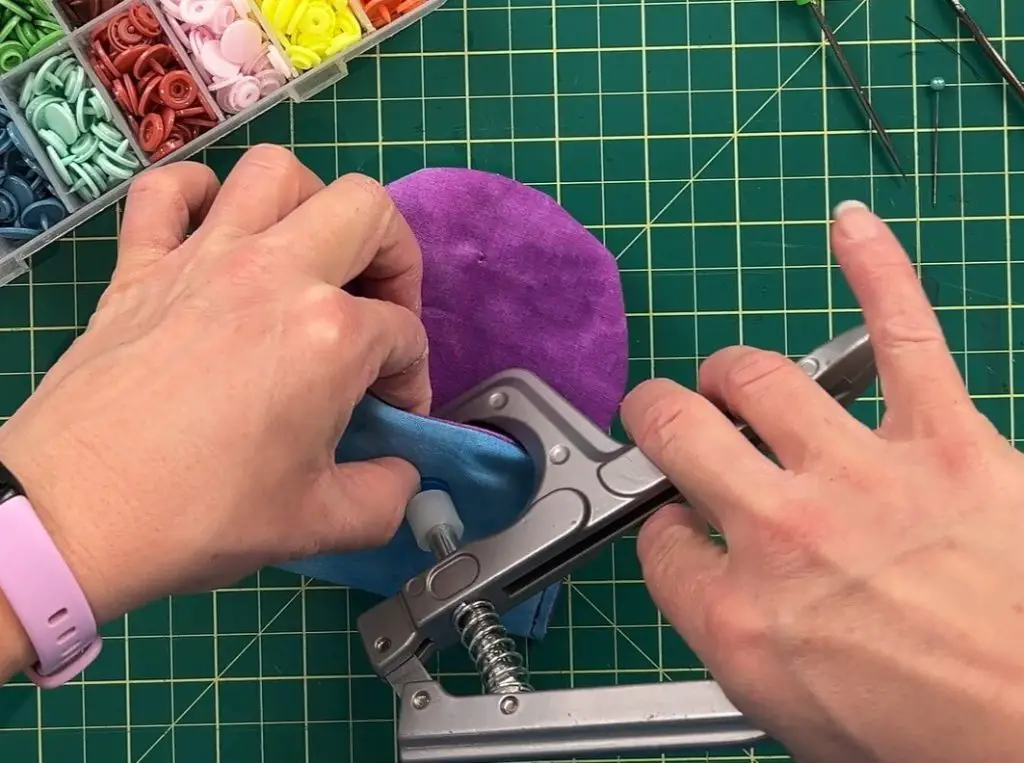
Repeat this for the female piece and the second hole.
And that’s it! Your DIY Simple Wallet is Complete!
Things I learned while making this DIY Simple Mini Wallet
If you are an apt sewer, you may remember the struggles of the early stages of sewing. Even as someone who sews rather frequently some issues still arise. So, let’s review some things.
- If you are new to sewing, or your machine isn’t the greatest, or whatever other reason you have, and are not confident with tight sizes, I recommend that instead of making this 4.5″ x 8″ to start, that you give yourself an extra 1/2″ of fabric and cut the elements to 5″ x 9″ instead. This extra space will do wonders.
- Increasing the size also helps when working with inferior fabric. One of the fabrics I used was terrible, and it needed at least 1/4″ of space before sewing my 1/8″ seam.
- Flipping the fabric after the initial pass of sewing – For some reason, I thought it would be easy to flip the fabric with 1/2″ of space. I did it, but it would have been much easier if I had a larger hole.
- Cutting fabric can be challenging, so take your time and do it slowly. If you have straight-cut lines, it makes it easier to sew straight.
- I am currently using regular old-school interfacing. I purchased a bunch once and didn’t realize it wasn’t the iron-on type. And I refuse to buy more when I still have a lot left. So I will suffer through with it. But I highly recommend using iron-on interfacing. You can cut it smaller to avoid the stitches, and since it won’t be sewn in most places, it makes sewing easier.
- I typically use needles to hold my fabric together. But recently I have found that when I pin things together, it is all moved around and off-center. If you are like me, you can use these little clips instead. I find they hold everything nicely.
- I made the top flap of the wallet round. I like the look of this better. However, sewing around a circle is harder than sewing a straight line. The first wallet I made was not circular in shape. It was more of a deformed square. If you have not sewn round edges, I recommend a few practice passes before wasting too much fabric.
Did you enjoy making this DIY Simple Mini Wallet?
Did you enjoy making this DIY Simple Mini Wallet? Let me know if you tried out this sewing project. If you have suggestions to make this project better, let me know in the comments below!
If you enjoyed this project, check out my other sewing projects here.