Do you ever find yourself digging around for a pen when you need it most? Whether you’re journaling, sketching, or taking notes, a pen holder attached to your notebook is a game*changer. Today, I’ll show you how to sew your very own DIY Notebook Pen Holder. This project is simple, beginner-friendly, and totally customizable with fabric and elastic of your choice.
Not only are these holders perfect for fancy pens without clips, but they’re also fantastic for kids’ notebooks when you’re on the go. Plus, you can size them to fit any notebook you have—big or small. Let’s get started!
As an Amazon Associate, I earn from qualifying purchases. This post contains affiliate links. I may receive a commission if you purchase an item from one of my links. This will not change the price you pay.
Supplies Needed to make a DIY Notebook pen Holder
To make your DIY notebook pen holder, you’ll need the following supplies:
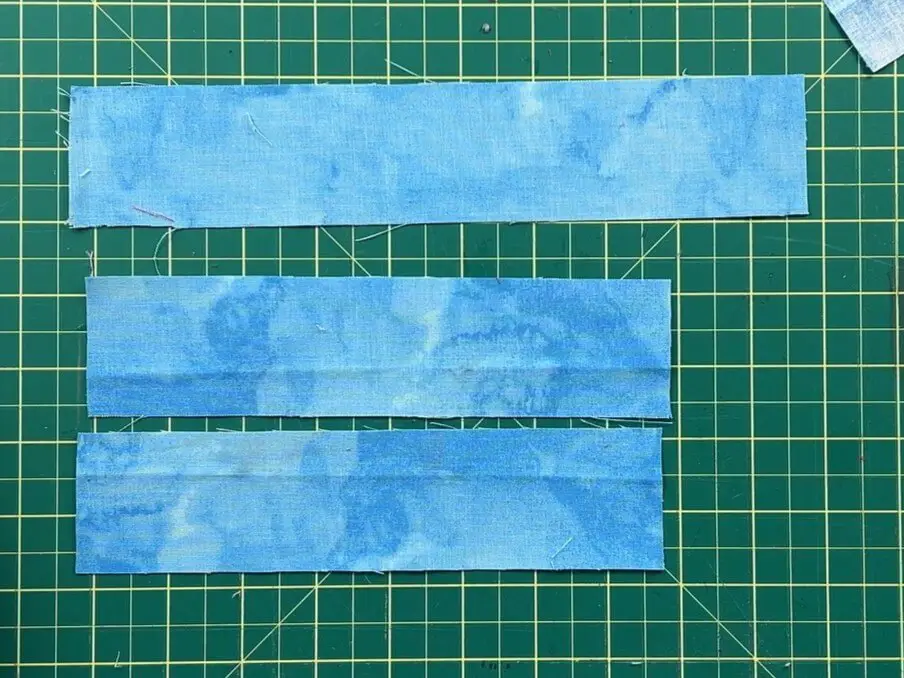
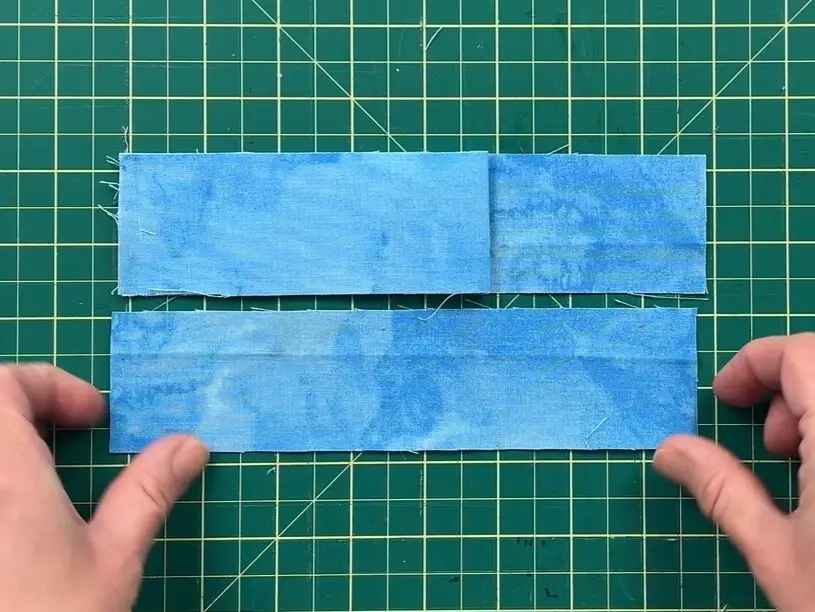
- Fabric: You can use any color you like, or you can even use scrap fabric. You need:
- 1 piece measuring 10” x 2”
- 2 pieces measuring 8” x 2”
- Elastic band: 1½” to 1” wide (black, white, or your preferred color). I used 3/8″ and it was a bit small, but still worked. You can use whatever you have.
- Sewing clips or pins. I used clips this time, as it was easier to hold the elastic in place.
- Sewing machine (or needle and thread if sewing by hand)
- Scissors
- Iron
Making the Notebook Pen Holder
This project isn’t too difficult to make, and I will try to keep the description simple as well. So, let’s jump in.
Prepare your fabric
Line up your 3 pieces of fabric. Place the 10″ piece on top, and the two 8″ pieces below.
Take the 10” piece of fabric and fold it in half, design side facing outward.
Place it on top of the first 8” pieces of fabric.
Insert the elastic
Working with the elastic can be tricky. So, I do it backwards, or at least I think it’s backwards. But don’t worry, I will try to keep it simple.
The notebook pen holder should go around the entire notebook. That means the length of the book that is not covered by the pen holder needs to be elastic. Plus, you need to add extra so it can be sewn together.
I know that sounds messy, so I do not cut my elastic at the start. I leave the full elastic that I have and trim it later in the process.
I place the elastic on top of the fabric I have just laid out. I want some elastic pointing out past the bottom of the folded pieces, so that I can sew over it later. I run the elastic the full length of the pen holder and keep it flat.
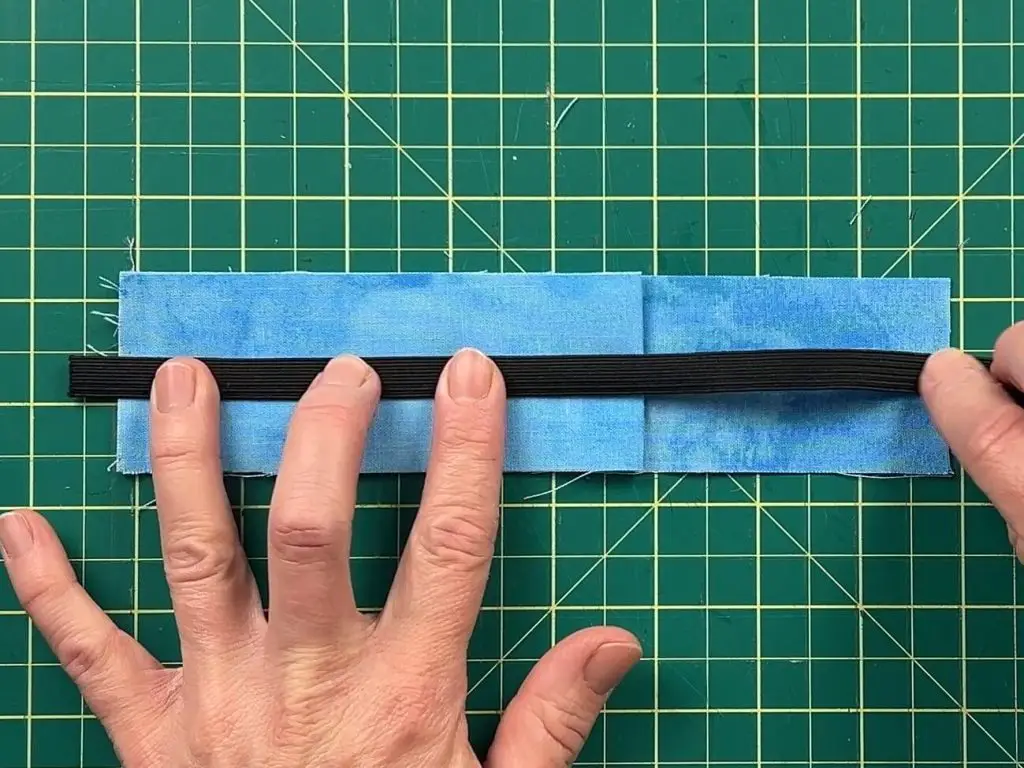
Once the elastic is down, place the last piece of fabric, design side down, on top of the elastic and fabric.

I recommend using a clip to hold it in place, especially if you have a thin elastic like I do. Or, you can use pins.
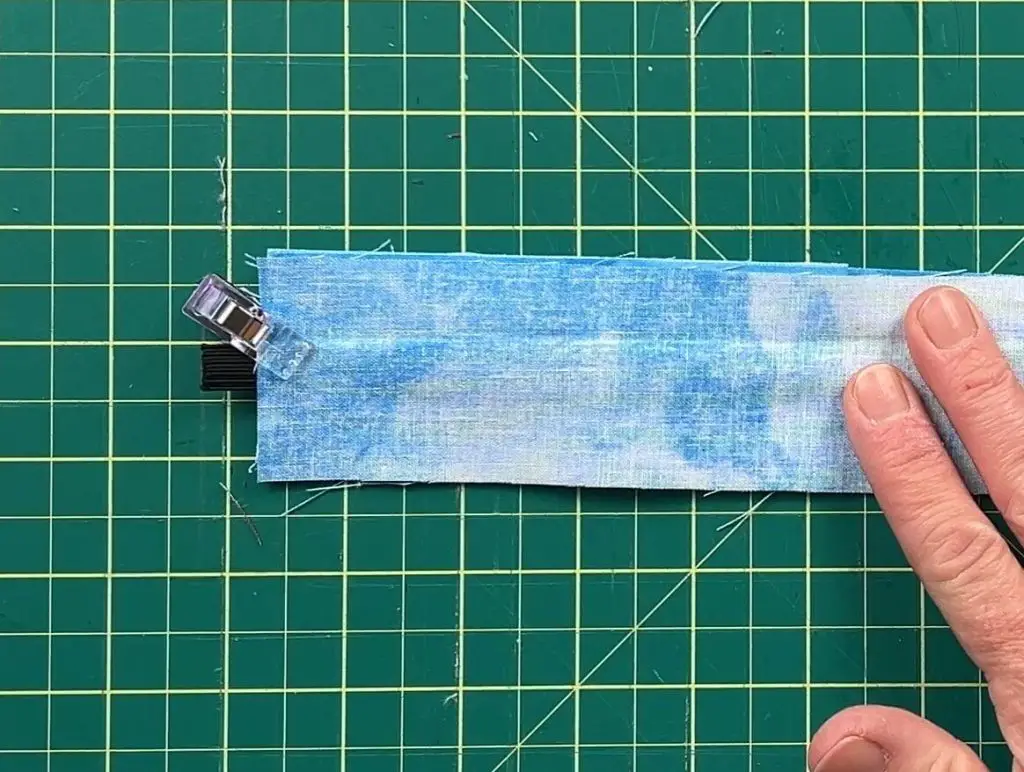
Sew the pocket
Sew along three sides of your fabric (two short sides and one long side), making sure to stitch over the elastic ends so it stays in place. Leave one short side open.

Next, snip the corners and any surplus fabric that you don’t want. I don’t like cutting the elastic so that it doesn’t fray over time.

Flip the Pen Notebook Holder Right Side Out
This part is a bit silly, but we need to flip this project. I like to tug on the elastic and massage the fabric until it has flipped. I will also use a pointing tool to poke all the corners out and then iron the fabric flat.

Cut the elastic to length
At this point in the project, I like to check my dimensions and cut the elastic. Place the notebook pen holder on top of the notebook you want to use it with. Pull the elastic around the book (or just the book cover) and place it on top of the pen holder. Pull the elastic a bit so that it is tight. The location where the elastic is located on top of your pen holder is where you want to sew it together. You can mark it with a chalk pen or eyeball it. From this point, I like to cut the elastic about an inch further to allow space for sewing.

Finish the top edge
Fold the raw edge inward, about 1/4″ to 1/2″, and iron it down. Next, we want to place the elastic into the opening and sew the top shut.

At this point, you have two options: you can add a seam around the full outside of the notebook pen holder, or you can leave it with just the one seam. Or if you’re very experienced, you can do a blind seam over the elastic. I’m not that good, so that’s not happening.


Test the fit of your notebook pen Holder
Slip the elastic around your notebook to check the tension. It should stretch snugly but not too tightly. Slide your pen into the pocket and you’re done!
And that’s it—your notebook pen holder is complete!

Things I learned While Making this Notebook Pen Holder
As always, we had to learn something while sewing this project, so let’s review:
- This little project is quick to sew. I completed this project in under 15 minutes.
- I love how this notebook penholder helps in keeping your notebooks organized. No more losing pens for me!
- You can create these in different fabrics for each notebook, make wider pockets for multiple pens, or even coordinate them with matching fabric covers.
- A wider elastic (½” or 1”) works best for holding pens securely, but use what you have on hand.
- I love how customizable these are—whether for school supplies, journaling, or sketching on the go, a Notebook Pen Holder keeps your pens exactly where you need them.
Did you enjoy this Sewing Tutorial?
If you give this project a try, let me know how it worked out for you! Do you prefer the single-pen version or the looser pocket that can hold two? Share your thoughts and any tips you discovered in the comments below.
If you enjoyed this project, be sure to check out my other sewing projects here
Happy crafting!