We are quickly approaching summer over here, and with that board games and card games will be used much more extensively than during the school year. And that means it’s time to get everything found and organized. The one thing I find really annoying about card games is that the boxes they come in fall apart quickly. And as much as I love using zip-lock bags to hold it all together, it just doesn’t look great. So, that is how we came to make a custom game card pouch.
As an Amazon Associate, I earn from qualifying purchases. This post contains affiliate links. I may receive a commission if you purchase an item from one of my links. This will not change the price you pay.
Supplies Needed to make a DIY Simple Mini Wallet
Let’s start with a review of what supplies we need to make this custom game card pouch.
- Sewing machine – Ideally you want a sewing machine. Currently, I can’t recommend one as I just broke mine and am on the hunt for a new one.
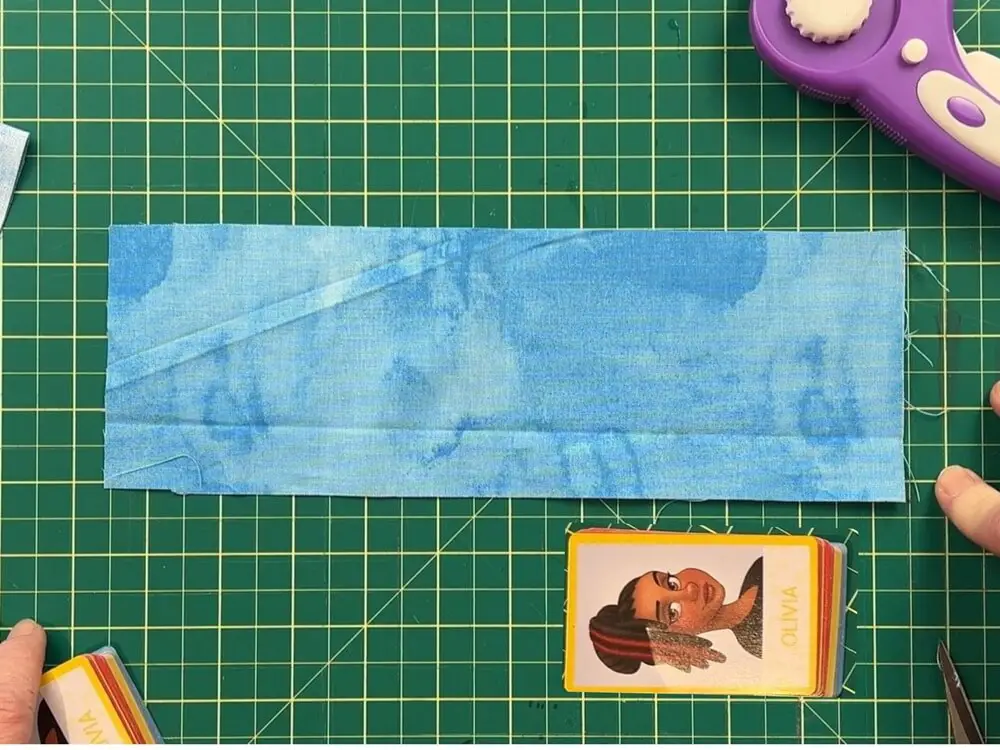
- Fabric – You can use new or scrap fabric. I will go over the sizing below. I recommend you get this at a fabric store.
- String/Yarn/Ribbon/Floss – this is to tie the bag.
- Drawstring clip – optional
- Sewing Pins – To hold the fabric together
- Thread – ideally you want a thread that matches your fabric, buy any color will work.
- Cutting Machine – I used my Cricut Explore Air 2
- Cutting Mats
- HTV Vinyl – I used white for all my pouches
- Teflon Sheets – to protect my iron from the HTV
- Iron – to attach the HTV to the pouches.
- Heat Press – optional in place of an iron.
- 10- 20 minutes to complete this project. If you’re good at sewing and cutting fabric, it may take less time.
How to Make Custom Card Game Pouch
When making the custom card pouches, I focused on using scrap fabric. As I have been on a sewing spree, I wanted to use up all the pieces. That resulted in having random sizes that I could use to make this work. So, I will go over 2 methods to make these custom pouches.
Method 1 – Pouch made with 2 Pieces of fabric
Measuring the Fabric
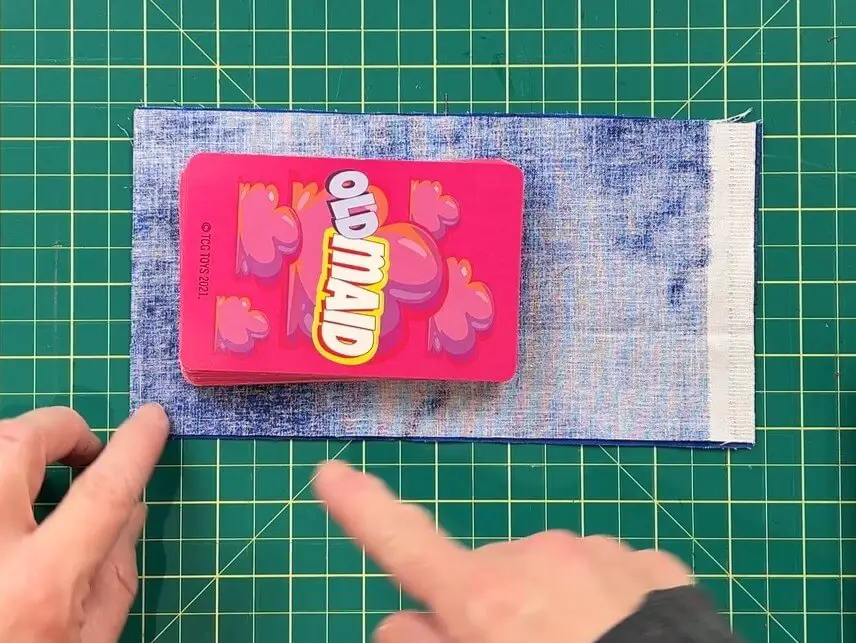
If you have kids like I do, you will quickly learn that every card game has a different size of cards. Just to make life interesting. So, I can’t give you an exact size of fabric to cut.
You want to have the fabric reach past the top of the card on 3 sides.
For standard card decks with 56 cards, you will need about 3/4″-1″ clearance around 3 sides of the card. But as some card decks are larger than others, I recommend pulling the fabric over the cards to be sure.
Sewing the Custom Card Game Pouch
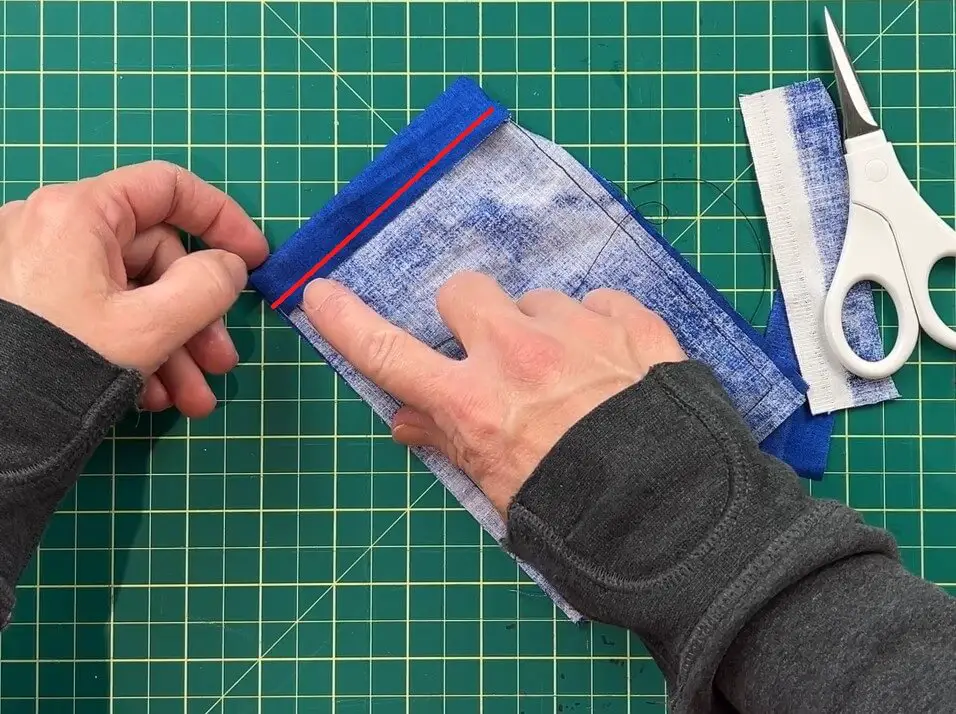
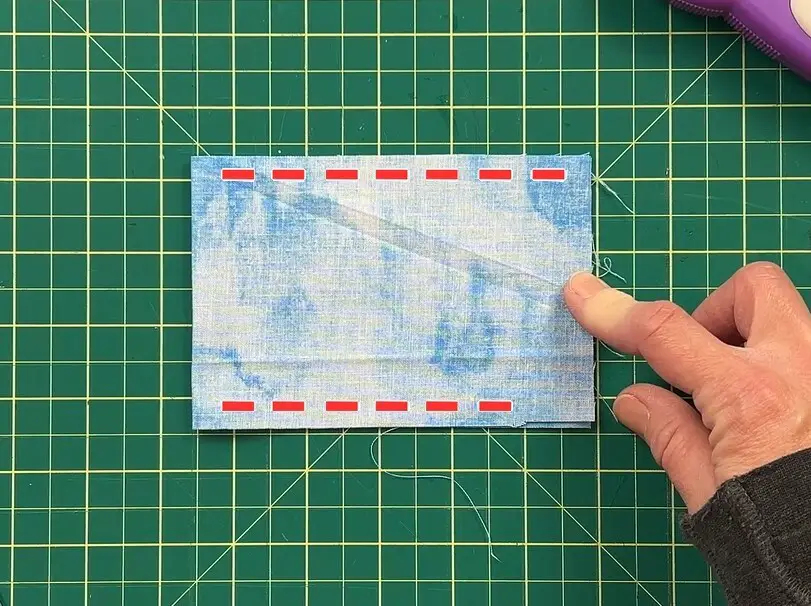
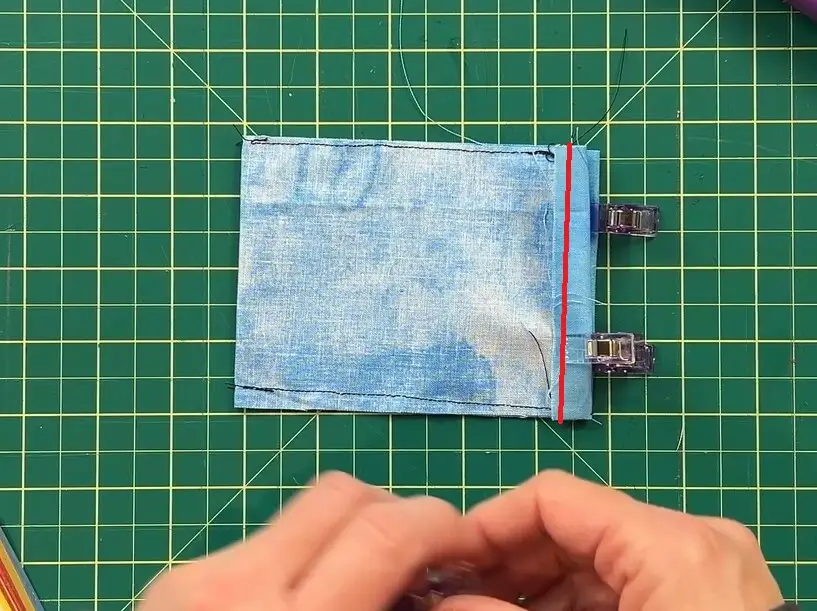
First, we want to sew the outer seam of the card pouch. I made a 1/8″ seam on 3 sides.
Once you have finished sewing this part, I recommend flipping the pouch right side out, to see if the card will fit. Better to measure twice. Once happy that it fits, flip the pouch inside out.

You will want to have 1.5″-2″ surplus fabric at the top of the bag. If you have more than this, you can trim it off.
Next, fold the top of the bag about 1/2″ and sew along the fabric edge. This will leave a gap in the fabric to pull the drawstring through.
When sewing this portion, you want to make sure you are sewing only one piece of the pouch fabric at a time. This may require you to remove the support from your sewing machine or curl the fabric around to fit it under the needle without sewing the top of the bag shut.
Method 2 – Pouch made with 1 Piece of fabric
Measuring the Fabric
For this second method, you will want the fabric to be 2.5x the length of the cards, and the width to be long enough for the fabric to reach over the top of the cards.
For standard card decks with 56 cards, You will need about 3/4″-1″ clearance on the width sides of the card. But as some card decks are larger than others, I recommend pulling the fabric over the cards to be sure.
Sewing the Custom Card Game Pouch
Fold the fabric in half and sew two seams, one on each side at 1/8″ from the edge.
Once you have finished sewing this part, I recommend flipping the pouch right side out, to see if the card will fit. Better to measure twice. Once happy that it fits, flip the pouch inside out.
You will want to have 1.5″-2″ surplus fabric at the top of the bag. If you have more than this, you can trim it off.
Next, fold the top of the bag about 1/2″ and sew along the fabric edge. This will leave a gap in the fabric to pull the drawstring through.
When sewing this portion, you want to sew only one piece of the pouch fabric at a time. This may require you to remove the support from your sewing machine or curl the fabric around to fit it under the needle without sewing the top of the bag shut.
Adding Name Tags to Card Pouches
Ok, so we have the basic outline of our bags. Before we finish them up and so that we don’t melt the string/ribbon we use to tie the bag shut, it is time to add labels to our bags so we know which game is in which bag.
I used my Cricut to make these labels, but any cutting machine works, even just purchasing iron-on letters will work, as well. However, we will talk about making this with our Cricut.
Creating Labels for Card Games
In Cricut Design Space select the Text button and type in the game name you are making a bag for.
You can use different text styles by selecting the Font Drop-Down menu. Additionally, you can change the size and color to match what you would like.
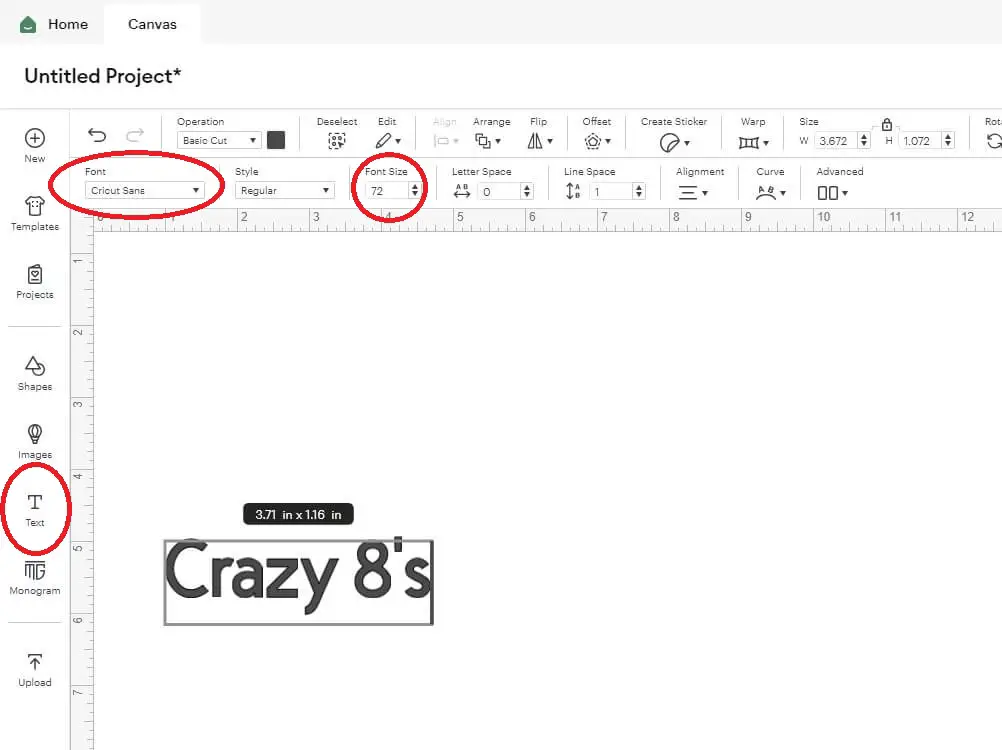
Once happy with the size, send the design to Make.
When cutting out the design, make sure you MIRROR the design as this will be cut on HTV.
Using my card game labels
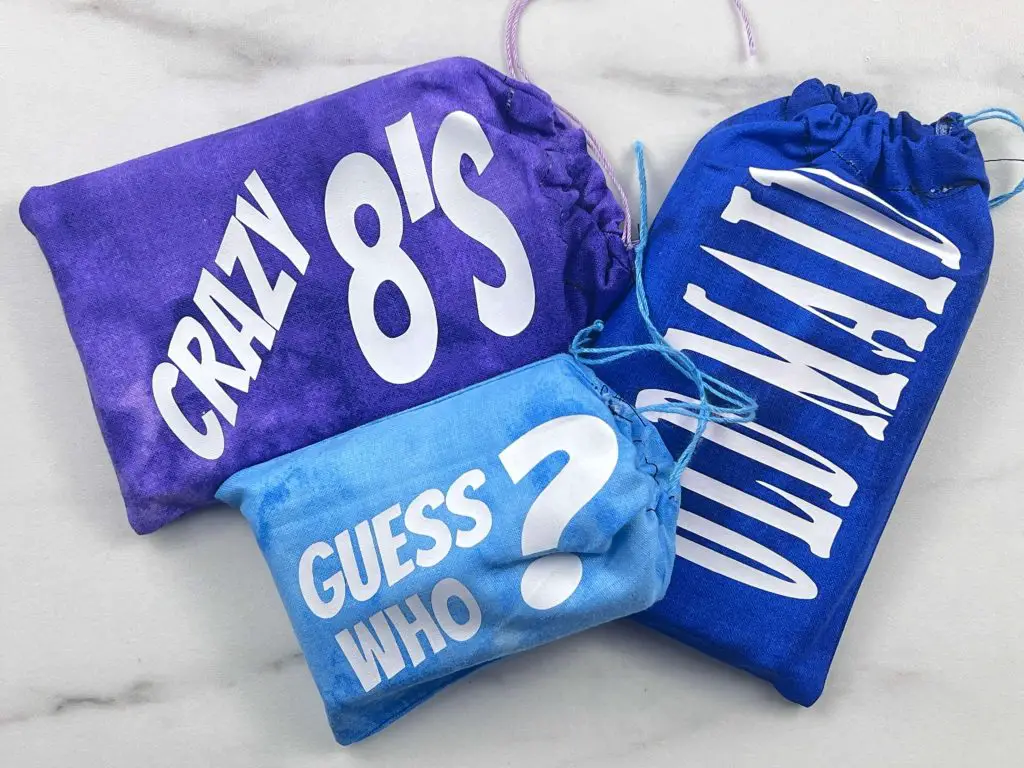
If you don’t want to make your own card game labels, I have a set of names you can use. I have covered several very common games. You can sign up for my newsletter below and I will send you a copy. It includes premade names for:
- Crazy 8’s
- Snap
- Go-Fish,
- Old Maid,
- Guess Who?
- Uno
- War
- Memory
- Rummy
- Slap Jack

Importing the Game Card Name File
Once you have the file saved to your computer, you will need to perform the following steps:
- Unzip the file –
- Right-click on the file with your mouse and select Unzip
- Select a location where you want the file to be saved.
- Hit Enter and your file will be unzipped and saved.
- Upload the file to Cricut Design Space.
- Select the Upload Icon on the left side of your screen.
- Select the Upload Image button.
- Select the File from the location where the file was saved from above.
- Select the file from your DS Recently Uploaded documents. There should be a green rectangle around it.
- Hit the Add to Canvas button.
Using the Game Card SVG File
Once the game card names SVG file is on your Design Space Canvas ungroup the whole design.
You will need to adjust the size of the names to fit the bags which you have sewn for each card game. Ideally, you want to leave about 1/2″ around the outside of the text so it can be visible on the bag.
Once happy with the size, send the design to Make.
When cutting out the design, make sure you MIRROR to design as this will be cut on HTV.
Weed and Press the Game Labels
Now that you have cut out your design, simply weed the design. (aka, remove the surplus HTV off the carrier sheet).
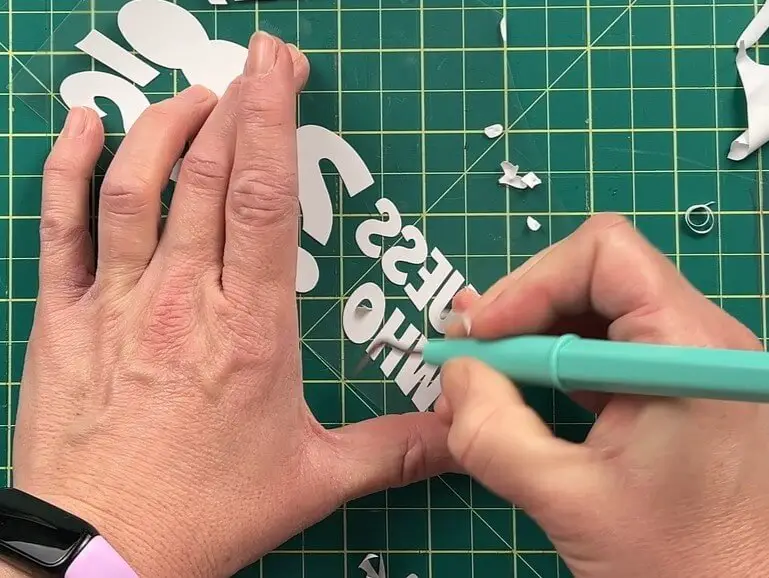
Finally, place the HTV on the correct bag and press it onto the bag.
You need to read the instructions on your HTV when pressing for time and temperature, but typically 315F and 30 seconds work.
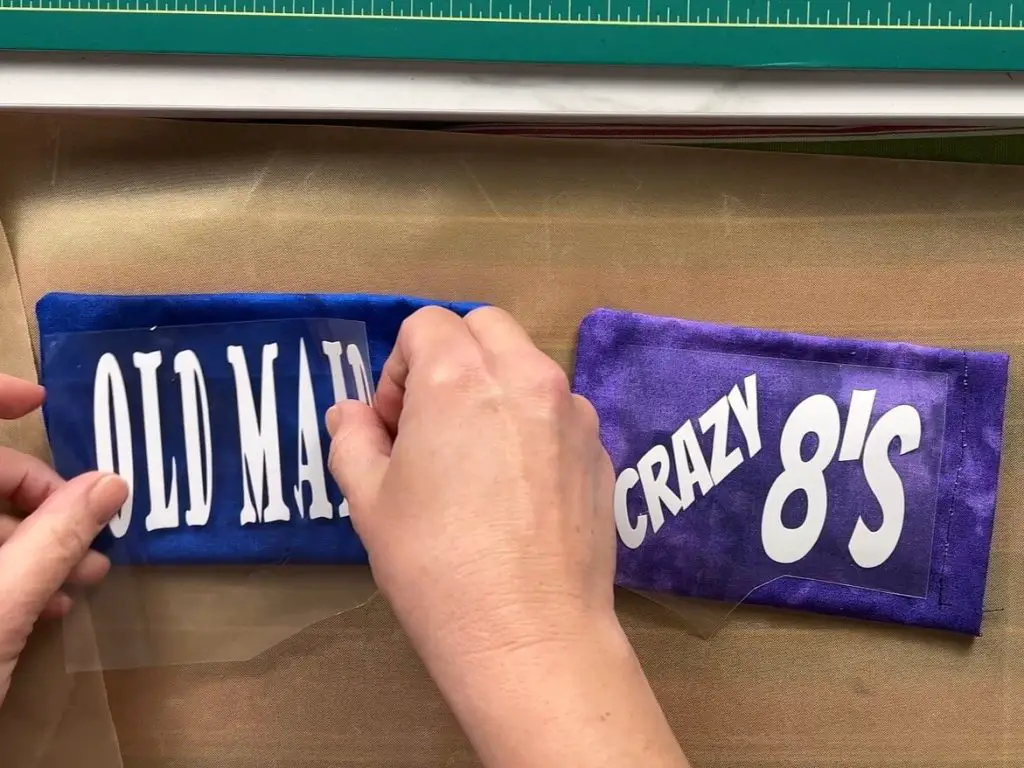
If you are using an iron, set it to the highest setting and be sure to apply a lot of pressure onto the iron so that the HTV will stick.
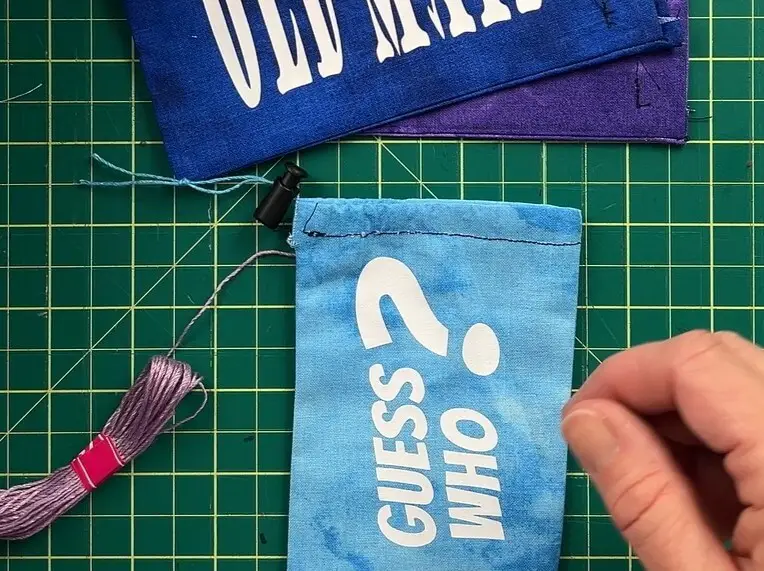
Adding a Draw String to your Custom Card Game Pouch
The final step is to pull a string, yarn, ribbon, floor or whatever you would like to use as the draw-string for the bag. This will need to be at least 2.5x the width of the bag. Using a safety pin (or in my case, a paper clip because I can never find a safety pin when I need one). Tie a know in the string on the safety pin and pull it through the string opening of the bag. Pull it all the way through both sides.
Once you have pulled the string through, you can use these draw-string clips to hold the string in place. Pull both ends of the string through the hole, tie a knot and you are good to go.
If you do not want to use the clip, you can pull a second string through the other side, so that the strings start on opposite sides of the bag, and pull it through all the way.
Tie a knot in both strings and pull the bag closed.
Now, all that’s left is to put the Cards into the custom card game pouch and you’re ready to go!
And that’s it! Your Custom Card Game Pouch Complete!
Things I learned while making this Custom Card Game Pouch
This was a fun quick project, but that doesn’t exclude it from having issues. So, let’s review some things.
- If you are new to sewing, your machine isn’t the greatest, or whatever other reason you have, and are not confident with tight sizes, I recommend you give yourself an extra 1/2″ of fabric around all edges. It is better to have a bag that is a bit too big than a bag that is too small.
- Increasing the size also helps when working with inferior fabric. One of the fabrics I used was terrible, and it needed at least 1/4″ of space before sewing my 1/8″ seam.
- Cutting fabric can be challenging, so take your time and do it slowly. If you have straight-cut lines, it makes it easier to sew straight.
- When making the slot for the drawstring, I didn’t sew the inside part of the fabric. This allowed me to pull the string in from both sides. If your fabric was sewn all the way up, you can use one string with a draw-string-clip or undo the threat on the other side to access the string on both sides.
- I made several of these bags and they work great. My kids love them and they keep everything organized. The nice thing is that if they get ruined I can quickly make new ones, or be thrown into the washing machine if they get dirty.
Did you enjoy making this Custom Card Game Pouch?
Did you enjoy making this Custom Card Game Pouch? Let me know if you tried out this sewing project. If, you have any suggestions on improving this project, let me know in the comments below!
If you enjoyed this project, be sure to check out my other sewing projects here.