Have you ever wondered how well printable iron-on actually holds up in the laundry? I certainly have!
There are so many brands of printable iron-on and transfer paper available, and while they might look great when you first apply them to a shirt, what happens after a few trips through the washing machine?
I decided to find out by comparing Cricut Printable Iron-On against A-SUB Dark Fabric Transfer Paper.
I printed the same design onto two identical pink T-shirts, applied the designs according to each product’s pressing instructions, and then spent the next 10 weeks washing and drying them.
I was expecting some peeling, cracking, or maybe even a complete disaster.
But apparently, neither brand wanted to cooperate with my experiment!
So, let’s take a closer look at how these two products compared, from printing and pressing to the final results after 10 wash cycles.
Want to see the entire experiment? Watch my Cricut vs. A-SUB comparison video below to see how the shirts changed over 10 washes!
Cricut Printable Iron-On vs. A-SUB Transfer Paper
As an Amazon Associate, I earn from qualifying purchases. This post contains affiliate links. I may receive a commission if you purchase an item from one of my links. This will not change the price you pay.
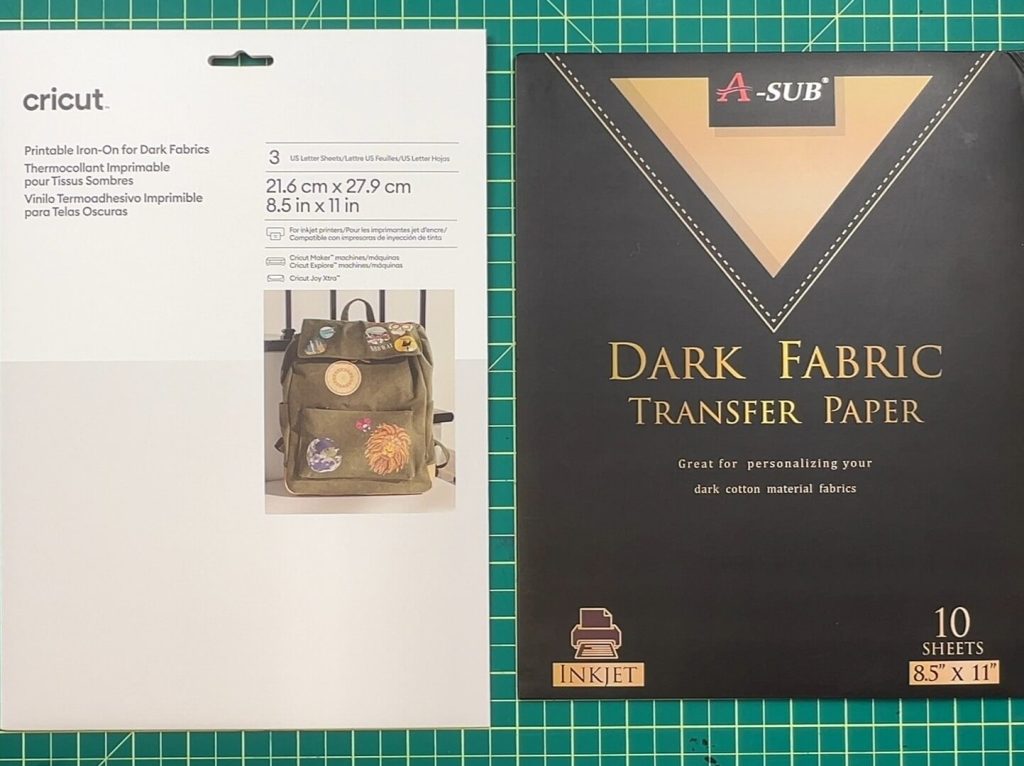
For this experiment, I used two products designed for dark fabrics:
Even though I used pink T-shirts, I chose the dark-fabric versions because I wanted the designs to work well on colored fabric.
Comparing the Materials
Right out of the packaging, there were some noticeable differences between these two products.
The Cricut printable iron-on was noticeably thicker and felt much more like traditional vinyl. One side was shiny with a sticker identifying the backing, while the printable side had a slightly rough, textured surface.
The A-SUB transfer paper was thinner and had more of a paper-like feel.
I also appreciated that the A-SUB backing had the brand name printed all over it, making it easy to identify which side to print on.
Not a huge deal, but a nice little detail!
Comparing the Print Quality
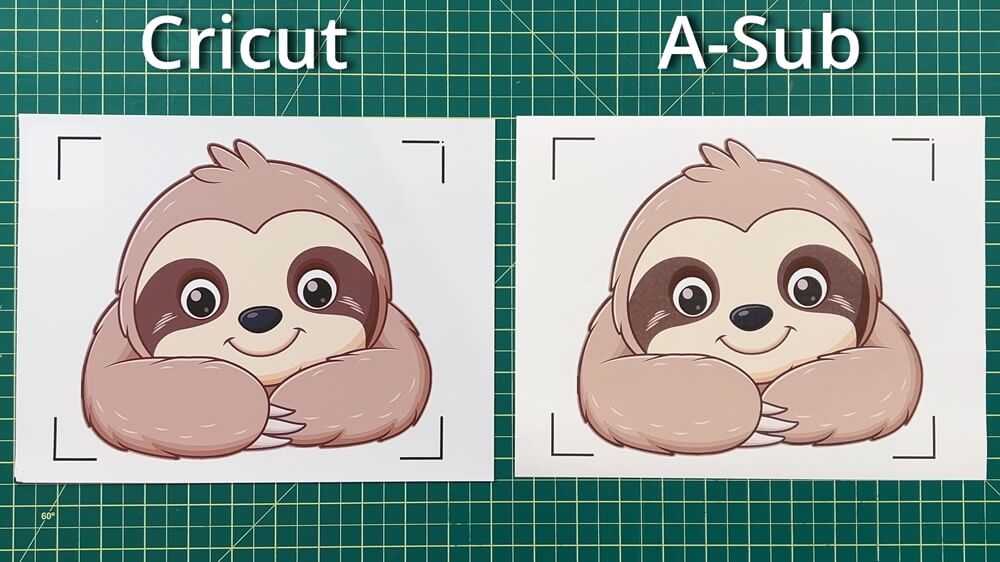
To keep the experiment as consistent as possible, I used the same adorable sloth design for both shirts.
Both designs were printed using high-quality print settings, and both looked good when they came out of the printer.
However, there was a difference in the colors.
The Cricut printable iron-on produced brighter, more vibrant colors, while the A-SUB colors were slightly more muted.
It wasn’t an enormous difference, but it was noticeable when comparing the prints side by side.
Cutting the Printed Designs with Cricut
After printing the designs, it was time to cut them out.
I used my Cricut to cut around the designs because, quite frankly, I’m not very good at fussy cutting! Both materials can also be cut with scissors, but having the Cricut do the work makes things much easier.
If you’re using Cricut Print Then Cut for projects like this, it’s important that your machine cuts accurately around your printed images.
If you’ve ever had your Cricut cut slightly outside the printed design, check out my tutorial on How to Calibrate Cricut Print Then Cut Using a Computer. Proper calibration can help prevent those frustrating cutting problems.
And since printable iron-on isn’t free, I always like to make the most of every sheet!
If you’re looking to fit more designs onto your printable material, take a look at my tutorial on How to Maximize Your Cricut Print Then Cut Space. I even have a free Print Then Cut sizing template to help you make better use of your printable sheets.
After all, the less material we waste, the more projects we can make!
Applying the Printable Iron-On to the Shirts
Once the designs were printed and cut, it was time to apply them to the shirts.
I used identical pink T-shirts and gave each one a quick press beforehand to help remove moisture and wrinkles.
One important thing to know is that Cricut and A-SUB have different heat press requirements.
Cricut Printable Iron-On Settings
For the Cricut material, I used:
- Temperature: 315°F
- Pressing time: 30 seconds
A-SUB Transfer Paper Settings
The A-SUB instructions specified a temperature range of 329°F to 365°F and a pressing time of 20–25 seconds.
For my project, I used:
- Temperature: Approximately 350°F
- Pressing time: 25 seconds
Both designs adhered nicely to the shirts after pressing.
Important: These are the settings I used for the specific products in my experiment. Always check the instructions for your own materials, as pressing requirements can vary depending on the product, fabric, and equipment.
How Did the Shirts Look Before Washing?
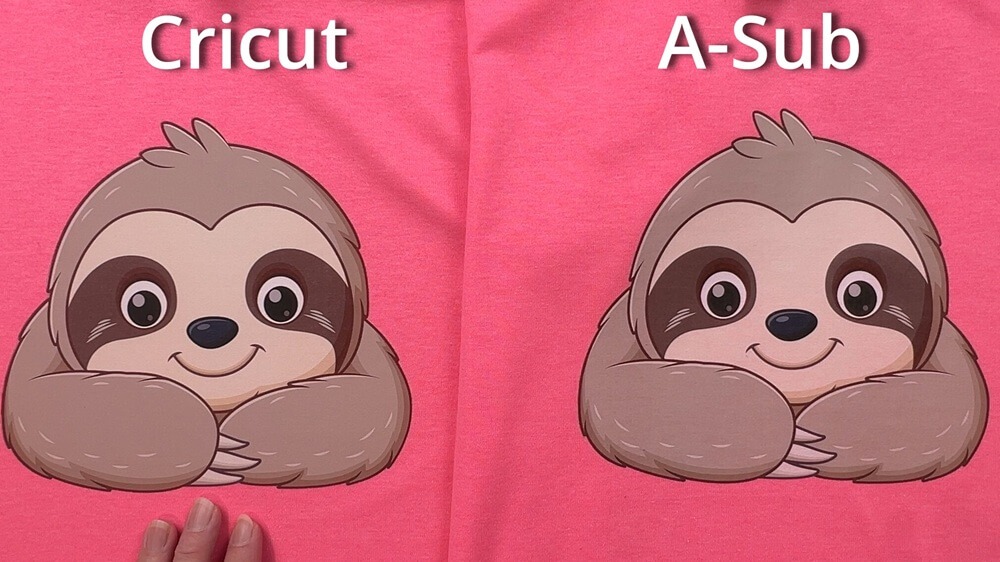
Once both designs were applied, I compared the shirts side by side.
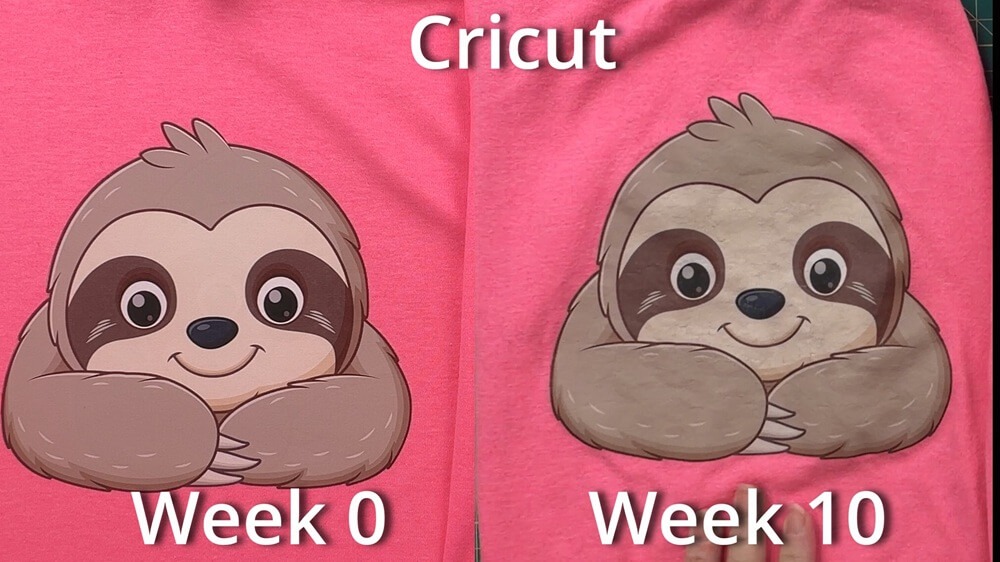
The Cricut design still had noticeably brighter colors.
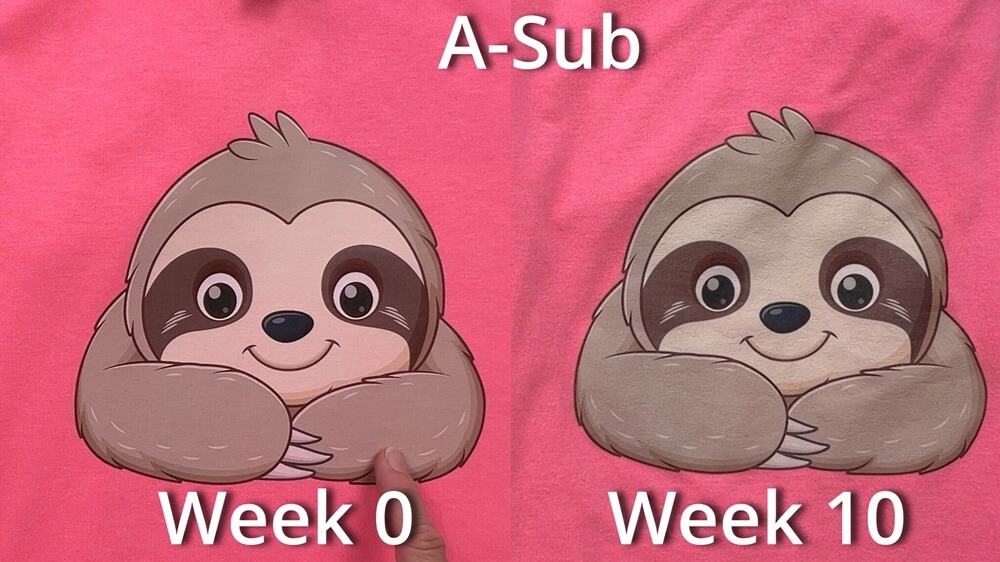
With the A-SUB design, I could almost see some of the pink T-shirt showing through the sloth’s face.
Otherwise, both designs looked great!
Now came the real test.
The 10-Wash Printable Iron-On Experiment
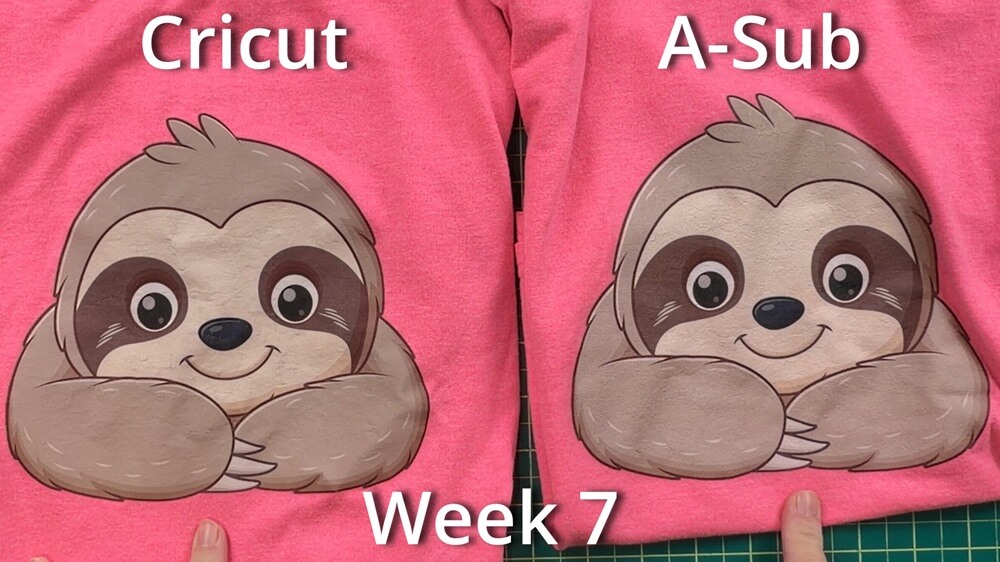
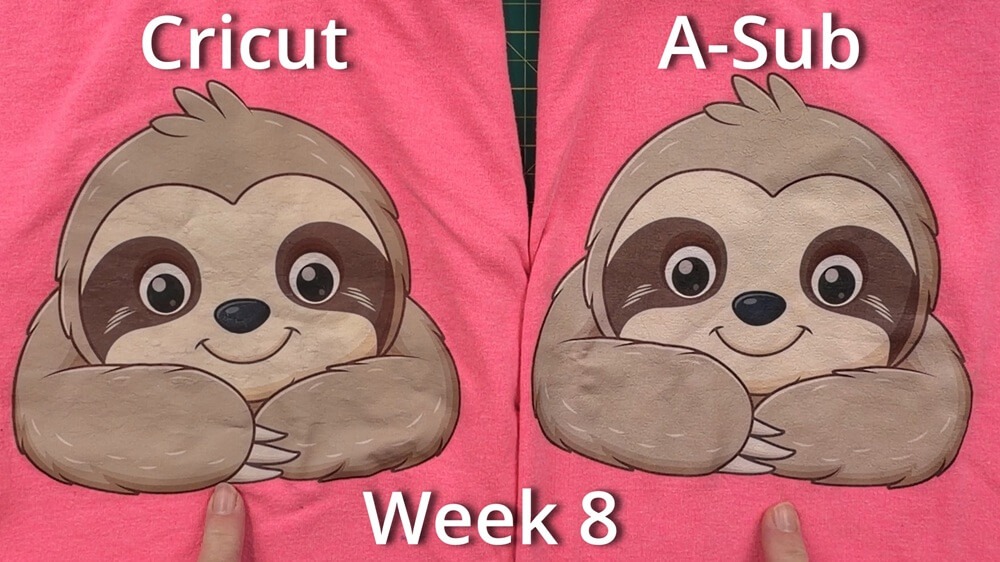
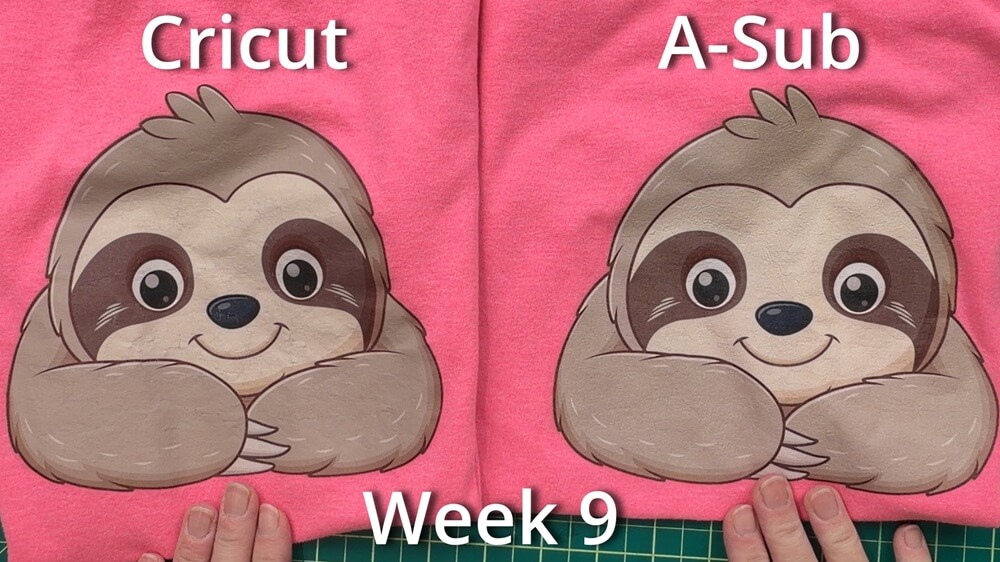
Over approximately 10 weeks, I put both shirts through 10 complete wash-and-dry cycles.
To keep track of everything, I labeled one shirt with a C for Cricut and the other with an A for A-SUB.
Both shirts went through regular laundry cycles. Nothing fancy, no delicate washing, and both designs faced outward during washing. I know that the package says to wash them inside out and hang dry, but that’s just not happening at my place.
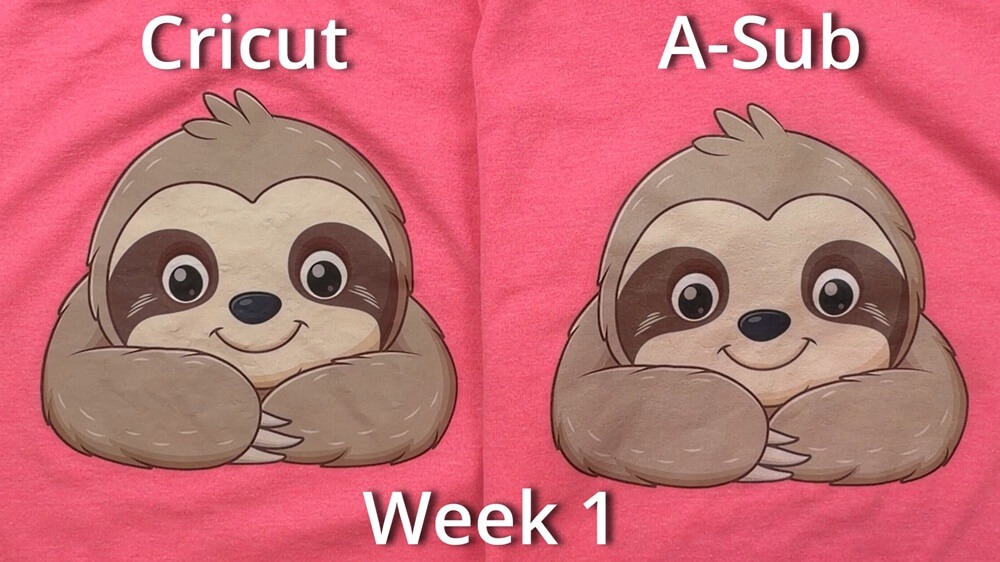
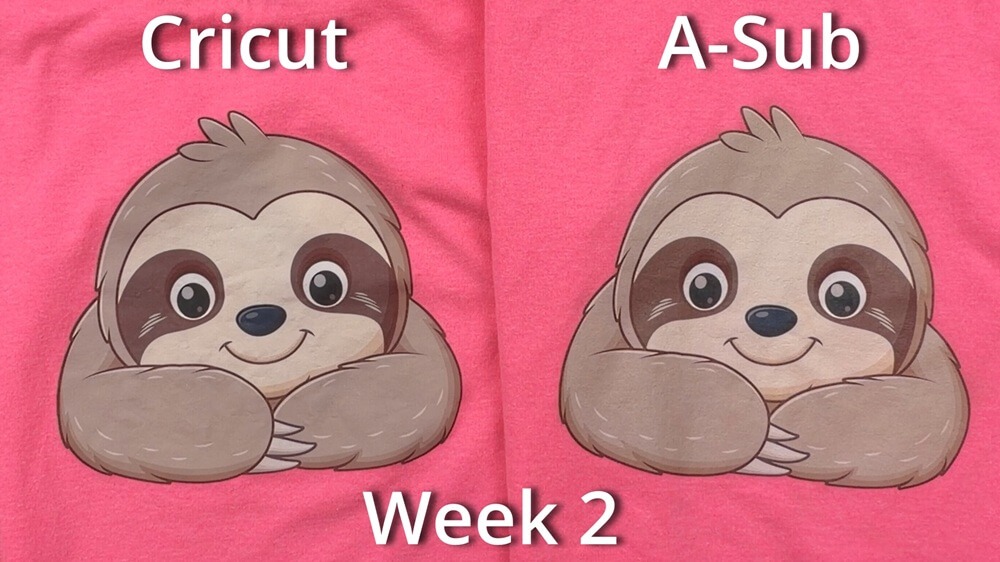
After every wash-and-dry cycle, I recorded the shirts so I could compare how they changed over time.
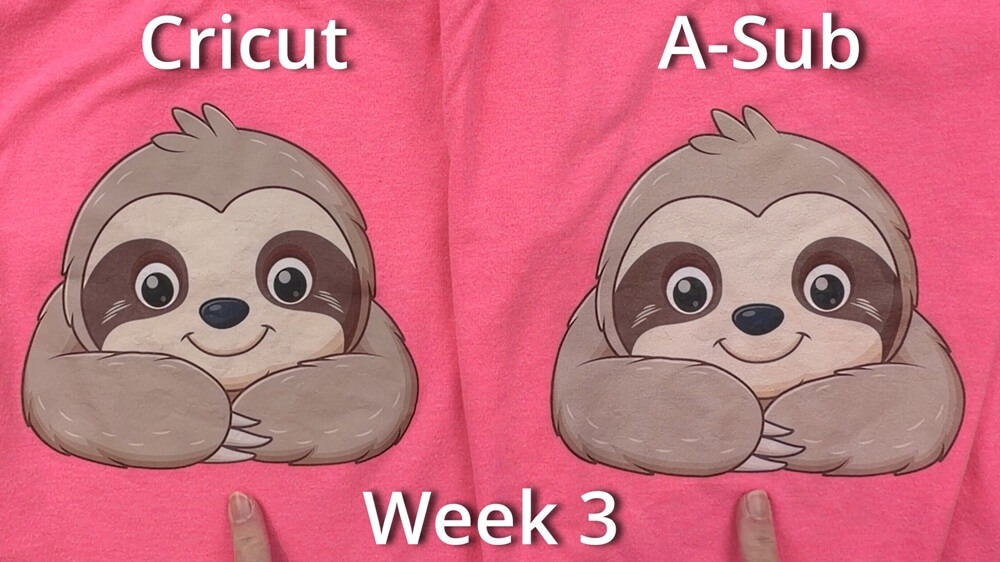
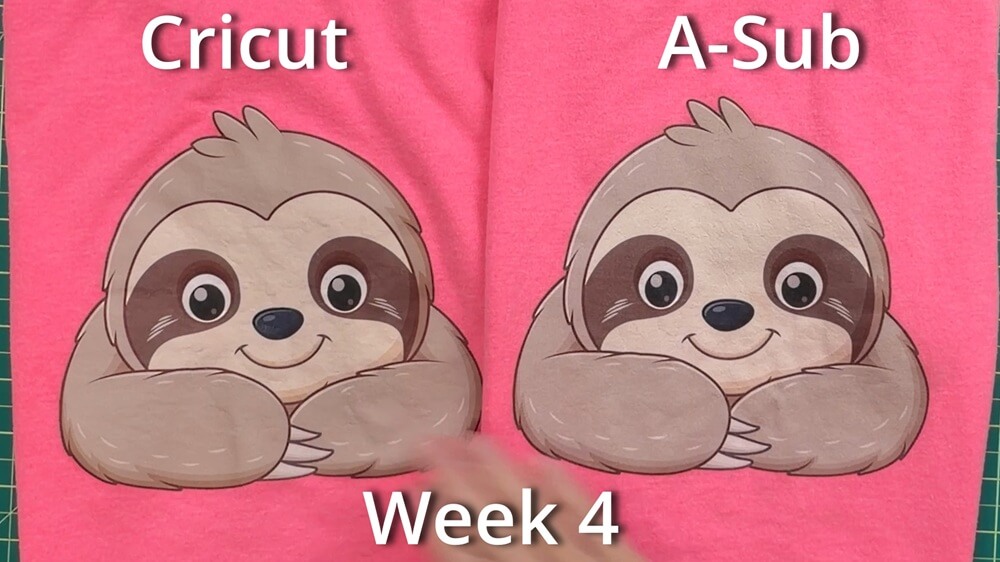
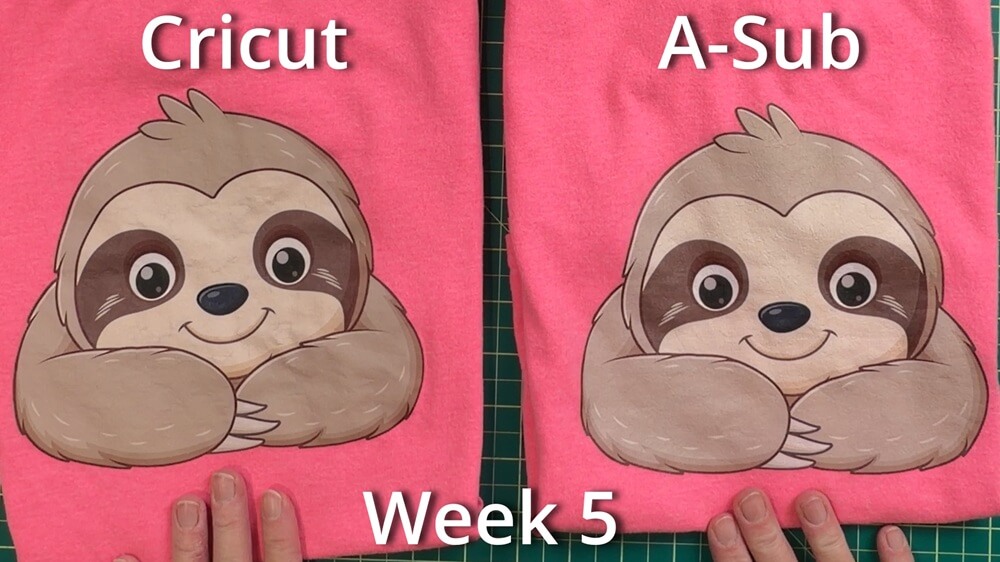
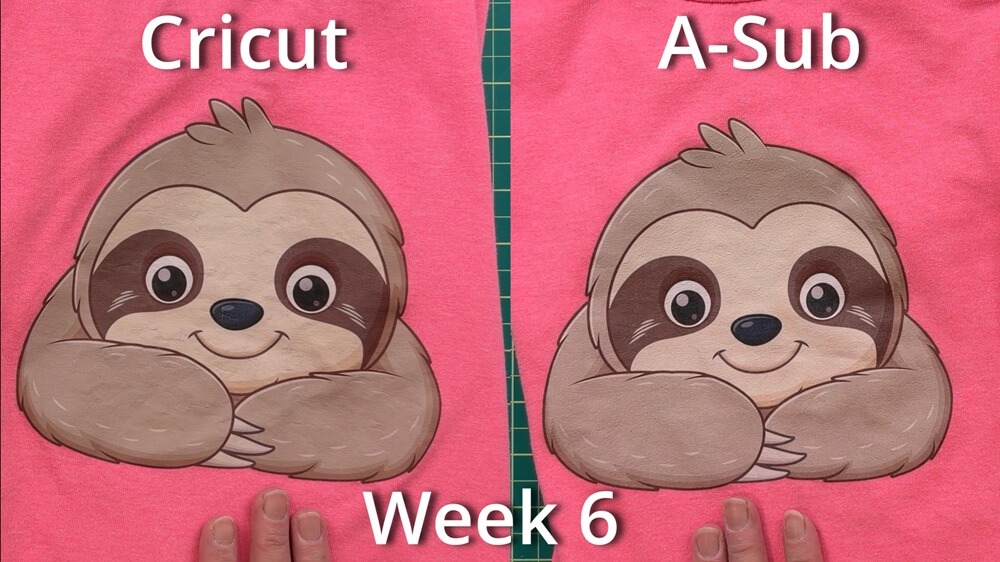
Were the Shirts Actually Worn?
Nope!
Apparently, my kids didn’t approve of wearing matching pink sloth T-shirts. Imagine that! 😂
So, rather than being worn between washes, the shirts went straight back into the laundry each week.
This is important because my experiment tested repeated washing and drying, not everyday wear and tear.
It also wasn’t a test of manufacturer-recommended garment care. Always follow the washing and drying instructions for your particular transfer material.
What Happened After 10 Washes?
Here’s where things got interesting.
Or, perhaps more accurately, where things didn’t get quite as dramatic as I expected!
Did the Printable Iron-On Peel Off?
No!
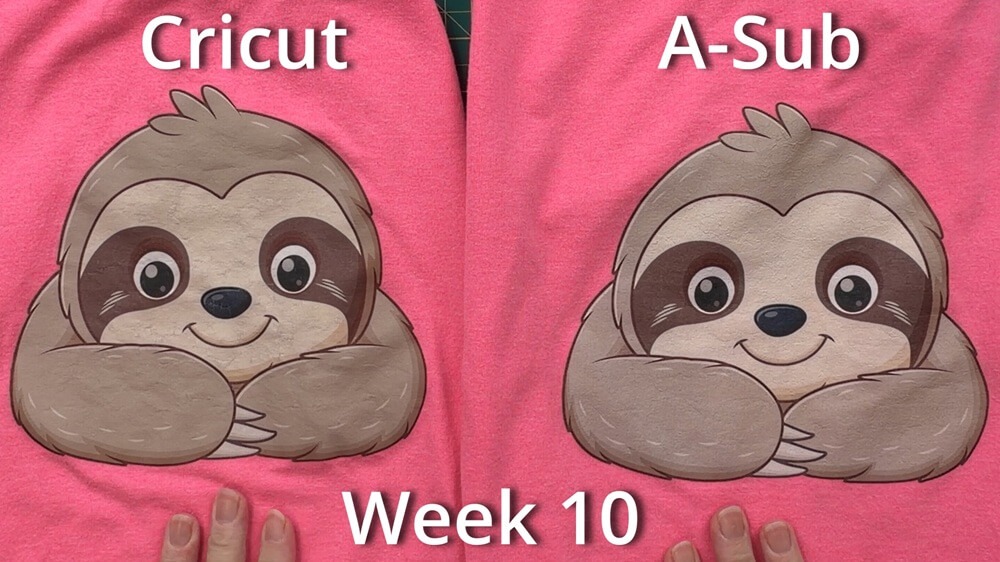
After 10 wash-and-dry cycles, both the Cricut and A-SUB designs were still firmly attached to their shirts.
There was no major peeling or separation from the fabric.
I was genuinely impressed with how well both materials stayed attached after all that laundry.
Did the Colors Fade?
The Cricut design was still noticeably brighter and more vibrant than the A-SUB design after 10 washes.
However, Cricut had started out with brighter colors, so this doesn’t necessarily mean it resisted fading better.
Both designs looked different from when they were first applied.
I also noticed that the pink showing through the A-SUB sloth’s face wasn’t nearly as noticeable at the end.
One thing worth mentioning is that I tried to keep my lighting consistent when recording the shirts every week, but that didn’t always happen. Because of that, some of the apparent color changes between recordings may be due to lighting differences.
It’s difficult to say exactly how much each design faded based on those comparisons alone.
Did the Designs Wrinkle?
Yes, and this was one of the most noticeable changes!
As the weeks went by, both printed designs became more wrinkled and less smooth.
By the end of the experiment, there were quite a few wrinkles in both transfers.
The wrinkles appeared somewhat more noticeable on the Cricut design than on the A-SUB design.
Neither material looked quite as smooth as it had when first applied, although both were still attached to the fabric.
Did the Materials Feel Different After Washing?
Remember how Cricut felt thicker and more vinyl-like, while A-SUB was thinner and more paper-like?
That difference was still noticeable after 10 washes.
The Cricut transfer still felt thicker on the shirt, while the A-SUB material remained noticeably thinner.
I can’t say for sure whether either material became thinner during the washing process, but the original difference in how they felt was definitely still there.
And personally, I prefer the thinner A-SUB material because it allows the shirt fabric to move more freely.
Did Either Printable Iron-On Crack or Tear?
This is where I finally found a little bit of damage!
When I inspected the Cricut design after the tenth wash, I noticed a small tear near the center of the nose.
It wasn’t a huge tear, and the rest of the design was still firmly attached.
Looking back through my weekly recordings, I could see that there had been a fold in that area during previous weeks. However, I couldn’t determine exactly when the tear developed.
Since neither shirt had been worn, the tear wasn’t caused by someone stretching the shirt while wearing it.
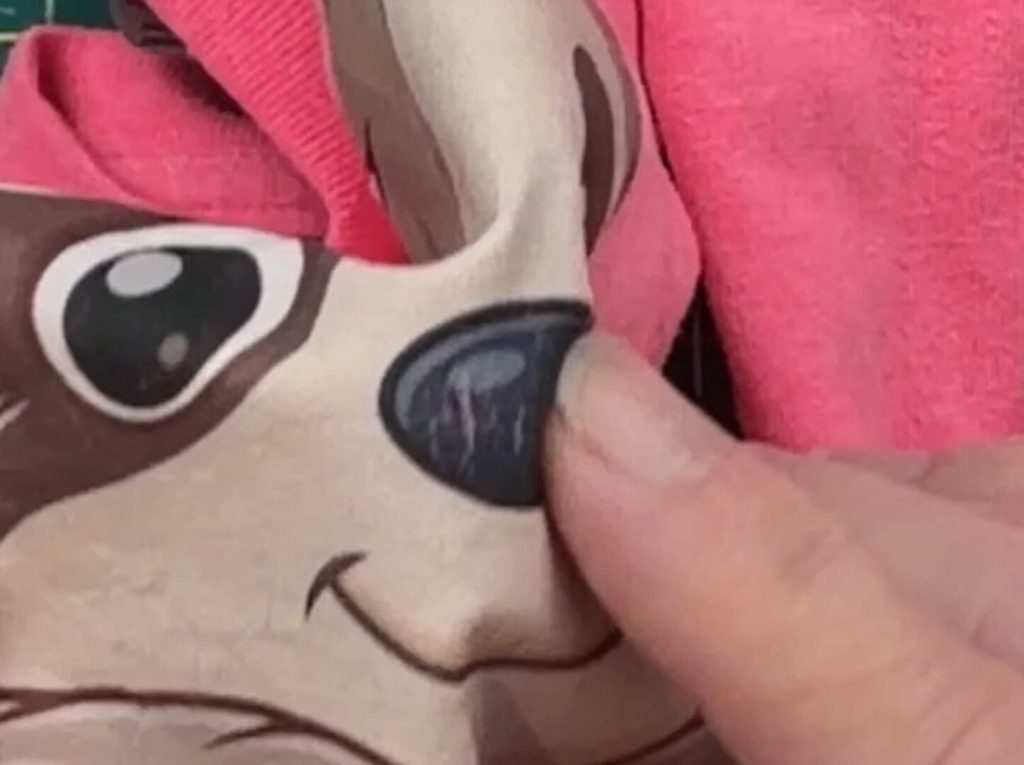
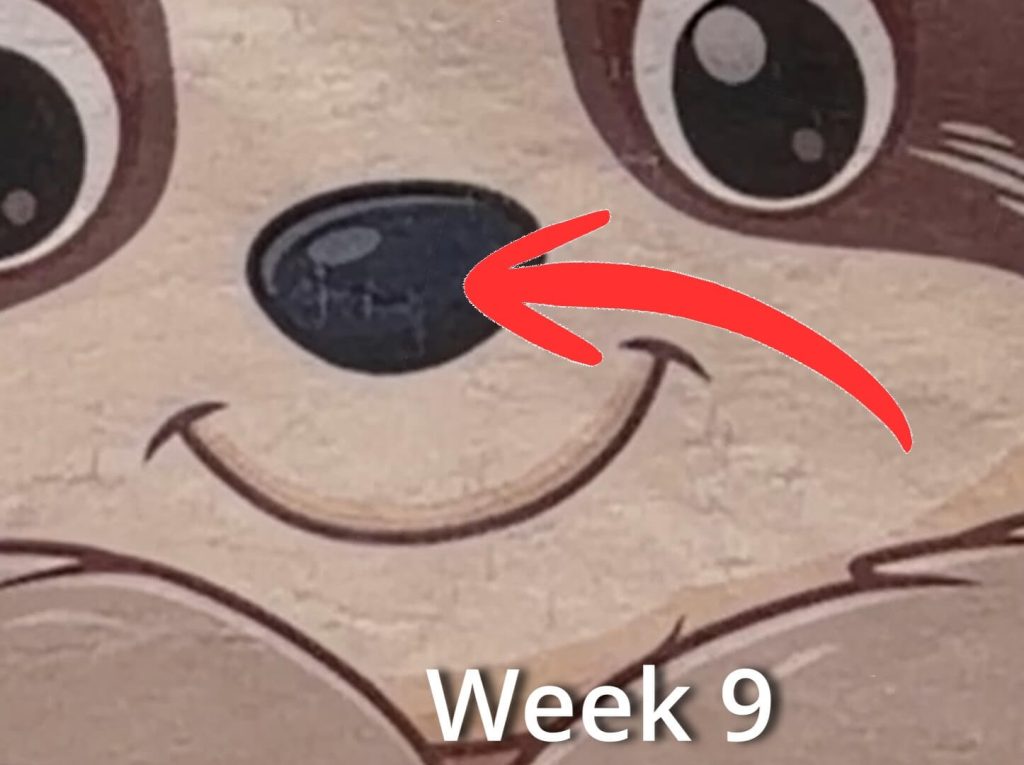
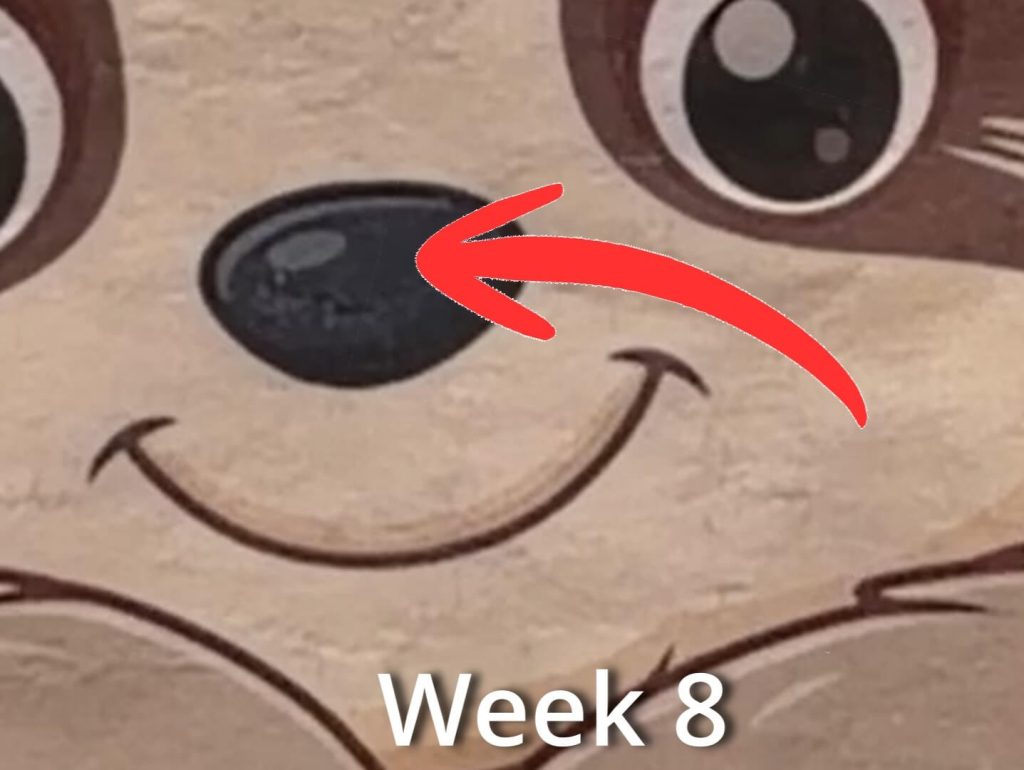
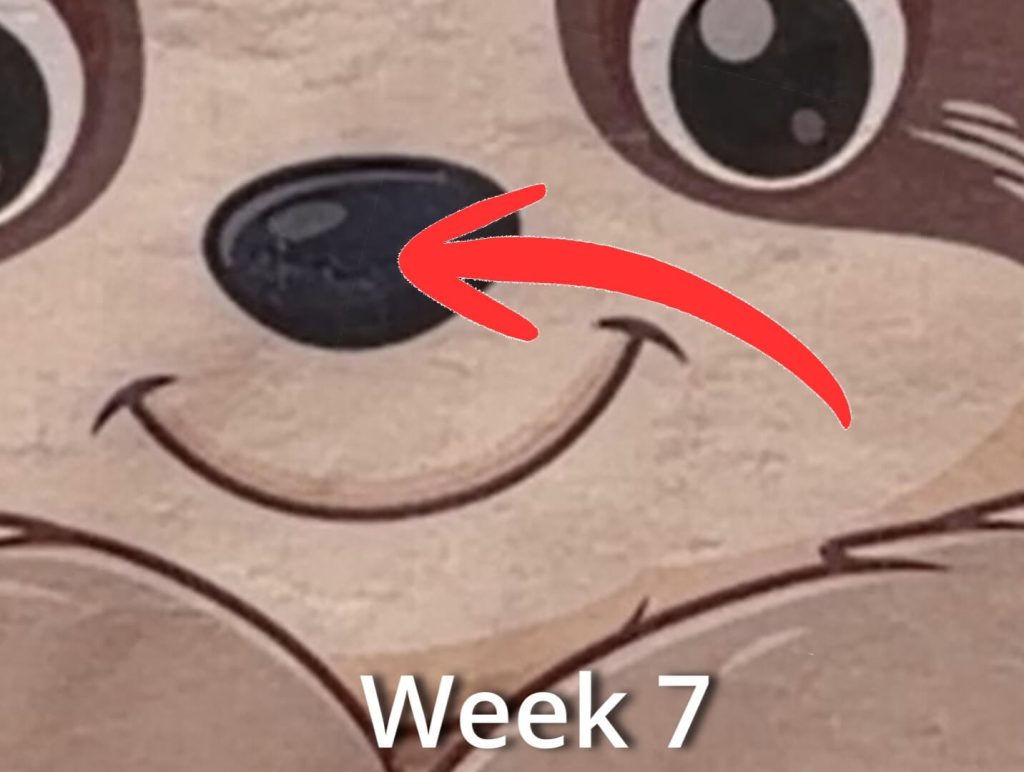
I didn’t notice any similar tearing on the A-SUB design.
This doesn’t necessarily mean that A-SUB is more durable overall, but it is an interesting result from this particular experiment.
Cricut vs. A-SUB: The Results
Here’s a quick comparison of what I observed.
| Comparison | Cricut | A-SUB |
|---|---|---|
| Initial print colors | Brighter, more vibrant | Slightly muted |
| Initial material feel | Thicker, vinyl-like | Thinner, paper-like |
| After 10 washes | Still brighter | Still more muted |
| Adhesion | Remained attached | Remained attached |
| Wrinkling | Noticeable | Noticeable, but appeared less pronounced |
| Visible tearing | Small tear | No obvious tearing |
| Feel after washing | Still thicker | Still thinner |
Overall, both products performed quite well in this test.
Keep in mind that I tested only one shirt with each product, so these results reflect my experience rather than a guarantee of how every shirt will perform.
Which Printable Iron-On Would I Buy Again?
After 10 weeks of washing shirts, I have to admit that neither product gave me the dramatic failure I was expecting!
Both stayed attached, both showed some wrinkling, and both held up reasonably well throughout the experiment.
So, which one would I choose for my next project?
Well, here’s my dilemma.
I prefer the feel of A-SUB. The material is thinner and doesn’t make the shirt feel quite as stiff. I like how the fabric moves more freely.
But…
I prefer the colors from Cricut. The prints were brighter and more vibrant right from the beginning.
So, what’s my final verdict?
I think I’m going to buy whichever one is cheaper when I need to restock my supplies!
I know, not exactly the dramatic conclusion I was expecting after 10 weeks of laundry! 😂
But both products performed well enough that I would be comfortable using either one for future projects.
Ready to Make Your Own Printable Iron-On Projects?
If this experiment has inspired you to try making your own T-shirts, tote bags, or other personalized projects, why not give it a try?
You don’t even have to start with a complicated design!
For example, I have a fun set of Watermelon Digital Files available in my shop that includes SVG, PNG, and JPG files.
You can use the printable images to create your own T-shirts, tote bags, and other personalized projects using compatible transfer materials.
And once you’ve tried making one shirt, you might just find yourself wanting to make a whole collection!
If you need a little help getting started with the Cricut side of things, don’t forget about my Cricut Print Then Cut Calibration Tutorial and my Free Print Then Cut Sizing Template.
They’re both great resources to have handy when working with printable materials.
Have You Tried Cricut or A-SUB Printable Iron-On?
Now I’m curious!
Have you tried Cricut Printable Iron-On, A-SUB Transfer Paper, or another brand altogether?
Do you prefer brighter colors, or is having a thinner, more flexible design more important to you?
Let me know in the comments below. I’d love to hear what works best for your projects!
👉Don’t forget to Watch the Video HERE
Happy crafting! 💖