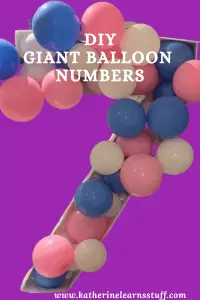
It is that time of year again at my house, where there are lots of birthdays! So we have to get some giant balloon numbers made!
Last year was all about flower balloons, but we needed to change it up this year. So, here we are, making giant birthday number balloons.
As an Amazon Associate, I earn from qualifying purchases. This post contains affiliate links. I may receive a commission if you purchase an item from one of my links. This will not change the price you pay.
Materials required to make a Giant balloon Number
This list is simple, but you can make some substitutes.
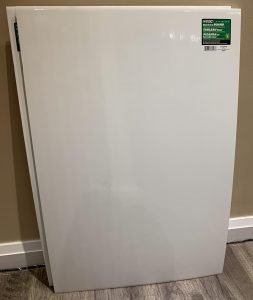
- White foam board – I used foam board from the dollar store (20″ x 30″) as it is more sturdy than poster board, but that will also work. The added bonus about poster board is that it comes in many colors, so you are not limited to white.
- Balloons – colors of your choice – about 15-20
- Sharp edge – I use box cutters and Exacto knives, depending on what I have close at hand. This works better than scissors on foam board.
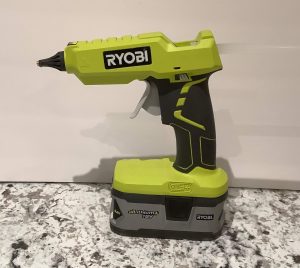
- Glue Gun and Glue – You can use any type of glue. However, I find that hot glue dries and sets faster than crafting glue, which makes this process faster.

Design your number
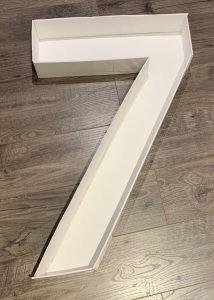
As this giant balloon number will most likely be for a birthday, you will have a number in mind. I’m working with the number 7.
Some key dimensions you should keep in mind before you sketch out your number:
- The width of the number and;
- The depth of the number.
As you will be filling your number with balloons, you need the number to be at least 5 inches in width and a depth of 4 inches. For my number 7, I made it 6inches wide and 4 inches deep. 5 inches in width seemed too small. 7 or 8 inches would also have worked for the width of the letter.
Using a pencil, lightly draw the number. A pencil allows you to change up the location of the lines.
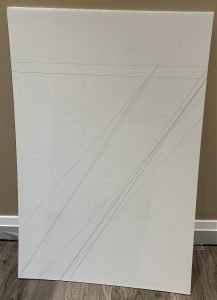
Do not try cutting the number out without a sketch or stencil.
Once you are happy with the shape of the number, cut it out using a sharp edge or an Exacto knife.
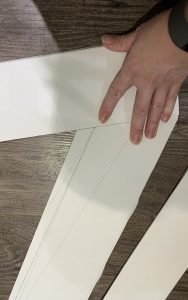
Cutting the walls for your number
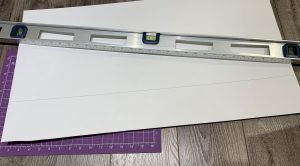
You want the walls to be about 4inches in depth. The easiest way is to cut several long strips of 4-inch wide foam board.
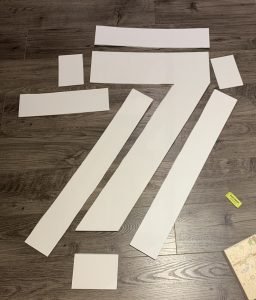
Once you have a bunch of pieces, you can measure out the sides and mark off how long they need to be. You need one wall piece of each side of the number. For my number 7, I needed 7 pieces.
It is best to measure each piece against the number itself instead of using a ruler to measure the number and then measure the board.
Once the pieces are measured, cut them to the required lengths.
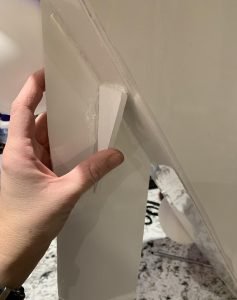
Gluing the walks to the number
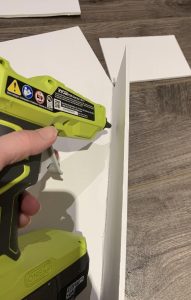
Using a glue gun and glue, run a bead of glue along the first edge of the numbers. It will be tricky with the first piece as it will want to fall over. You will need to hold it in place until the glue cools. Then, piece by piece, add more pieces on with glue. Do not forget to add glue in between the edges\joints between the walls.
Once all of the edges are glued, you can check for gaps. If there are large ones, you can glue them shut, but small ones can remain if you choose.
Install your balloons
You will need about 15 or 20 balloons for any number. The number of balloons will heavily depend on how much you blow them up. If you make balloons very small, you will need more, and vise versa if you blow them up large.
They do not need to be blown up all the way, just enough to give them shape and fill into the number.
I did a dry run of where I wanted balloons. As I was using 3 colors, I wanted the colors to be distributed evenly. I also tied a bunch together to keep them closer together and have them popping out of the number a bit. This is optional. You can just have each balloon on its own within the number.
Now, the big trick – you can use hot glue on balloons, and they will not pop. So you can glue them into place so they do not move or fall out.
Glue them all in.
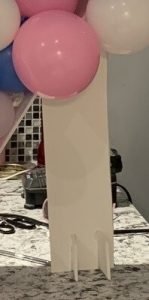
Support to Help Stand may be required
Some numbers are not symmetric and may tip over. Like the number 7. For this reason, I needed to add some support pieces to ensure it stood by itself.
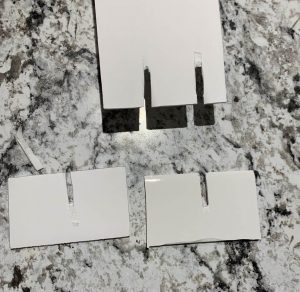
All I did was take some of the spare foam board, measure roughly 3/4 of the way up the leg of the 7. I cut a piece diagonally to fit the edge. I then made 2 slits at the bottom of that long piece.
I cut 2 small 4″ x 2″ pieces, each with a slit also. These were used to stabilize the bottom.
Additionally, I cut a small triangle to hide at the top back, to help keep the top from bending.
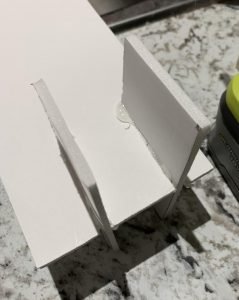
Using my glue and glue gun, I glued it all together so that it would stand.
You could make a similar support on that of symmetric numbers to make sure they don’t fall backward.
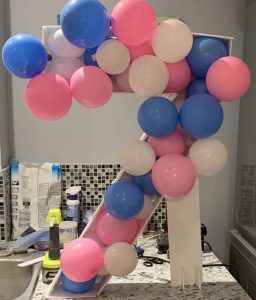
And that’s it! Your giant balloon number is done!

Tips for Making Giant Balloon Numbers
- I originally planned to make this out of old cardboard boxes. The process would have been the same, except I would have needed to paint the cardboard white. Or any other color desired for the event.
- I used an Exacto knife and a straight edge to cut the foam board. I did not realize that I had angled the blade away from the straight edge. This resulted in my edges not being square. To help make the edges look nice, try to keep the blade perpendicular to the cutting surface.
- When selecting the width for your number, remember that if you go too wide you will either:
- Have a number that is short and fat, or,
- You will need to increase the height of the number to be larger than one board.
- I free-handed the design of the number, which was easy as it was a 7. But you can always print out large numbers on a printer and tape them to the foam board. Then follow the lines to make the number you need.
- The number 7 is all straight edges, so the 4inch wall pieces all needed to be straight. If I were working on a number 2 or 3, for instance, I would have to cut notches into the sections of the foam board to help create a round shape. This works well with my foam board as there was a backing paper attached that holds it all together.
Don’t forget to sign up for my newsletters! You’ll get inside tips on upcoming posts and additional behind the scenes details about what’s happening on the site!
Did you find this Tutorial on how to Make Giant Balloon Numbers Helpful?
Did you find this tutorial on how to make giant balloon numbers helpful? Be sure to let me know if the comments below!
Also, check out other similarly craft projects here.