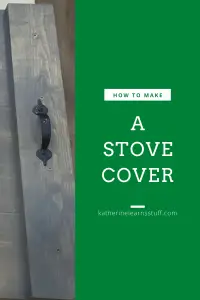
Another Stove Cover?
I know, I know! There are lots of tutorials on how to make a stove cover, they are littered all over Pinterest. That’s where I learned how to make my first stove cover! So, I’m not going to lie and tell you that I have some secret formula for it that makes mine better than someone else’s. I just hope you’re here to learn some of the things I learned along the way.
How it all started
Several months ago, I was visiting a friend and noticed that she was short on kitchen space. Most people are short on kitchen space when you have kids, so any extra space always helps. I had seen a bunch of mom’s in the area selling these neat stove covers for $150-$350 a piece! And you have to pay extra for a design! What? That’s crazy!
Even though this friend is near and dear to me, I was not willing to drop that kind of cash on her, even if her birthday was coming up!. So, I decided to try making one instead. Worst-case scenario, I could sell it online to someone at cost.
Important Notes to Remember
It’s important to remember that’s I’m a bit handy and have a bunch of stuff lying around the house for a lot of random projects. So the total price I would have paid, if I was doing it from scratch would have been a bit more. But not the $150 total that people were selling these for.
How to Make a Stove Cover
Keep reading below for the full details on how to make a stove cover. I’m going to give approximate costs for all the items that I bought or would need. I’ll round up to the nearest dollar or so.
What You Need:
- Wood – read step one below to figure out how much wood you need, as some simple math is required. I used pine so, the total cost of wood should be around $25.
- Screws – you’ll need 8 x 1.5″ wood screws. I have a huge box of these as I use them often, but you can buy a 10 pack for $4 at the local hardware store.
- Handles – you need 2. I bought mine for $4/each. There were cheaper ones, but I liked the look of them.
- Stain for the wood – Again, I have stain laying around, so I used my existing stuff, but you can buy a small jar (which will last you for about 4-6 of these covers for less than $15.
- Wood glue – optional.
- Tools – Ideally you need a saw and a power drill/driver. However, you can get the wood cut at the hardware store. Typically they give you 1-2 cuts free, and the rest are about $1/cut. And you can get away with just a standard screwdriver and a lot of sweat.
So, the total cost is approximately $55.
Let’s Begin!
Calculate Your Wood Dimensions
You need to measure your stovetop. Typically, stoves have a lip around the cooking surface. You want to measure the outer edge of this lip. This will be the size of the stove cover.
Once you know your size, for example, my stove is 30″ wide by 22″ deep, you can calculate how much you need.
The cheapest way to buy wood is in larger sizes (ie: 10ft is cheaper than 8ft per foot).
We also need to keep in mind that the size of wood that they sell isn’t the actual size. So if the piece of wood you buy is 6″ x 1″ – in reality, you are getting a piece that is 5.5″ x 0.75″. That’s because when they cut the wood it’s the 6″ x 1″ but when it dries it shrinks.
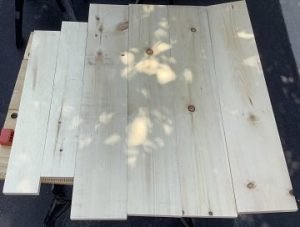
So, for my stove, I bought a 10ft piece of wood that was 6″x1″ (really 5.5″x0.75″). The 10ft (120 inches) will provide me with 4 rows of wood at 30″ a piece.
I typically get one free cut at the store so that I can fit the wood into my car and do the rest of the cuts at home.
You also need a piece of wood for the side panels. This will need to be at least 2 times the depth of the stove. So, in my case, in needed 44 inches. I like the look of a 3″ side panel, so I opted for a 3″ x 1″. Again, you can get this cut at the store for your first free cut. I bought a 5ft board so now I have a bit of surplus wood for other projects.
Cut the wood to size
Now that you have all of your wood at home, you need to cut it to size.
Make sure you measure twice and cut once. You don’t want to have to go back to the store and buy more wood.
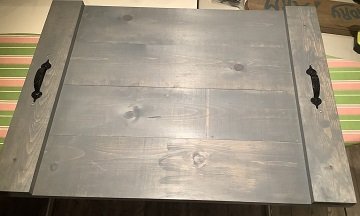
Assemble the Stove Cover
Now the fun part – assembly! Place the 4 planks together and line them up. Place the two side panels at both ends.
I layout the wood for a test fit – this is to make sure there are no bad cuts and no ugly wood grain showing up.
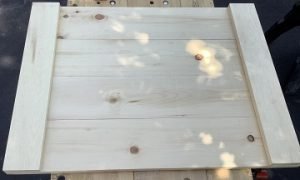
Once I like the look, I pull out my wood glue (optional) and apply glue to the side panel. I use clamps to hold the pieces together while I drill.
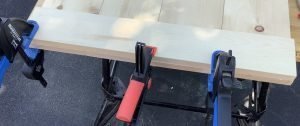
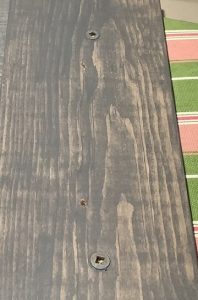
I drill 1 hole per vertical piece. So there will be 4 per each side panel on mine.
I also like to drill pilot holes so that the wood doesn’t crack/split.
Once my pilot holes are drilled in, I add the screws.
I repeat this on the other side. Once the screws are in, you can remove the clamps.
Now that both sides are done, I wait for the glue to dry. If you didn’t use any glue, keep going!
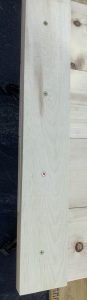
Sanding – optional
I always sand the edges of my wood projects. This makes the final product look nicer, but also gets rid of any loose bits that might cause slivers in the future.
A quick sanding and it’s ready for staining.
Apply the Stain
There is an abundance of different stain colors you can use. But something to keep in mind. If you are planning on using this stove cover for preparing food, you can’t use regular stain, you will need to use a food-grade stain (which is costly). I just use a regular stain and don’t prep food on it.
Depending on the type of stain you use, or the final finish you want, you may need to apply 2-3 coats of stain. Follow the stain instructions for the best results.
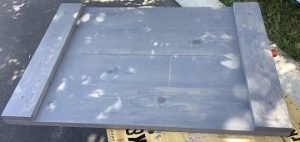
Let the stain dry completely before you proceed to the next step.
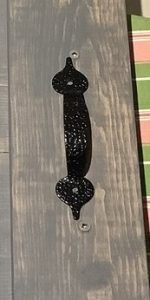
Assemble Handles
I like the handles centered, so I measure the center of the side panels and again drill some pilot holes. Screw in the handles and it’s ready to go!
And That’s It! You’re Done!
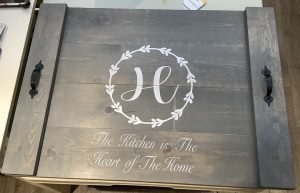
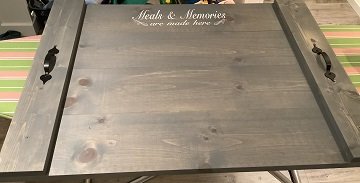
Added Touches
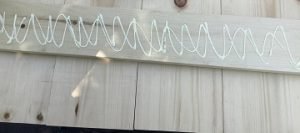
As with all of my projects, I like to add some personal touches to them, so I pull out my faithful Cricut and make some decals to add some extra accents.
You can also paint on accents, but I just use vinyl.
No sealing is required before or after the vinyl is applied.


Was this Tutorial Helpful?
Did you find this tutorial helpful? Let me know your thoughts in the comments below!
If you liked this tutorial, be sure to check out my other tutorials here


What a clever idea! Thank you for sharing these instructions
I never knew about this, but when I saw it, I saw how useful it could be!
Love it. Can’t imagine our kitchen without it now.
I’m glad to hear! There are so many uses for it, not just keeping it on the stove all the time.
What a great idea!
Thanks!
Very cool – and you make it look easy!
It’s surprising easy! The hardest part is waiting for the stain to dry!
Well, I must love under a rock bc I’ve never seen one, 😆. Love it though! Especially with kids (my toddler can reach the stove now). This would be great!
I never knew about it before this summer, so my rock isn’t far away from yours! But it’s great, you can place all your kids snacks on it and leave it on the stove, or carry it out like a tray and have it somewhere else in the house.
you are so skill ful !
Thanks!
This is very clever and beautiful! I think it can give your kitchen this vintage and classy look! Good job!
Thanks! It can add a nice look but it’s also practical, which is an added bonus! Thanks!
This is a smart idea and beautiful! I had never even heard of these before. It would come in handy for me since I have a toddler.
It’s a great help in the kitchen! And if you leave snacks on it, kids get used to it and love it! It’s totally worth having one!
Do the boards open up and leave spaces if they’re not glued?
I have always made mine with glue. But I would guess that if the wood you use is dry, it shouldn’t shrink and no gaps should form.